Even though there are so many mapping apps and services out there to get you from point A to point B, the definitive king of maps is Google Maps. I use it on my computer, tablet and 90% of the time on my smartphone. It’s got the best data, the most navigation and routing options and cool features like Street View and walking, biking and mass transit info.
But what if you need to use a map or directions outside of Google’s website? Suppose you have your own wedding website or a personal blog and guests could visit your site, type in the address they will be coming from and automatically get directions to the event location!
Well, there are a couple of ways you can go about accomplishing this. The easiest way is to simply embed the map onto your webpage using the embed code generated by Google Maps. The second way is a bit more technical, but more customizable and dynamic. I’ll mention both methods below.
Embed Google Map
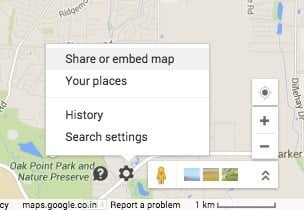
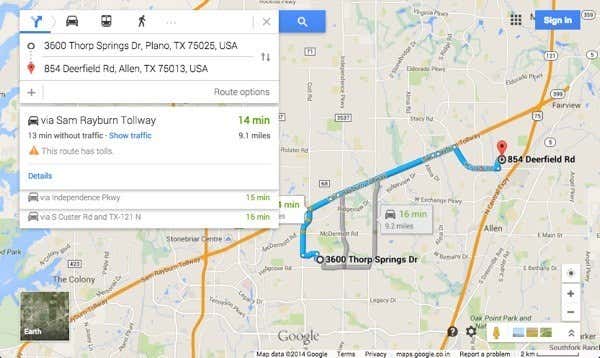
If you only want to display directions from one location to another, the easiest thing to do is to embed whatever map you are viewing using the embed code. First, go ahead and setup whatever directions you want in Google Maps and then click on the gear icon at the bottom right of the page.
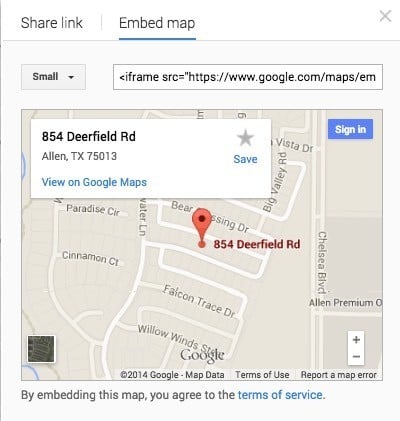
Click on Share or embed map and then click on the Embed map tab. Here you can pick a size for your map and then copy the iframe code and drop that onto any webpage you like.
The only downside to this method is that the user just sees a static map. In the second method below, you can create a form whereby the user can type in any starting address and it will generate a map from that address to a destination address of your choosing.
Create Google Maps Form
To illustrate what I mean by the second method, go ahead and type a US address in the box below to get directions from your location to my house:
Cool huh? You can easily create this little form on any website, blog, or anywhere you can put in some HTML code! This is also great for small business web sites as you can throw it up on your contact page and people can get directions quickly, rather than having to copy your address, open a new window, and then type in their starting address.
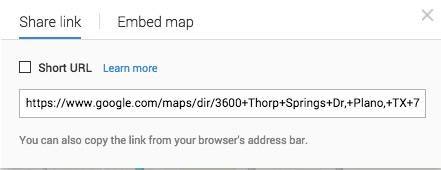
So how do we go about creating this modified get directions box? Well first, we’ll need to get the correct syntax for the URL that Google uses for directions. Luckily, we can figure that out by getting directions between two places and then just copying the URL from the address bar. You can also click on the tiny gear icon at the very bottom right of the page and choose Share or embed map.
The Share link tab will contain the URL, which is the same URL in your browser address bar. I ‘ve gone ahead and pasted the entire URL below just to show you what it looks like.
https://www.google.com/maps/dir/3600+Thorp+Springs+Dr,+Plano,+TX+75025,+USA/ 854+Deerfield+Rd,+Allen,+TX+75013,+USA/@33.1125686,-96.7557749,13z/ data=!3m1!4b1!4m13!4m12!1m5!1m1!1s0x864c3d45018517a5:0xbabd3c91a1321997!2m2!1d-96.762484!2d33.08947!1m5!1m1! 1s0x864c16d3018a7f4f:0xab2052b5786cd29f!2m2!1d-96.666151!2d33.133892
Yikes! That’s pretty long! There’s a lot of stuff in there, most of which doesn’t make any sense! Google Maps URL parameters used to be very straightforward and easy, but the new URL structure is quite complicated. Thankfully, you can still use the old parameters and Google will convert them into the new version automatically. To see what I mean, check out the link below.
http://maps.google.com/maps?saddr=start&daddr=end
Go ahead and give it a shot. Put in an address in quotes for the starting and ending address and paste the URL into your browser! I replaced start with my home city New Orleans and end with Houston, TX, so this is what my Google Maps directions URL looks like:
http://maps.google.com/maps?saddr=”new orleans, la”&daddr=”houston, tx”
It works! As you can see, though, Google Maps converts the links into something far more complicated once the map fully loads. Ok, so now that we have a sane URL that we can pass into Google Maps, we need to create a simple form with two fields, one for the starting address and one for the destination address.
If you want people to just type in their address and get directions to your place, then we’ll want the second field to be hidden and already set to the destination address.
<form action=”http://maps.google.com/maps” method=”get” target=”_blank”>
Enter your starting address:
<input type=”text” name=”saddr” />
<input type=”hidden” name=”daddr” value=”854 Deerfield Rd, Allen, TX” />
<input type=”submit” value=”get directions” />
</form>
Check out the code above. The first line starts out form and says that when the submit button is clicked, the data should be sent to maps.google.com/maps. The target=blank means that we want the result to open in a new window. Then we have a text box for the starting address, which is blank.
The second text box is hidden and the value is the destination address that we desire. Finally, there is a submit button with the title “Get Directions”. Now when someone types in their address, they’ll get this:
You can customize the directions and map even more with a few extra parameters. For example, let’s say you don’t want the default view to be maps, but instead want it to be Satellite and show Traffic.
Notice the layer=t and t=h fields in the URL. layer=t is for the traffic layer and t=h means hybrid map! t can also be set to m for normal map, k for satellite and p for terrain. z is the zoom level and you can change it from 1 to 20. In the above URL, it’s set to 7. Just tack those on to your final URL and you’ve now got a highly customized Google Maps Get Directions form on your site!
Have any issues with this, post a comment and I’ll try to help! Enjoy!


