
Want to help visitors find your venue, business, or event without making them copy-paste an address into a separate tab? You’re in the right place. Whether you’re setting up a wedding website, a small business contact page, or a local event landing page, adding Google Maps directions to your site is one of those things that sounds complicated but really isn’t, at least for the most common use case.
In this guide, you’ll learn two ways to do it: the easy no-code method (embed a map straight from Google Maps) and a slightly more hands-on approach using a “Get Directions” link that opens Google Maps with your destination already filled in. We’ll also touch on the developer route if you need something more custom. Let’s get into it.
Do You Need to Pay for Google Maps on Your Site?
This is the first question everyone asks, so let’s clear it up right away. The short answer: for most people, no.
- Simple iframe embeds (generated via the Share → Embed a map dialog) are free for typical small-to-medium sites. Google handles this through its Maps Embed API, which is free with unlimited requests and no usage caps.
- “Get Directions” links that open Google Maps in a new tab are completely free. You’re just linking to Google’s website.
- Custom interactive maps using the Maps JavaScript API or Routes API require a Google Cloud billing account. As of March 2025, Google replaced the old $200/month credit with free monthly usage caps per API (SKU) — for example, roughly 28,000 dynamic map loads per month before charges kick in. Heavy usage can still cost real money, but most small sites stay well within the free tier.
For most wedding sites, event pages, and small business contact pages, the free methods below are all you need.
Method 1: Embed a Google Map on Your Page (No Coding Required)
This is the easiest approach. You’ll get an interactive, zoomable map right on your page, and it takes about two minutes to set up.
Step 1: Open Google Maps and Search for Your Location
Go to maps.google.com in any modern browser (Chrome, Edge, Firefox, or Safari all work fine). Type your venue’s address or name into the search bar and press Enter. Make sure the pin lands in the right spot before moving on.
Step 2: Click Share
Once your location is showing, look at the panel on the left side of the screen. You’ll see the place name, address, and a few action buttons. Click Share.
Step 3: Click “Embed a map”
A dialog box will pop up with two tabs: Send a link and Embed a map. Click Embed a map. You’ll see a live preview of the map along with a size selector dropdown.
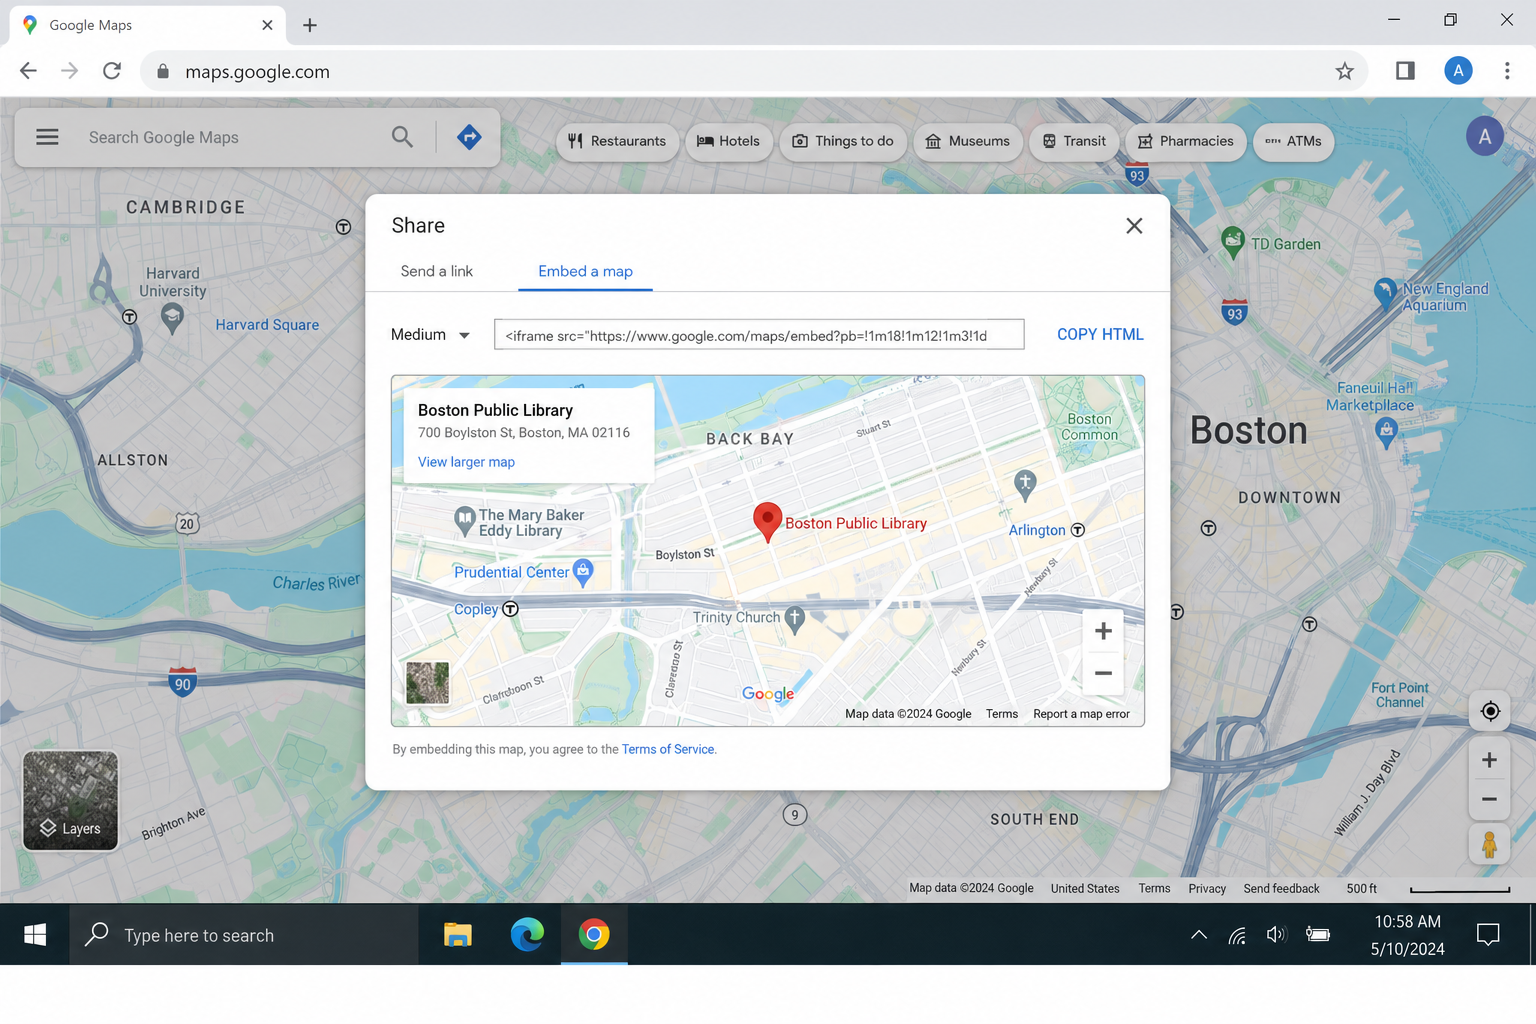
Step 4: Choose Your Map Size
Use the dropdown to pick a size: Small, Medium, Large, or Custom size. If you’re not sure, start with Medium, you can always tweak it later. If you pick Custom size, you can type in specific pixel dimensions to match your site’s layout.
💡 Tip: The default iframe uses fixed width and height values, which can look awkward on mobile. See the troubleshooting section below for a quick CSS fix to make it responsive.
Step 5: Copy the Embed Code and Paste It Into Your Site
Click Copy HTML. This copies an <iframe> snippet to your clipboard. Now paste it into your website wherever you want the map to appear, in your page builder’s HTML block, your CMS’s code editor, or directly in your HTML file.
Here’s what the code looks like (the long string in the src is just Google’s encoded location data, so don’t worry about it):
<iframe
  src="https://www.google.com/maps/embed?pb=!1m18!..."
  width="600"
  height="450"
  style="border:0;"
  allowfullscreen=""
  loading="lazy"
  referrerpolicy="no-referrer-when-downgrade">
</iframe>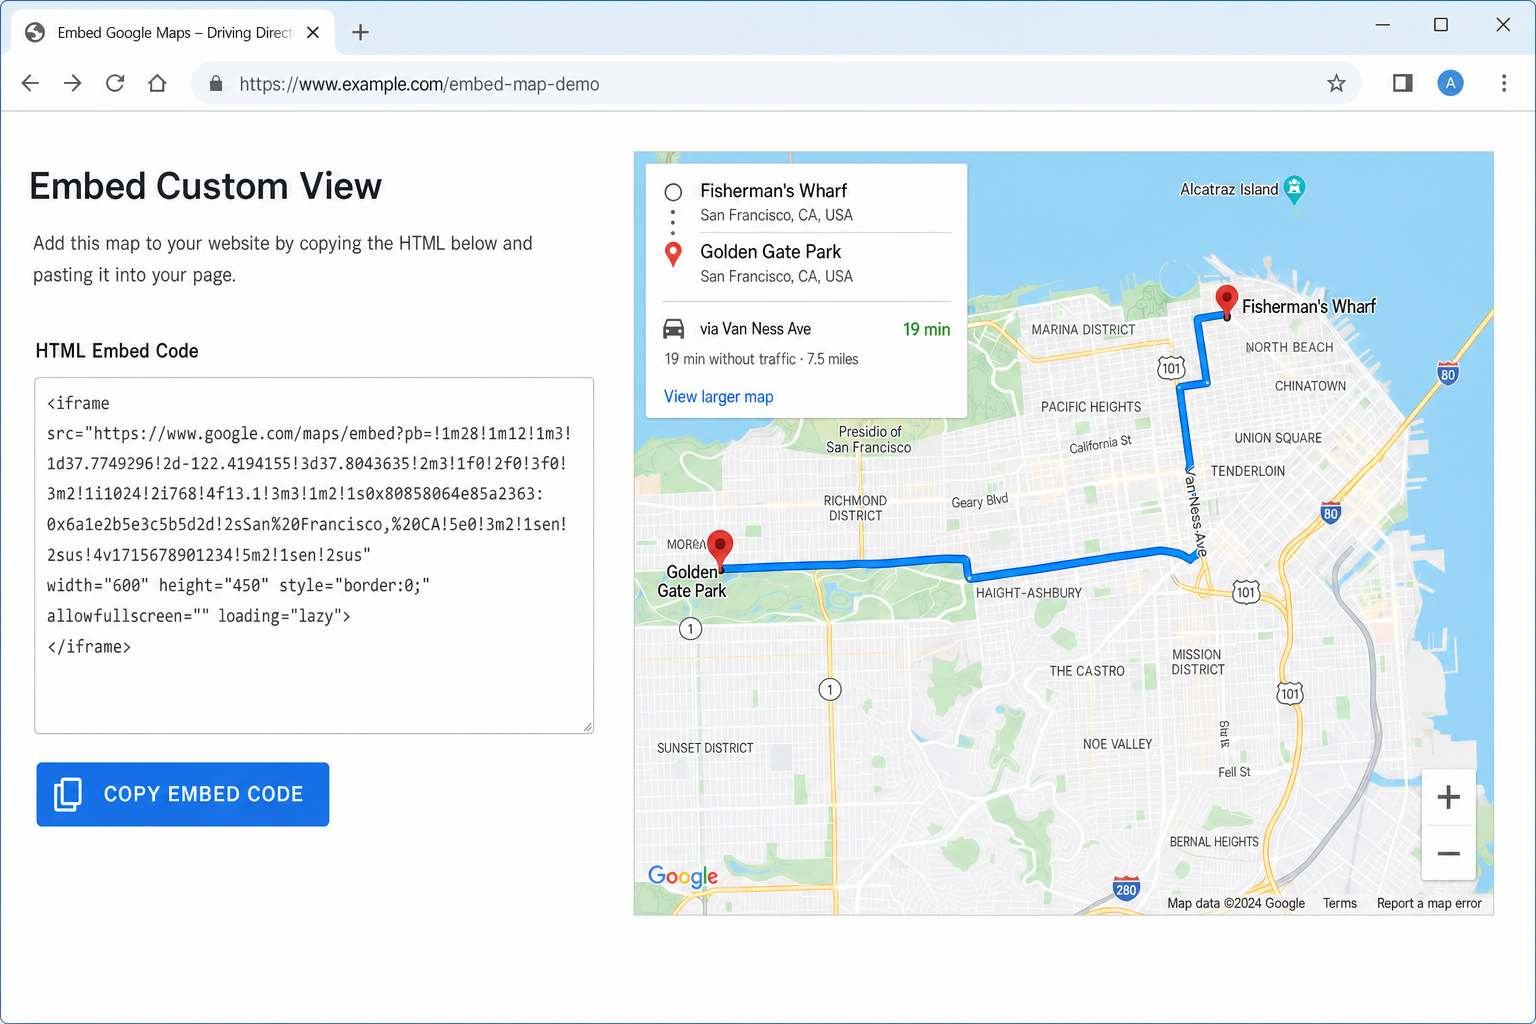
That’s it! Your visitors will see an interactive map they can zoom in and out of, switch to satellite view, and even click through to get full directions in Google Maps.
Method 2: Add a “Get Directions” Button or Link
Embedding a map is great for showing people where you are, but if you want to help them actually get there, a “Get Directions” link is even more useful. When someone clicks it, Google Maps opens with your destination already filled in. They just need to confirm their starting point and hit Go.
Google has an official URL format for this (called Maps URLs) that works on desktop, mobile browsers, and even triggers the Google Maps app on phones. Here’s the pattern:
https://www.google.com/maps/dir/?api=1&destination=YOUR+ADDRESS+HERE&travelmode=drivingJust replace YOUR+ADDRESS+HERE with your venue’s address (use + signs instead of spaces). The travelmode can be driving, walking, bicycling, or transit.
Example: Simple “Get Driving Directions” Link
Here’s how to add a basic directions link to your page. Paste this HTML wherever you want the button to appear:
<a
  href="https://www.google.com/maps/dir/?api=1&destination=The+Riverside+Hall,+123+Main+St,+Springfield&travelmode=driving"
  target="_blank"
  rel="noopener">
  Get Driving Directions
</a>
When a visitor clicks that link, Google Maps opens in a new tab with your venue already set as the destination. On mobile, it’ll launch the Google Maps app if they have it installed, which is exactly what you want.
Optional: Pre-Fill Both the Starting Point and Destination
Want to link from a specific starting point, like a nearby hotel, to your venue? You can pre-fill both the origin and destination. This is handy for event pages where guests might be staying at a partner hotel.
<a
  href="https://www.google.com/maps/dir/?api=1&origin=Hotel+A,+Springfield&destination=The+Riverside+Hall,+Springfield&travelmode=driving"
  target="_blank"
  rel="noopener">
  Directions from Hotel A to the Venue
</a>
You can also use GPS coordinates instead of addresses if you need pinpoint accuracy:
https://www.google.com/maps/dir/?api=1&origin=37.4219999,-122.0840575&destination=37.7749,-122.4194&travelmode=drivingMethod 3: Custom Interactive Maps for Developers
If you need something more powerful, like a map where visitors can type in their own starting address and get a route drawn right on the page, you’ll need to use the Google Maps JavaScript API. Fair warning: this requires setting up a Google Cloud account, enabling billing, and writing some code. It’s not for everyone, but here’s the overview.
Step 1: Set Up Google Cloud and Get an API Key
- Go to the Google Cloud Console.
- Create a new project (or select an existing one).
- Enable billing. A credit card is required. As of March 2025, Google no longer offers a flat $200/month credit — instead, each API has its own free monthly usage cap, after which pay-as-you-go rates apply. Most small sites stay within the free tier.
- Enable the Maps JavaScript API from the API Library. For routing, note that the Directions API is now designated a Legacy service — it continues to work for existing integrations, but new projects should use the Routes API (specifically the Compute Routes endpoint) for routing, as it’s Google’s current recommended approach. Enable whichever fits your project.
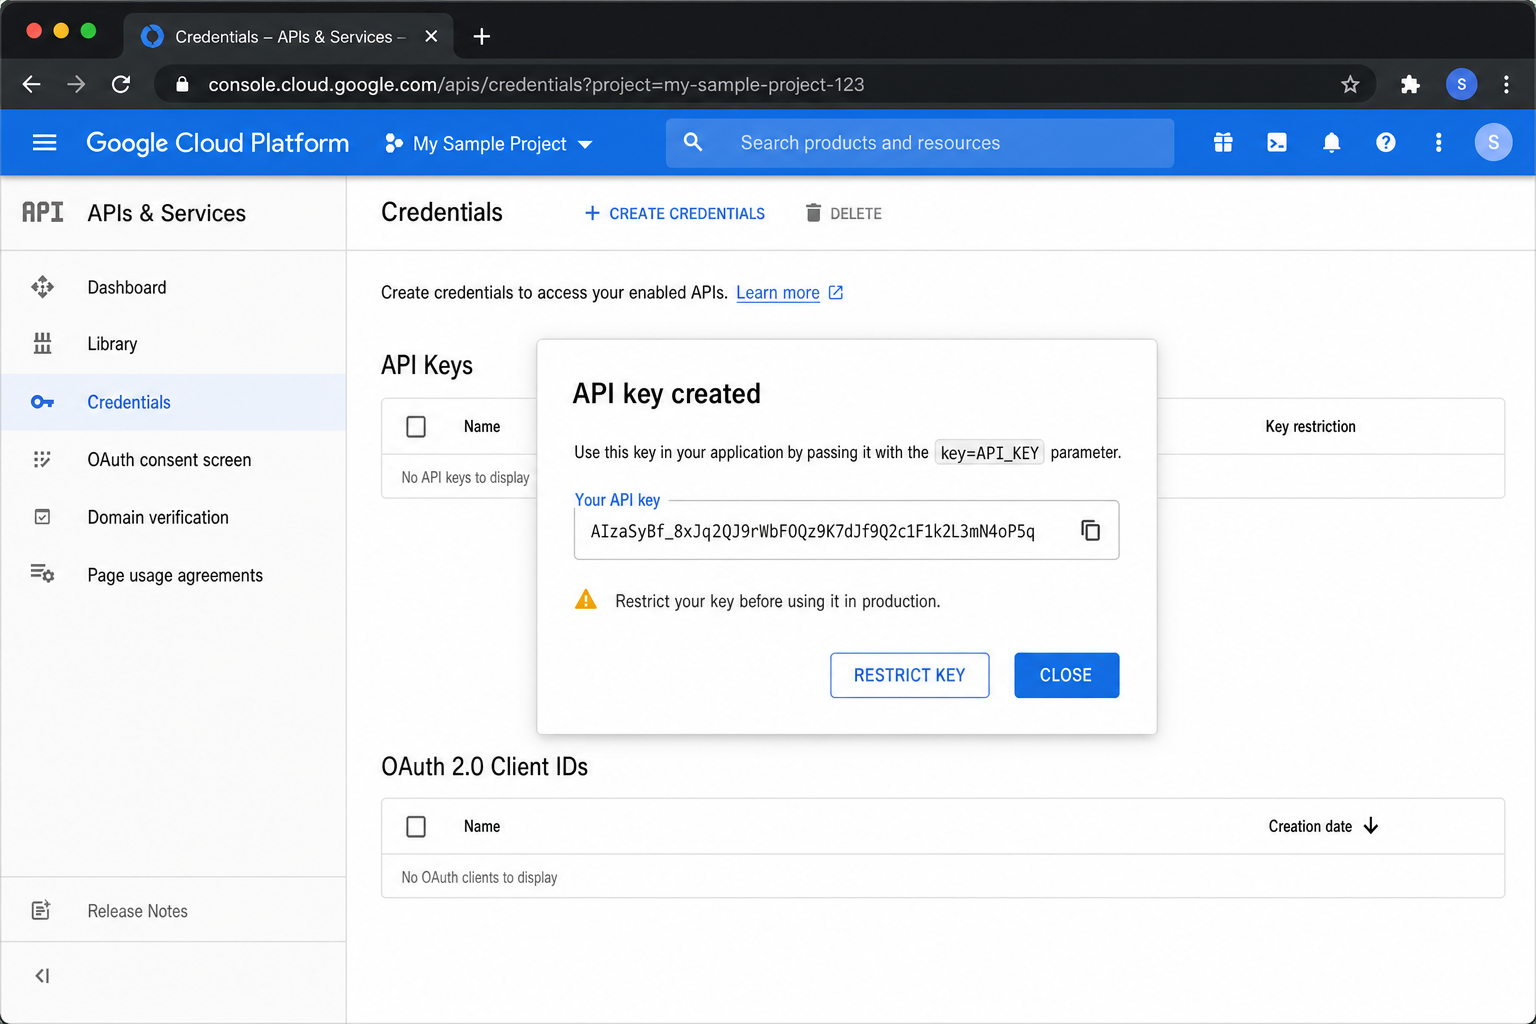
- Go to Credentials and create an API key. Make sure to restrict it to your domain so nobody else can use it.
Step 2: Add the Map and Directions to Your Page
Here’s a simplified example that displays a map with a driving route already drawn between two cities using the Maps JavaScript API with the legacy DirectionsService (still functional for existing projects). Replace YOUR_API_KEY with the key you created above, and swap out the origin and destination for your own locations:
<div id="map" style="height: 400px;"></div>

<script
  src="https://maps.googleapis.com/maps/api/js?key=YOUR_API_KEY&callback=initMap"
  async defer></script>

<script>
  function initMap() {
    const map = new google.maps.Map(document.getElementById("map"), {
      zoom: 7,
      center: { lat: 41.85, lng: -87.65 }
    });

    const directionsService = new google.maps.DirectionsService();
    const directionsRenderer = new google.maps.DirectionsRenderer();
    directionsRenderer.setMap(map);

    directionsService.route(
      {
        origin: "Chicago, IL",
        destination: "Springfield, IL",
        travelMode: google.maps.TravelMode.DRIVING
      },
      (response, status) => {
        if (status === google.maps.DirectionsStatus.OK) {
          directionsRenderer.setDirections(response);
        } else {
          console.error("Directions request failed: " + status);
        }
      }
    );
  }
</script>
This draws a route directly on the map, no new tab required. You can extend this further to let users type in their own starting address, add multiple stops, or switch between travel modes. Check the official Maps JavaScript API docs for the full picture.
Need multi-stop route optimization? The standard Directions API handles simple A-to-B routing. If you need to optimize the order of multiple stops (think delivery routes or field service scheduling), Google offers a separate Route Optimization API for that. It’s a whole different beast.
Tips and Troubleshooting
Common Issues
Problem: My old Google Maps embed stopped working (gray box or error)
This happens a lot with embeds that haven’t been updated in a while. Common causes:
- The embed code uses an outdated URL format or deprecated Place IDs (older embeds using deprecated Place IDs may stop working over time).
- Your site is on HTTP instead of HTTPS, and mixed content blocks the map from loading.
- If you’re using the JS API: billing isn’t enabled, or the API key is invalid or restricted incorrectly.
Fix: The easiest solution is to re-generate your embed code from scratch using the Share → Embed a map method above. For JS API issues, check your Google Cloud Console for errors, billing status, and API enablement.
Problem: The map looks terrible on mobile (too wide, cut off)
The default iframe code uses fixed pixel dimensions, which don’t play nicely with small screens. Wrap it in a responsive container like this:
<div style="position: relative; padding-bottom: 56.25%; height: 0; overflow: hidden;">
  <iframe
    src="https://www.google.com/maps/embed?pb=!1m18!..."
    style="position: absolute; top: 0; left: 0; width: 100%; height: 100%; border: 0;"
    allowfullscreen=""
    loading="lazy"
    referrerpolicy="no-referrer-when-downgrade">
  </iframe>
</div>
This keeps the map at a 16:9 aspect ratio and scales it to fit any screen size.
Problem: The “Get Directions” link opens Google Maps but doesn’t show a route
Double-check that your destination address is URL-encoded correctly. Spaces should be replaced with + signs, and special characters like commas and ampersands need to be encoded. If the address has unusual characters, try using GPS coordinates instead (latitude and longitude) for reliability.
Pro Tips
- Offer multiple transport options: Add separate “Get Directions” links for driving, walking, and transit by changing the
travelmodeparameter. Visitors coming by public transport will thank you. - Don’t force a starting point: Unless you have a specific reason to pre-fill the origin (like linking from a hotel page), leave it blank. Google Maps will use the visitor’s current location automatically, which is way more useful.
- Consider linking to multiple map apps: Some of your visitors use Apple Maps or Waze instead of Google Maps. You can add separate links for each using their own URL schemes.
https://maps.apple.com/?daddr=for Apple Maps andhttps://waze.com/ul?q=for Waze. - Add a text backup: For safety-critical directions (like a hospital or emergency venue), don’t rely solely on the map. Write out the key landmarks or exit numbers in plain text too, something like “Take Exit 428A toward downtown, then turn left on Main St.”
Wrapping Up
Adding Google Maps directions to your website doesn’t have to be a headache. For most people, including those building wedding sites, event pages, and small business contact pages, the free embed method or a simple “Get Directions” link is all you need, and you can have it set up in under five minutes. If you need something more custom, the Maps JavaScript API is powerful, but be aware of the billing side of things before you go all-in.
Honestly, for 90% of use cases, the “Get Directions” link method (Method 2) is the sweet spot. It’s free, works perfectly on mobile, and hands the navigation experience off to Google Maps where it belongs. Give it a try and your visitors will never have to fumble with copy-pasting your address again.