Zoom is a popular video conferencing and meeting app. If you’re in a Zoom meeting, it can be helpful to mute yourself so that you don’t accidentally interrupt the speaker, especially if the meeting is large, like a webinar.
While you can only mute other participants if you’re the meeting host or co-host, Zoom always allows you to mute yourself. In this article, we’ll cover how you can mute yourself or disable your microphone in Zoom on your PC, Mac, iPad, or mobile device.
1. Mute Yourself With the Zoom Toolbar
The Zoom toolbar makes it simple to mute yourself, and the process is essentially the same for both the PC and mobile app.
To mute yourself on Zoom:
- Once you’re in the Zoom call, click or tap the mute button in the bottom left corner. The mute button should change to a crossed-out microphone icon and say “Unmute”. This unmute button indicates that your microphone has been turned off.
If the toolbar isn’t visible and you’re using Windows or a Mac, all you need to do is hover your mouse over the Zoom window. If you’re using an Android or iPhone, simply tap the screen and it will appear.
Note: The loudspeaker icon at the top-left of the screen simply turns your audio down so that you can’t hear anything. It doesn’t turn the mute on.
2. Mute Yourself Using Zoom Keyboard Shortcuts
There are several helpful Zoom keyboard shortcuts on both Mac and PC. To mute yourself on Windows 10, press Alt + A. To mute audio on a Mac, press Shift + Command + A.
There are plenty of other useful shortcuts and tips to use in Zoom, including shortcuts that mute participants (rather than clicking Mute All or Unmute All in the participants window).
3. Enable Auto-Mute When Joining Zoom Meetings
Some people prefer to join a meeting muted so that they don’t cause unnecessary interruptions when they join. Luckily, Zoom has a dedicated setting to allow users to do just this.
To make sure you’re muted whenever you join a Zoom meeting on a PC or Mac:
- Open the Zoom desktop app.
- Select the Settings cog icon at the top-right of the Zoom window.
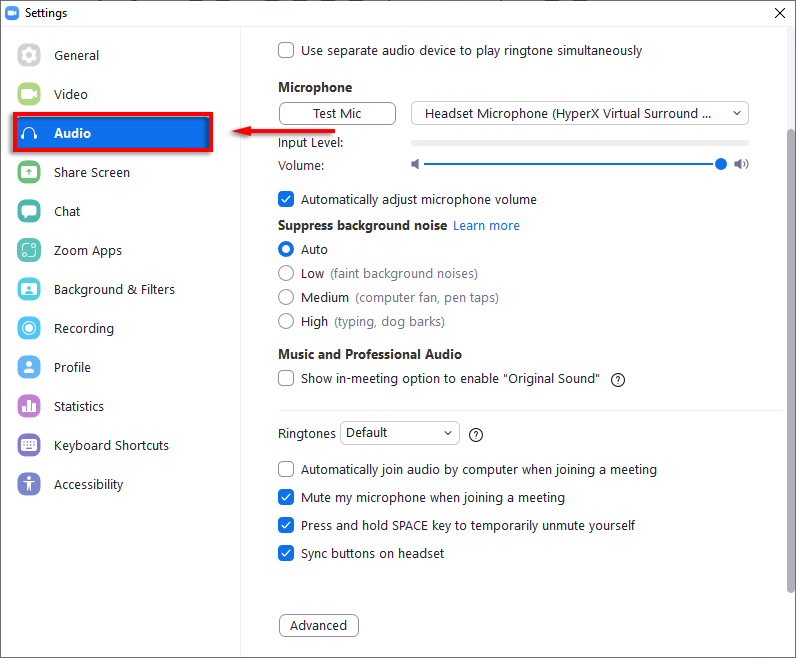
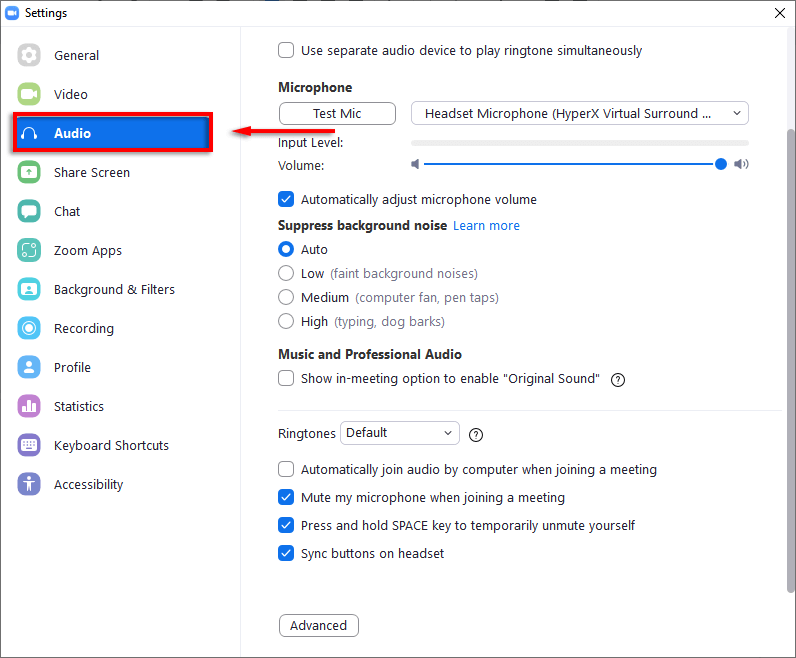
- Click Audio in the left-hand panel.
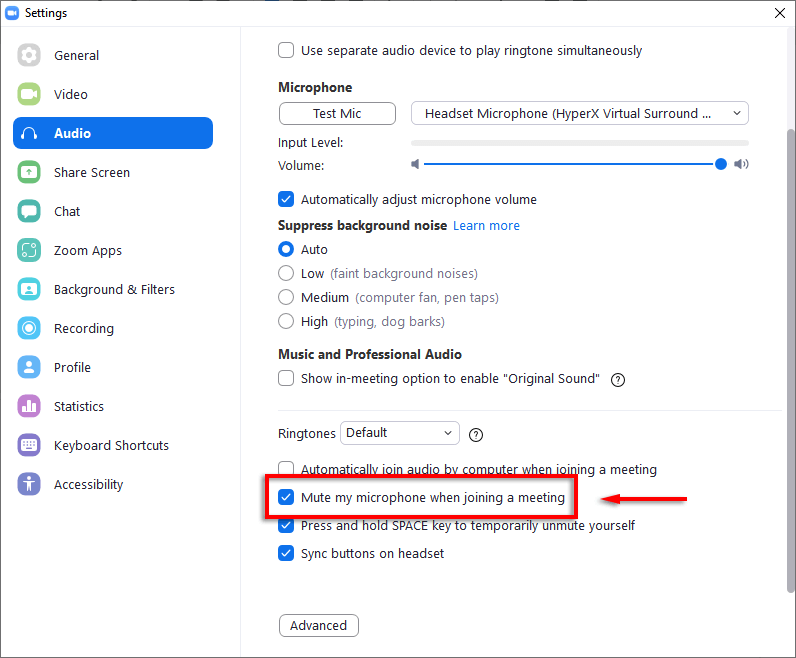
- Scroll down and check the box next to Mute my microphone when joining a meeting.
To make sure you’re muted when you join a meeting on your phone:
- Open the Zoom app.
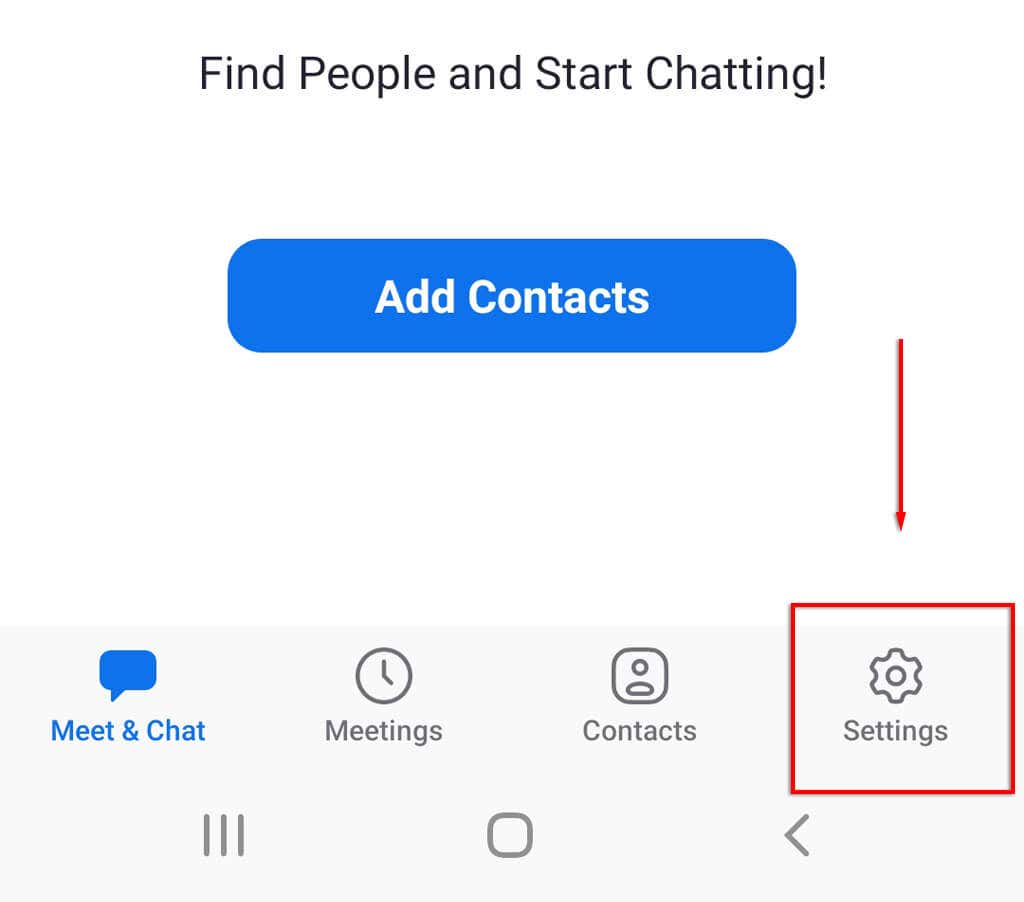
- Tap Settings at the bottom of the screen.
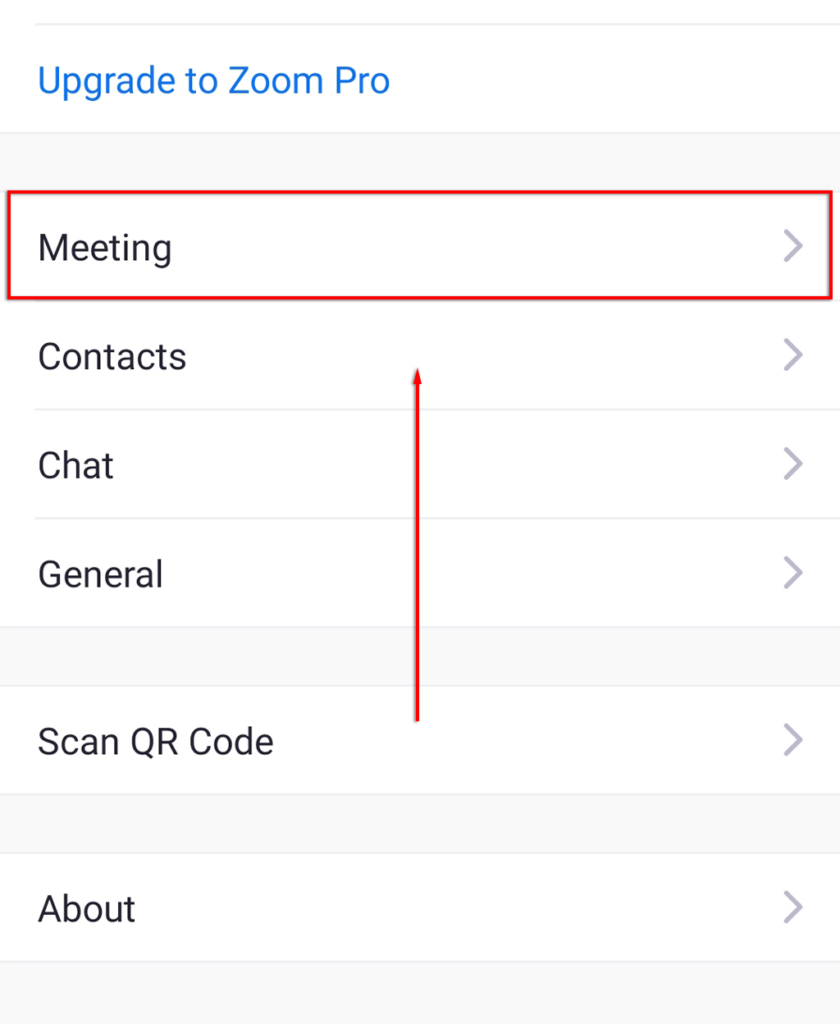
- Tap Meeting.
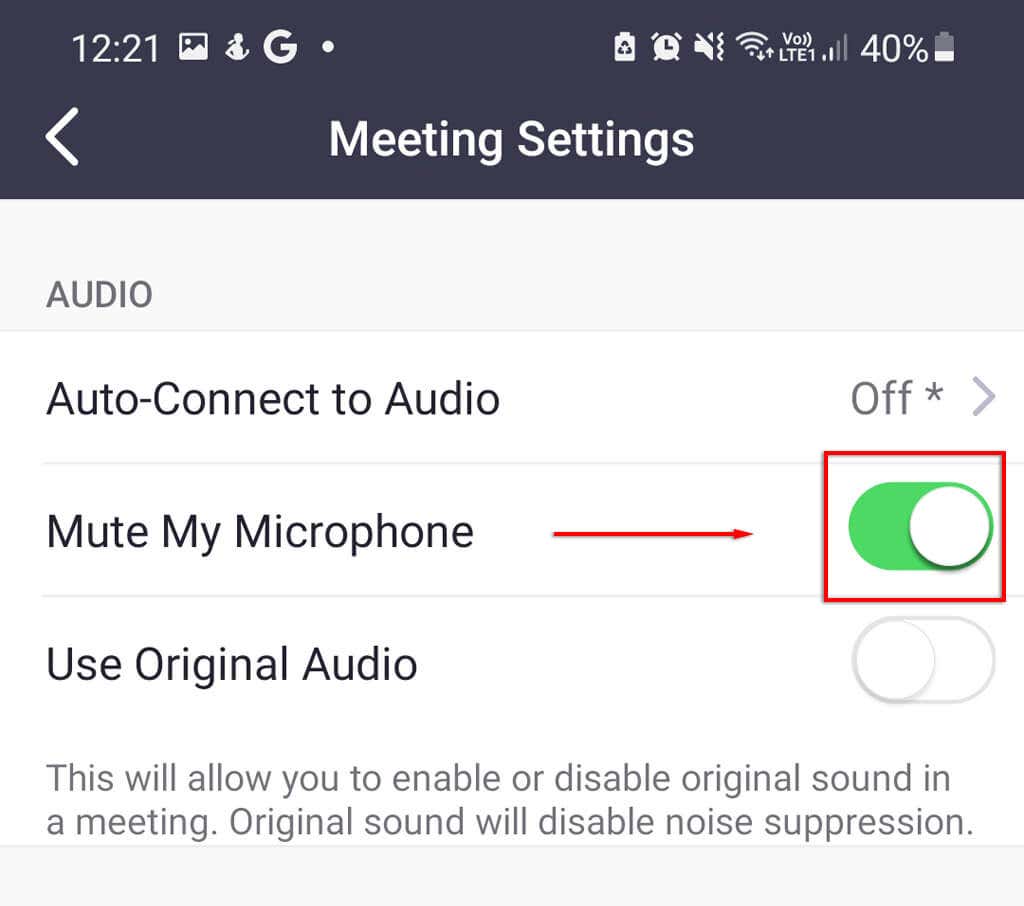
- Toggle on Mute My Microphone.
4. Disable Your Microphone
Another option that will ensure you are muted in Zoom is to disable your microphone directly via the system settings. This option is only available on PC or Mac. If you’re using Android or iOS you could consider not allowing your Zoom app microphone permissions when the pop-up appears.
To disable your microphone on Windows:
- Press the Windows key + I to open Settings.
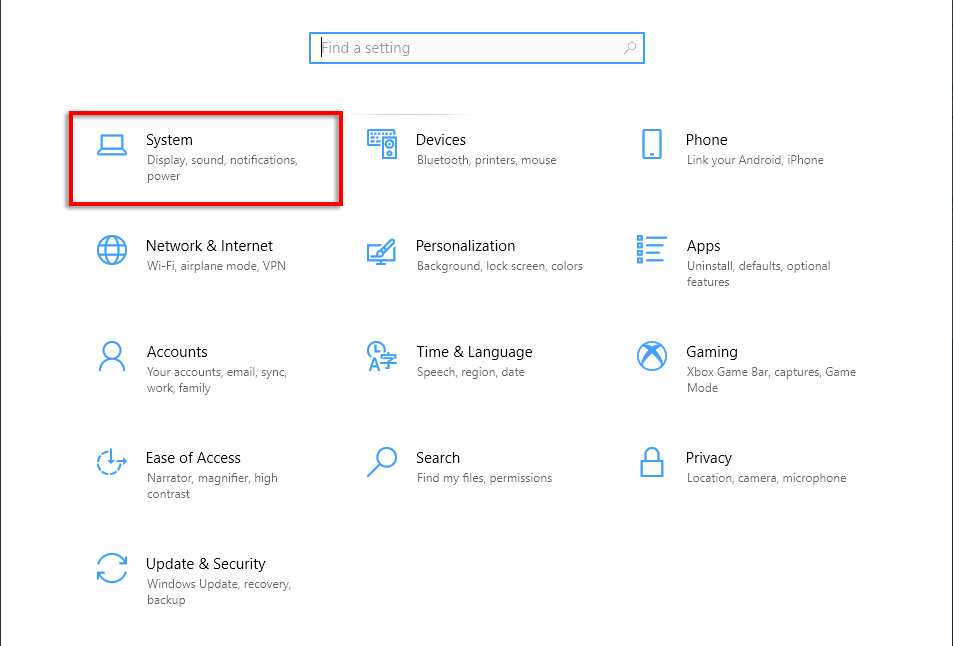
- Click System.
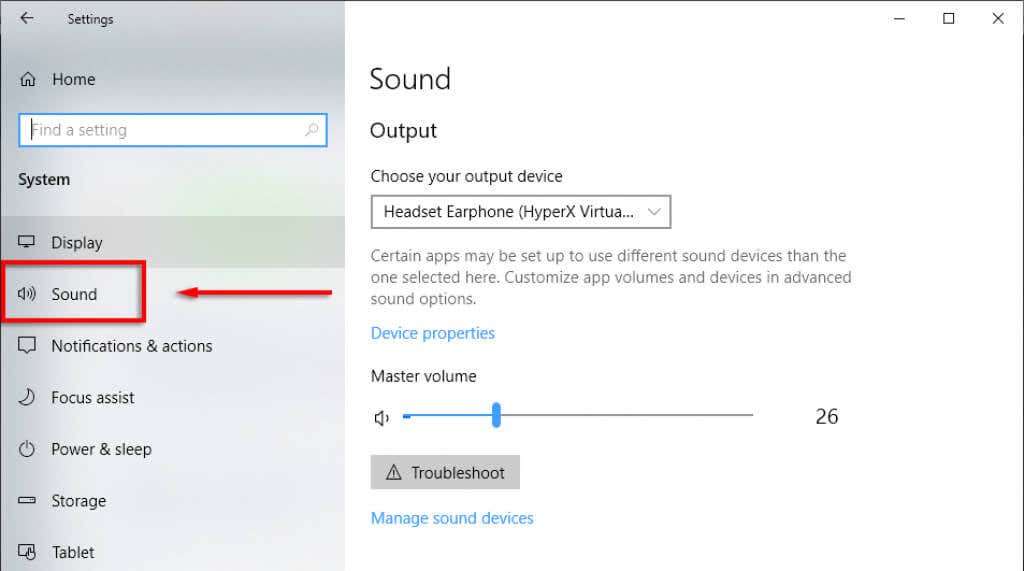
- Select Sound from the left-hand menu.
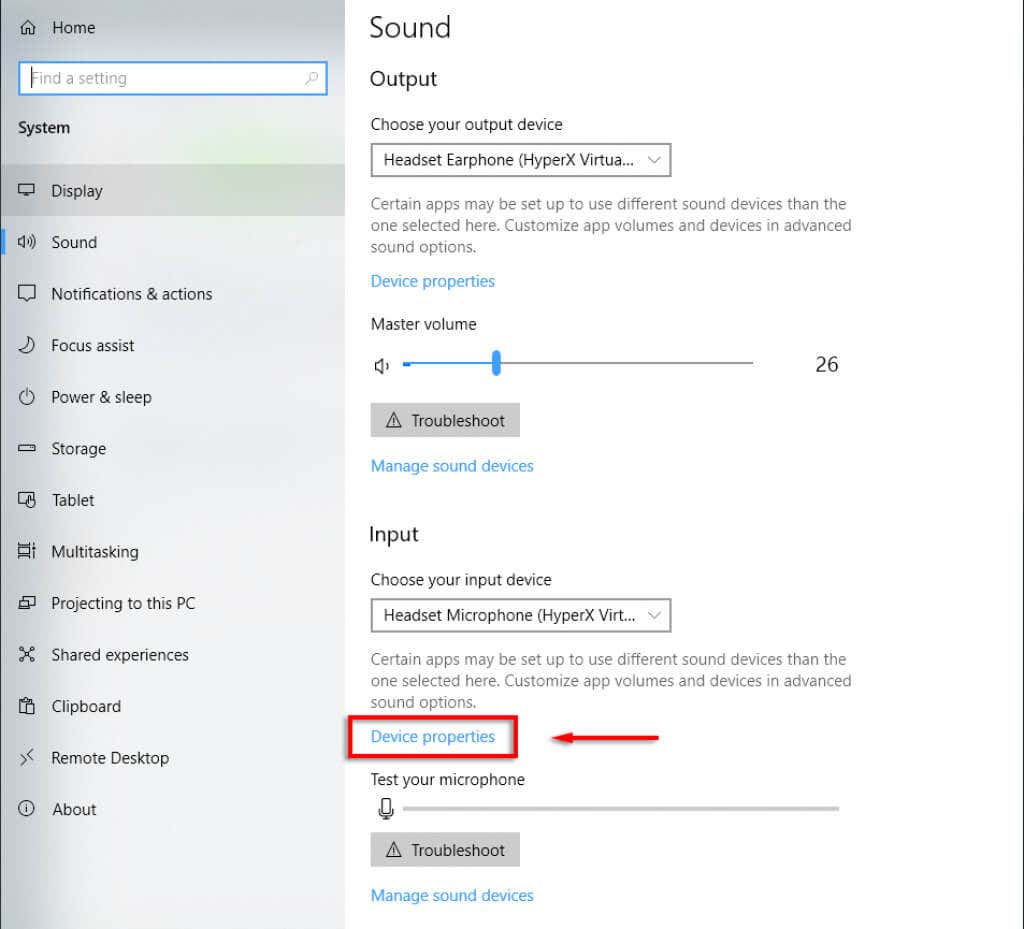
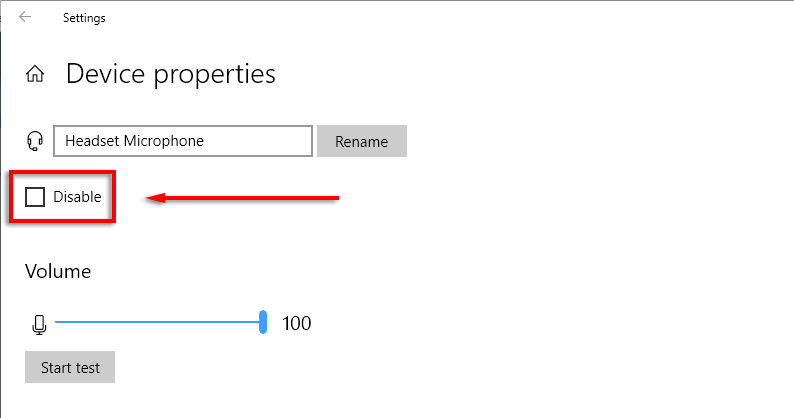
- Scroll down to Input, and underneath the input device drop-down menu, select Device properties (the input device will be your webcam if you don’t have a dedicated microphone).
- At the top of the window, check the box next to Disable.
To disable your microphone on a Mac:
- Click the Apple icon on the menu bar and select System Preferences.
- Click Sound.
- Select the Input tab.
- Under Input Volume, drag the slider all the way to the left to mute your microphone.
5. Suppress Background Noises
If you’re muting your microphone because you’re in a busy or loud environment, Zoom has a background noise suppression function that might help. Combining this with a virtual background is a great way to look more professional despite having less than ideal circumstances.
To enable this setting:
- Open Zoom.
- Click Settings > Audio.
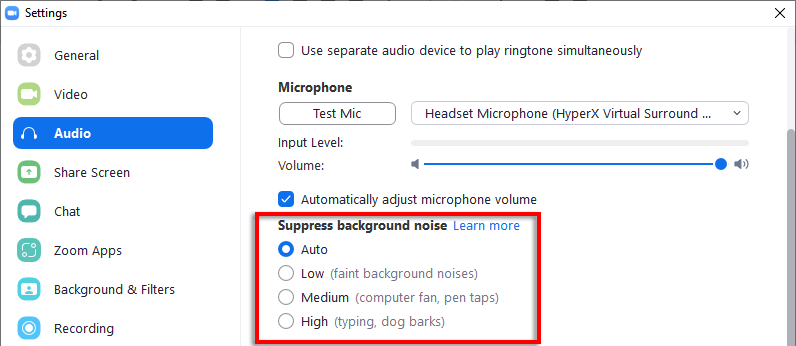
- Scroll down to Suppress background noise and check each level to see if it helps your microphone quality. There are three levels: Low, Medium, and High.
Note: Some people report that this causes their microphone not to work. If that’s the case, simply turn the setting back to Auto.
Radio Silence
Muting yourself in the Zoom app is fine, but it’s easy to double-click and unmute yourself by accident. If you’re paranoid that your microphone is transmitting sound while you’re supposed to be muted, you can use this guide to disable your microphone in the computer audio settings. This way you can be sure that no sound is going through!


