Today, we use our smartphones for everything from reading news to checking bank accounts to ordering food to texting family and friends. You always read about being careful when using a laptop on a public WiFi network because of hackers and snooping, but what about your smartphone? A hacker could probably gain more information about you from your smartphone if they could capture the data being sent between your apps and the Internet.
It’s probably true that the banking app you use on your iPhone probably encrypts the data sent between the phone and their servers automatically, but there is no guarantee. Plus, a lot of apps simply aren’t created with security in mind and therefore send data over the Internet in plain text. If you travel a lot and are routinely connected to unsecured WiFi networks, you should consider tunneling all that traffic through a VPN.
If you have a corporate iPhone, that’s probably already taken care of for you, but what if you want to secure your personal device? If you have the time and patience, which you’ll definitely need, you can setup your own personal VPN server and connect to your VPN from anywhere in the world whenever you want to secure all the traffic coming in and out of your iPhone.
In this article, I’ll walk you through the steps that would be needed to accomplish something like this. There are many ways to go about it and the best way depends on what kind of hardware you already own. For example, I own a Synology NAS that allows me to create a VPN server and to access the NAS from the Internet using dynamic DNS.
In order to do this, you’ll need to be a little bit of a geek. Unfortunately, it’s too hard for someone who doesn’t have a clue about technology. However, even without any previous tech knowledge, if you are willing to spend some time reading and understanding, it’s not impossible to accomplish.
Step 1 – Understanding IP Addresses and DNS
Before we delve into any details about how configure VPN settings on your iPhone, let’s talk about IP addresses and DNS. These two topics are essential to understand before you go about creating a VPN server. To get started, read my post on the difference between a static and dynamic IP address.
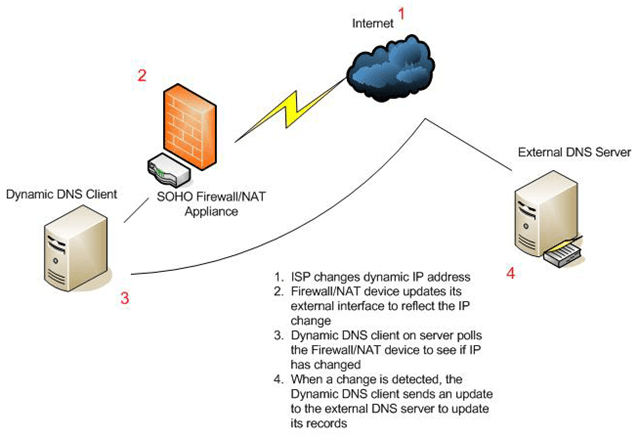
Basically, if you’re going to be running a VPN server from your home, you’ll need to setup dynamic DNS so that you can access your server from anywhere using a DNS name like myhomeserver.no-ip.com. No-IP is a service that provides free dynamic DNS.
Before you go creating an account, read my post on how to setup free dynamic DNS. The way it works is that you have to install a piece of software on your computer that keeps updating the service with the latest IP address assigned by your ISP.
Note that you don’t have to do this right now. You could go ahead and setup your VPN server first and then setup dynamic DNS. There is no real order you have to follow. You just need to make sure each part is working on it’s own.
Step 2 – Port Forwarding
The next part that needs to work independently is port forwarding. Dynamic DNS basically allows you to say “Hey send all the traffic for this VPN to myhomeserver.no-ip.com” and it will automatically figure out what the current IP address given by your ISP is for your home and send it there.
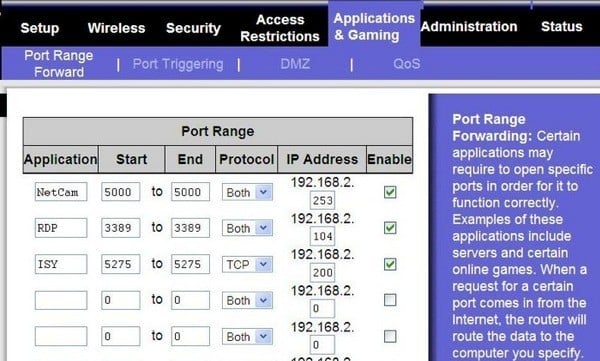
However, it won’t matter if that traffic is coming if your router blocks all of it, which all routers would do by default. Data send over VPN will use certain “ports” that need to be opened on your router in order for the data to be sent to the computer inside your network. This is called port forwarding.
Next, read my article that explains port forwarding and how it is used. You’ll have to open a couple of ports on your router for VPN. When you read the articles on setting up a VPN below, you’ll be told the actual port numbers.
Step 3 – Setup a VPN Server
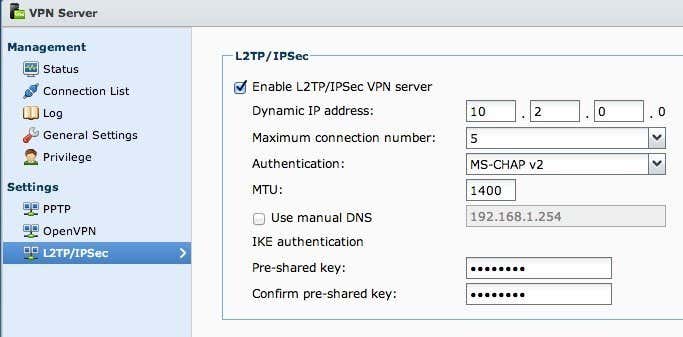
There is no single way to setup a VPN server, unfortunately. If you happen to have a Synology NAS like I do, you can follow these instructions for setting up the VPN server:
Simply click on L2TP/IPSec in the left-hand side and then click the Enable checkbox. Leave all the settings on default and simply type in a pre-shared key. Then click on Privilege and make sure that the user you want to have access to the VPN is granted the appropriate permission.
On the router, you’ll need to forward UDP ports 1701, 500 and 4500 if using L2TP. It takes about 5 minutes to setup and other than the ports, you need to configure DDNS, which is also built into Synology NAS products.
If you don’t have a NAS, you can configure VPN settings in your router if it has dd-wrt installed. dd-wrt is a open source Linux-based firmware for routers. You can actually replace your current router’s firmware with dd-wrt if it’s supported. It’s a bit more complicated to setup on dd-wrt, but they have lots of documentation on their site.
Step 4 – Connecting to a VPN via iPhone
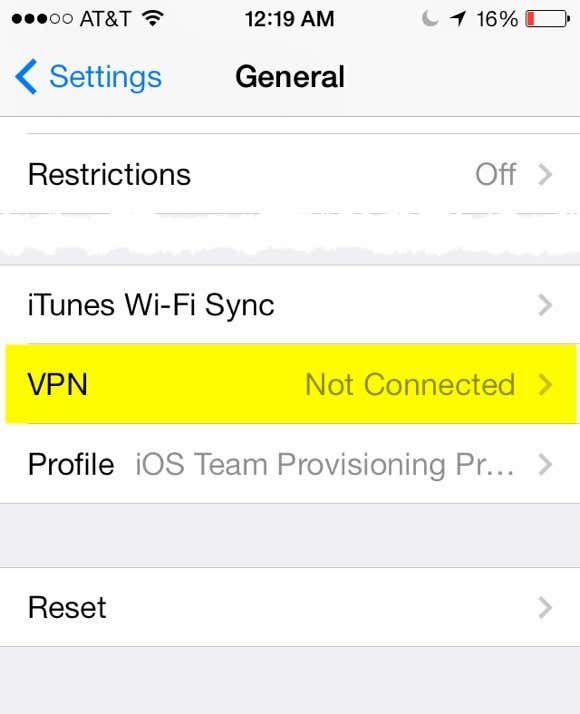
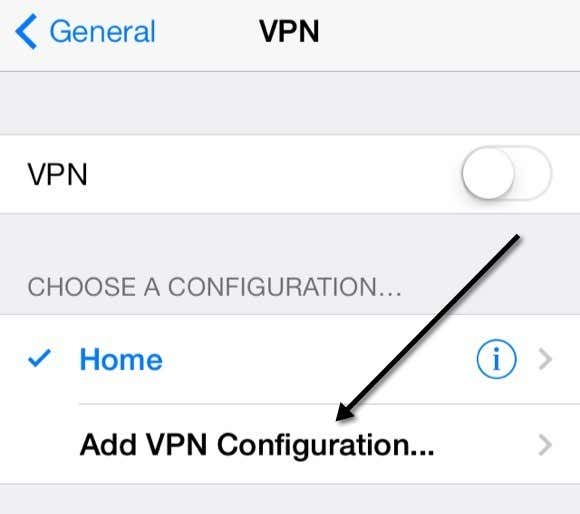
The last step in this whole process is actually connecting your iPhone to your personal VPN. Luckily, you don’t have to download any apps or anything else since it’s built into iOS. First go to Settings and then tap on General. Scroll down to the bottom where you’ll see VPN.
Now tap on the Add VPN Configuration button.
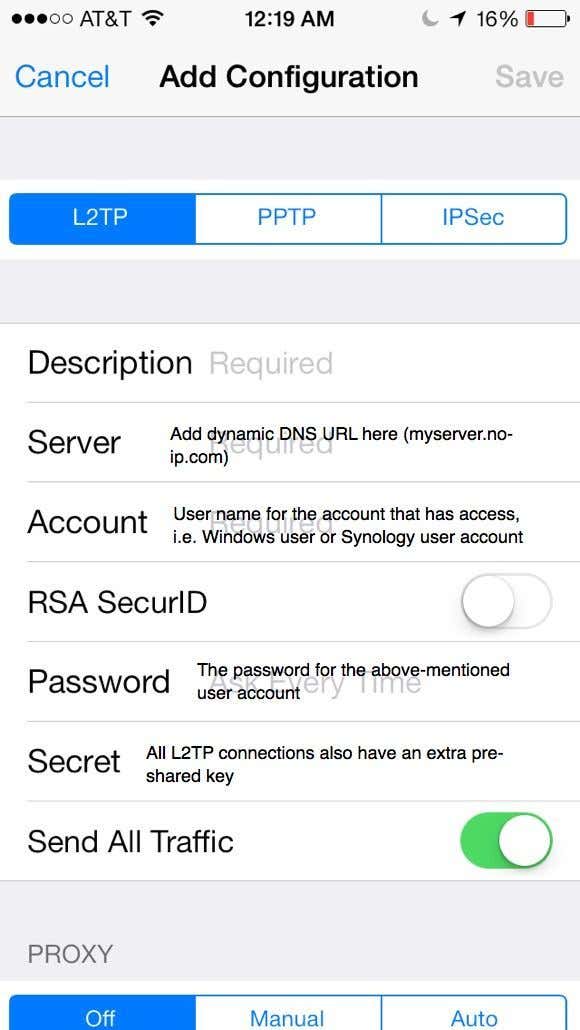
On this screen, you’ll need to enter all the pertinent information. This includes the server name, which should be the dynamic DNS URL you get when you sign up for a dynamic DNS service. You’ll also need the user name and password for the Synology account or Windows account that has permission to connect to the VPN. Lastly, the pre-shared key is that extra password you had to type in when creating the VPN server. Of course, you want to have Send All Traffic enabled so that everything gets encrypted.
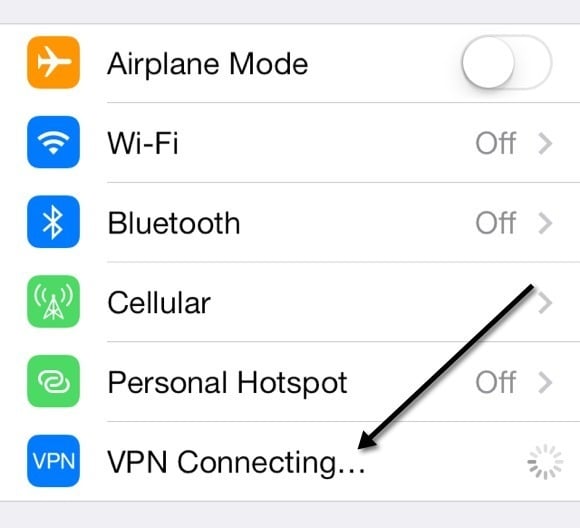
Now to connect to the VPN, go back to the main Settings screen and you’ll see a new VPN option below Cellular and Personal Hotspot. Go ahead and tap on that to connect and it will change to VPN Connecting.
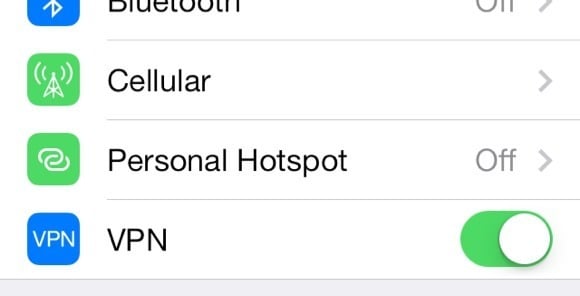
If all goes well, you’ll see it turn green!
Lastly, when you exit and go to any other screen, you’ll see the little VPN icon now at the top of the status bar.
Sweet! Now you can rest assured that no one can spy on your Facebook stalking sessions or other nefarious activities! Like I mentioned before, this is not the easiest thing to get working and it will take some time, lots of reading, lots of tweaking and testing before you get it right. However, once it’s setup, it’s pretty cool. Whenever I’m not at home and use my iPhone for anything other than browsing the web, I always connect to my VPN first.
Please feel free to post a comment here with your problems, questions and issues. I’ll be more than glad to help. Also, if you have a different setup for your iPhone using different tools and services, feel free to let us in on it too. Enjoy!
