Facebook launched its live feature in 2016 to all users. Since then, it has become a powerful marketing tool to interact with viewers in real-time. They report the following impressive Facebook Live statistics:
- One out of every five Facebook videos were live broadcasts in 2017.
- Facebook live broadcasts reached 3.5 billion in 2018.
- Live videos on Facebook have six times the number of interactions than traditional videos.
- There are ten times more comments on Facebook live broadcasts than regular videos.

Make sure you have everything you need to create a successful Facebook Live video, and if needed, the ability to download your facebook videos. Someone will need to control the technical aspects of the show. For simple events, this could be as basic as starting and stopping the broadcast. For interviews or co-hosted broadcasts, a more professional setup will be required.
How to Livestream on Facebook From Your Computer
Facebook enables you to broadcast live directly from your computer. You can stream to your Facebook pages, profile, event page, or business page.
Before starting your Facebook livestream, get prepared by:
- Have a defined outline and description about your topic.
- Stream from a comfortable location.
- Make sure your Internet connection is stable and reliable.
- Promote your live event ahead of time.
Facebook lets you broadcast live from almost anywhere at any time. If you are livestreaming for the first time on Facebook, you will be asked for permission to use your microphone and camera. Click Allow.
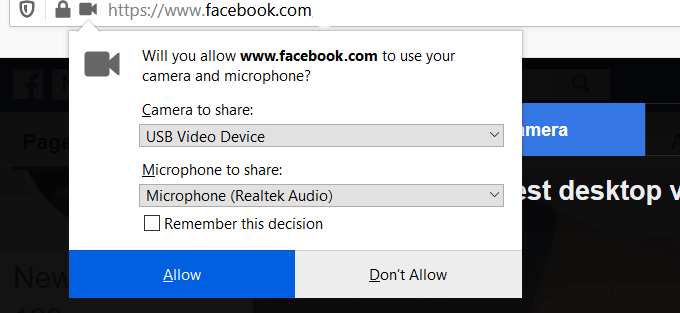
- Start by creating a new post. Click on Live Video.
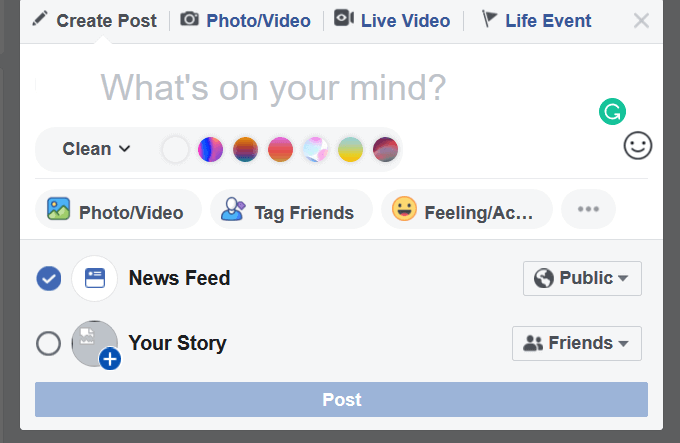
- Select a Category from the options Facebook gives you or Create Your Own.

From the popup of options, complete the following:
- Enter a title.
- Add a photo or video(s): choose from one of Facebook’s options or upload your own.
- Confirm the date.
- Give it a description.
- Tag Friends.
- Add Location
Click the dropdown next to Public and choose the audience of your live video. You can choose:
- Public, which includes everyone.
- Friends only.
- Friends except.
- Specific friends.
- Specific groups.
- Only me (useful for testing).

After filling in all the settings and choosing from the available options, click Go Live. When finished, click End Live Video.
Unless you delete the video, it will automatically be added to your timeline.
Livestream on Facebook From a Mobile Device
The steps below will work on an iPhone, Android, Tablet, or any other mobile device.
- Tap on What’s on your mind
- Click on Live Video
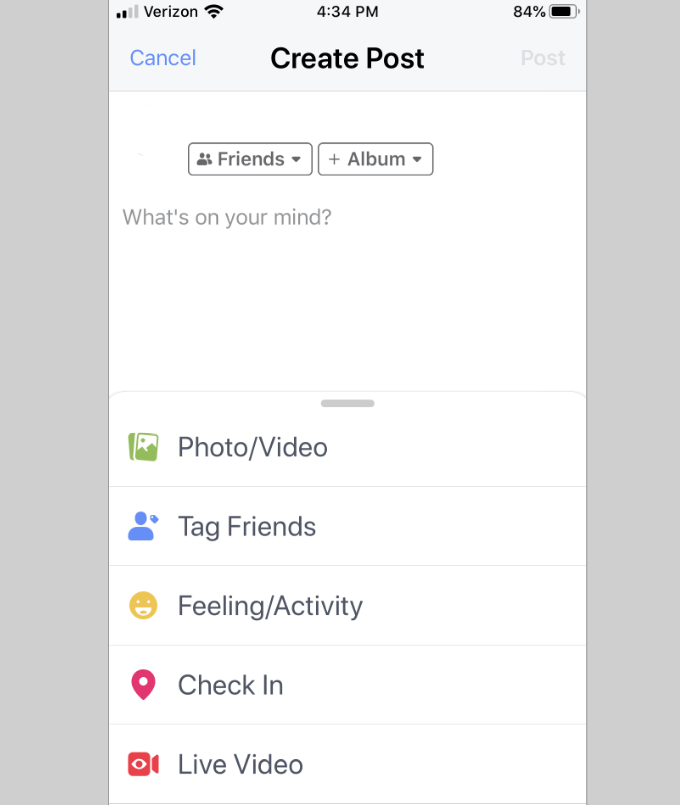
If this is your first-time livestreaming, you will also be asked on your mobile device for access to your device and microphone. Give your permission.
The next steps are the same as with using your computer. When you are ready, click Start Live Video. Your mobile device will show a Live red indicator in the corner of the screen. You will also be able to see who is watching your video.
There are tools at the bottom of your screen that you will be able to use while broadcasting, including:
- Adding filters
- Switch to the front-facing camera
- A lightning bolt to brighten the screen
- Typing comments
When the broadcast is over, click Finish. You can choose to Delete the video or Share it as a post to your Facebook friends or business page fans.
New Facebook Livestreaming Tools
Facebook recently rolled out updates to help publishers and video creators improve, enhance, and simplify live broadcasts.
These expanded features also include improved analytics. Some of the updates include the ability to:
- Test broadcasts before going live by limiting the audience to only business page admins and editors.
- Trim beginning and end of live videos to remove dead space.
- Broadcast live for up to eight hours.
Two additional significant enhancements to livestreaming on Facebook are:
- Watch parties that give users the ability to schedule an event in advance and enable video-on-demand replays.
- Creator Studio manages, measures, and monetizes content across Facebook Pages and Instagram all in one place.
Launch a Facebook Watch Party
Facebook Watch Parties are a way for people to watch videos on Facebook together in real-time. Participants can watch the video, live or recorded, and interact with others.
You can host a party on your personal profile, business page, or Facebook group. Follow the steps below to start your Watch Party:
- From your page, click in the Write a Post box and then on the […] to open more options.
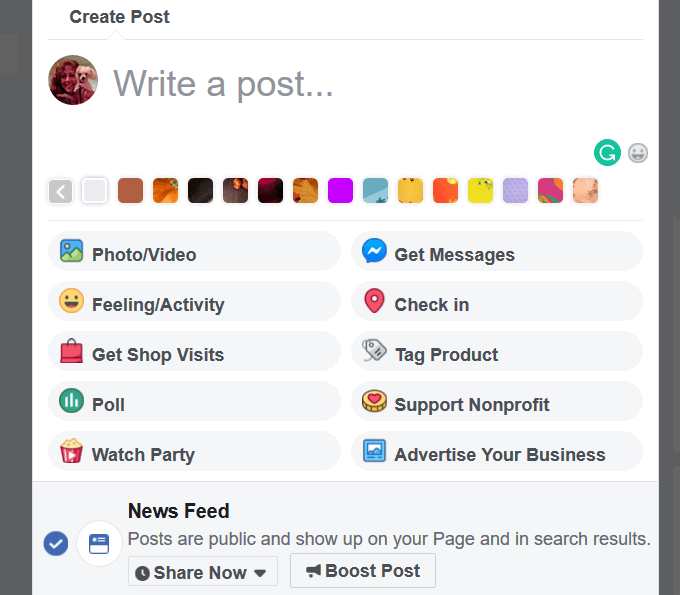
- Click on Watch Party as shown above. Next, you will see a screen where you can select which videos you want to show at your party.
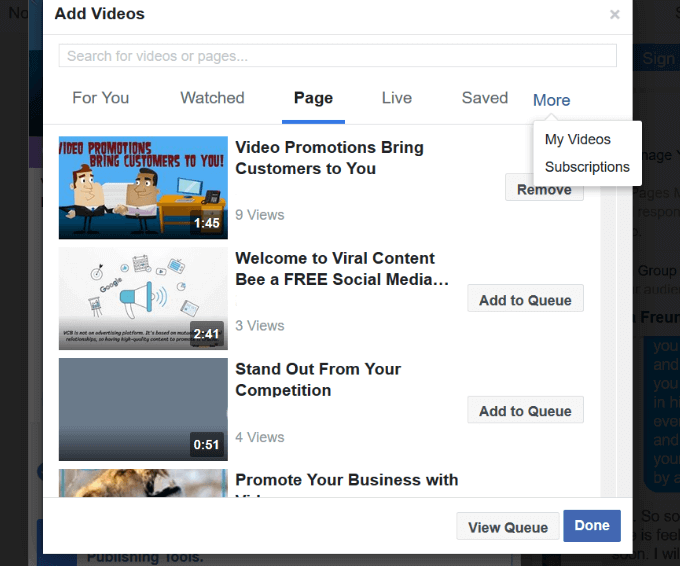
- If you want to add more than one video for your party, click on the Add to Queue. You can click on View Queue if you want to preview your playlist before going live.

- When you are finished adding your video or videos, click Done. At this point, you will be taken back to your post.
Be sure to give a clear description of the topic your watch party will be addressing to entice people to join. Promote it from your page to increase viewers.
Many companies use a Facebook Watch Party to replay a livestreaming event for those who couldn’t make it the first time. It is also good to repurpose a previously livestream broadcast that was successful.
The latest Facebook Watch Party features include advanced scheduling, ability to replay, tag business partners, and live commenting.
Livestream on Facebook’s Creator Studio
Facebook’s updated Creator Studio brings together in one place all the tools you need to post, manage, measure, and monetize all Facebook Pages and Instagram accounts.
The steps below will show how to start a Facebook Livestream from Creator Studio.
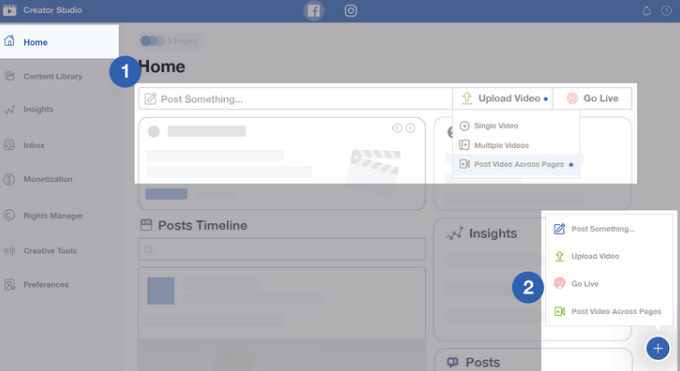
- To go live from the Home tab, select the + from the Content Library or the Home tab, then click the Go Live.
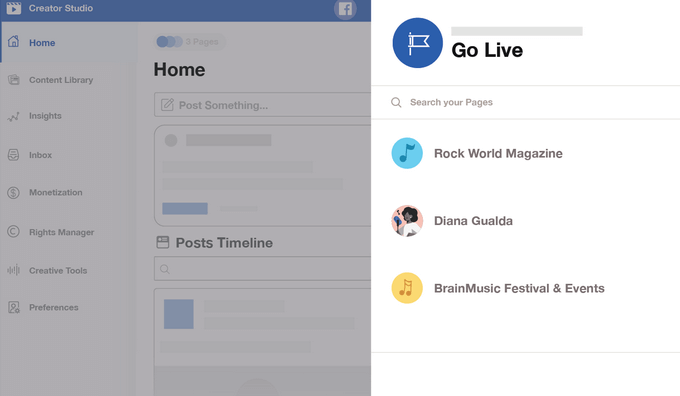
- Choose the page from where you want to stream. Note that you will need to have admin rights to that page.
- You will see two options to use to start your stream: Camera or Connect to another device. Select Camera to stream from your webcam or phone. Choose Connect when you:
- Use broadcast equipment or streaming software
- Go live from your phone
- Share the broadcast with someone else to go live
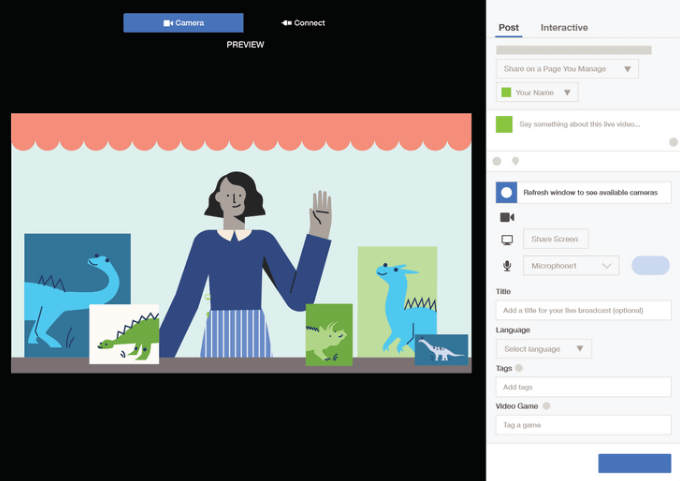
Choose the Post option from the image above to:
- Select where you want to post your live broadcast
- Add your title and description
- Choose the microphone, camera, and screen (for screen sharing)
- Select the language of your broadcast
- Include tags (invisible) for discoverability
- Choose Interactive if you want to add polls to your broadcast.
- When you are ready, choose Go Live to start your livestream.
As mentioned above, Facebook Live Videos are archived unless deleted. This gives you the opportunity to bring attention back to successful events and continue to add value to your target audience.
A few ways to achieve this are:
- Run a Facebook Watch Party to re-show a live event
- Create a post thanking the attendees of your live event to entice those who didn’t make it originally to view it
- Generate additional engagement by asking questions or making comments after the event
You can also cross-promote your Facebook Live content on other social media channels.
Don’t forget to analyze your results. This is now much easier using the New Creator Studio where all the critical metrics are in one place.