If you’re in the midst of project planning, the Timeline View in Google Sheets can help you stay on track. Take your project data and pop it into a simple timeline that includes cards for tasks with due dates and durations.
You can include task descriptions and color-coding. Then, view your timeline by week, month, quarter, or year for the best picture. Here’s how to set up and use the Google Sheets project timeline.
Timeline View Availability
To use the Timeline View, you should have one of the Google Workspace editions. These include Essentials, Business Starter, Standard, and Plus, Enterprise Essentials, Starter, Standard, and Plus, Education Fundamentals, Standard, and Plus, and Frontline.
Set Up the Project Data
While there’s no required way to set up your data to use the Timeline View, there are recommended columns and you do need to have at least one column with dates.
If you’re using Google Sheets formulas to determine start or end dates, just make sure the results are formatted as dates.
To make the most of the timeline, try to include the following columns:
- Task: Include the task or name of it.
- Start date: Add start dates for each task.
- End date: To view the full duration of a task on the timeline, include end dates.
- Description: Optionally include further details about each task.
- Duration: Add the length of time between the start and end dates for the project tasks. You can use days or hours, minutes, and seconds.
For help pulling in data from another spreadsheet, check out our tutorials for importing data into your sheet or for converting your Excel workbook to Google Sheets.
Create the Timeline
Once you have your data set up, you can create the timeline. If you want to make adjustments to the data, you can still do so, and the timeline will update automatically.
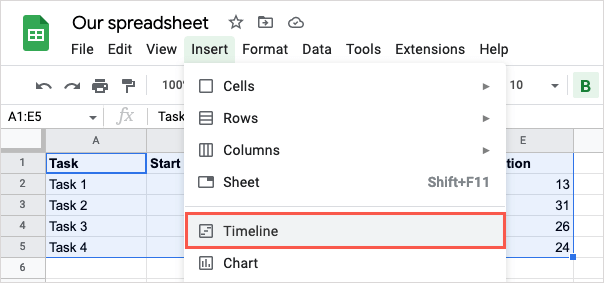
- Select the data you want to use for the timeline, including headers for the above columns.
- Go to the Insert tab and choose Timeline.
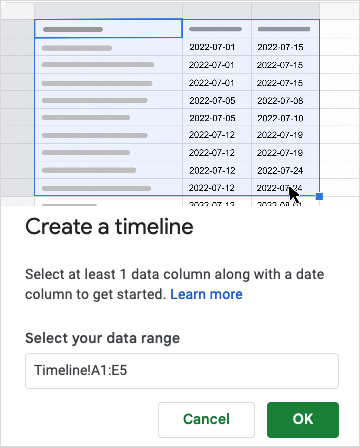
- When the Create a Timeline window opens, confirm or edit the data range and select OK.
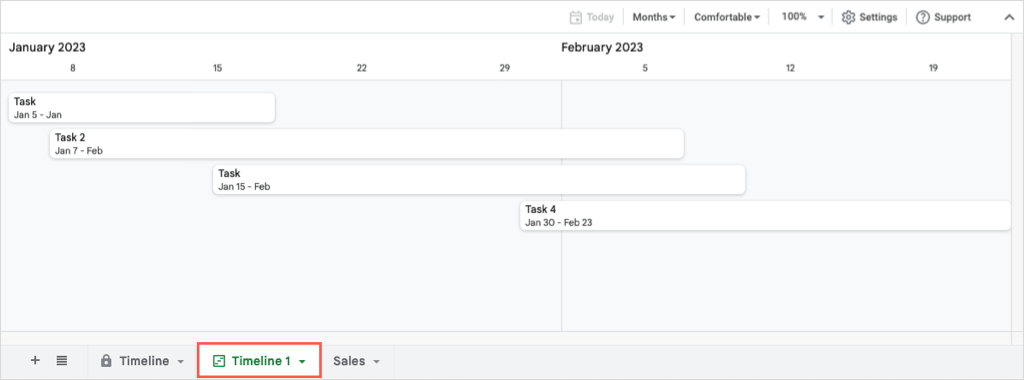
You’ll then see a new sheet added to your workbook labeled “Timeline 1” which looks similar to the Gantt chart.
From there, you can use different views, color-code the cards, and group the timeline tasks.
Use the Timeline View
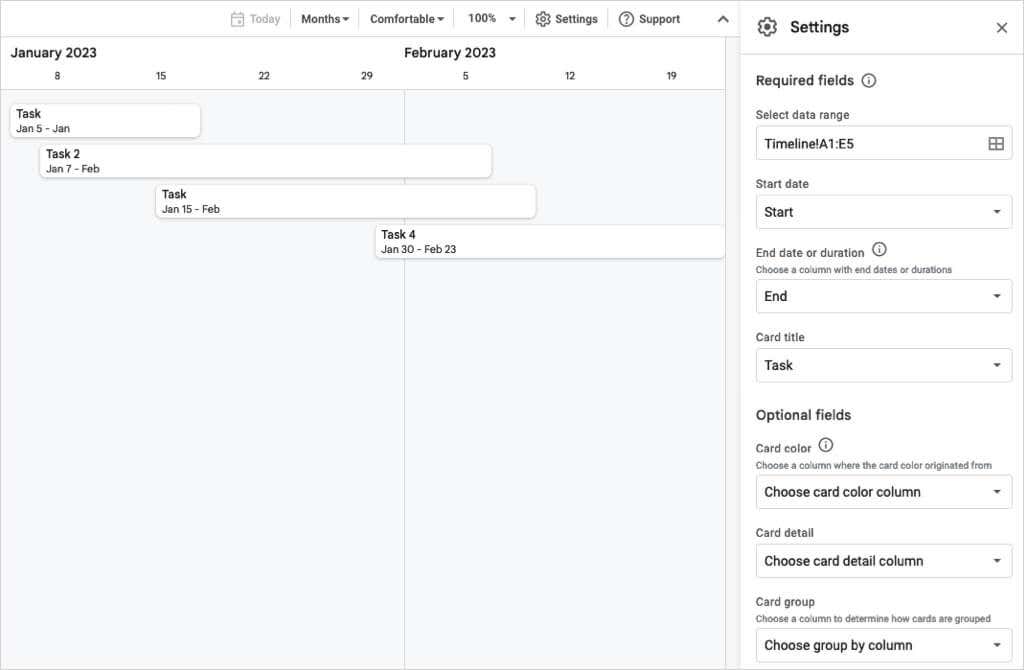
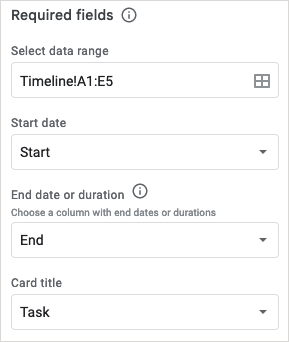
When the timeline opens, you should see the Settings sidebar open on the right at the same time. If not, choose Settings on the top right. Here, you can select the required columns and optional fields.
Pick the columns for the Start date, End date or duration, and Card title.
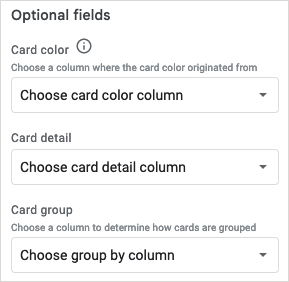
You can also select columns for the optional fields at the bottom of the sidebar:
- Card color: If you want to color-code your cards, choose a column to base the color on.
- Card detail: You can choose your Description column here to display the task details.
- Card group: Group your tasks by a column like start, end, or duration if you like.
Timeline Views
As mentioned, you can view your timeline by various timeframes. At the top, use the drop-down menu to pick from days, weeks, months, quarters, or years.
To the right, use the next drop-down boxes to pick between a comfortable or condensed view or zoom in on the timeline.
Card Details
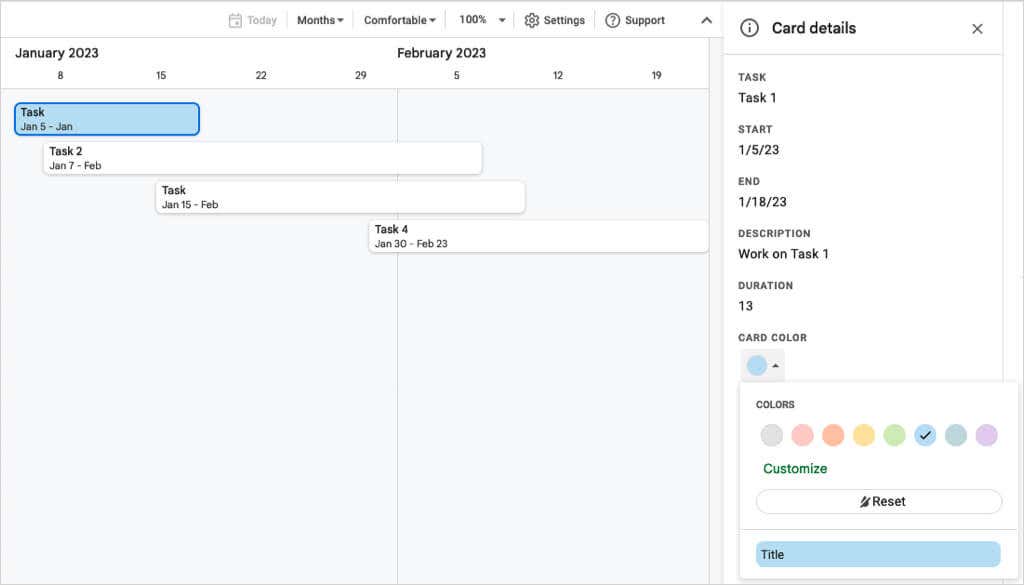
Depending on the view you choose to see your timelines, you may not see all details on the task cards. Simply select a card on the timeline and you’ll see the Card details sidebar open on the right.
From there, you’ll see the data in each of the columns. To color-code a card, choose a color from the drop-down box. To use your own color, pick Customize to open the palette.
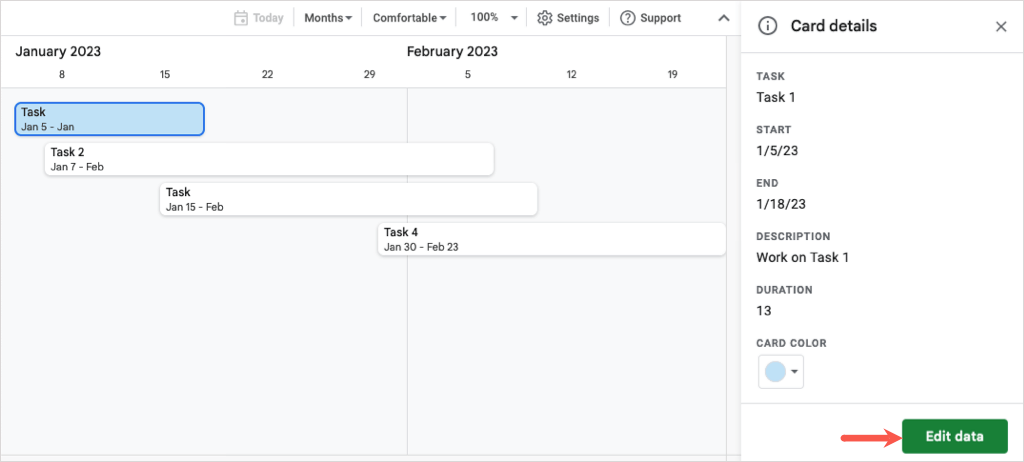
If you need to make changes to the details for a card (task), select Edit data at the bottom of the sidebar.
You’ll then be directed to the task in your spreadsheet. Make your changes and the timeline will update in real-time.
You can also adjust your data on the sheet at any time to see the updates on your timeline.
Staying on task and up to date is easier with the Google Sheets project timeline view. You can see your project milestones and tasks, and then share the project schedule with team members or stakeholders.
For more, look at our step-by-step guide for sorting or filtering by color in Google Sheets.


