Using unique fonts in your project will not only make your video stand out to viewers, but it can also be a great way to establish a brand. Thankfully, you aren’t stuck with only the default fonts already in Adobe Premiere Pro. You can use any available font to download and install on your computer.
Adobe Premiere pulls pre-installed fonts from your computer. We’ll show you how to install the fonts in Adobe Premiere and use them in your video in this tutorial.
Adding Fonts to Adobe Premiere Pro
To add fonts to Premiere, you just need to install them onto your computer. You can download free fonts online or have a custom font made for you that you can download. Here’s how to install these after you’ve downloaded them.
- Open the .zip file using a program such as 7zip. Inside there should be a .ttf or .otf font file.
- Extract the .ttf or .otf file somewhere you’ll remember it, and click on it to open it.
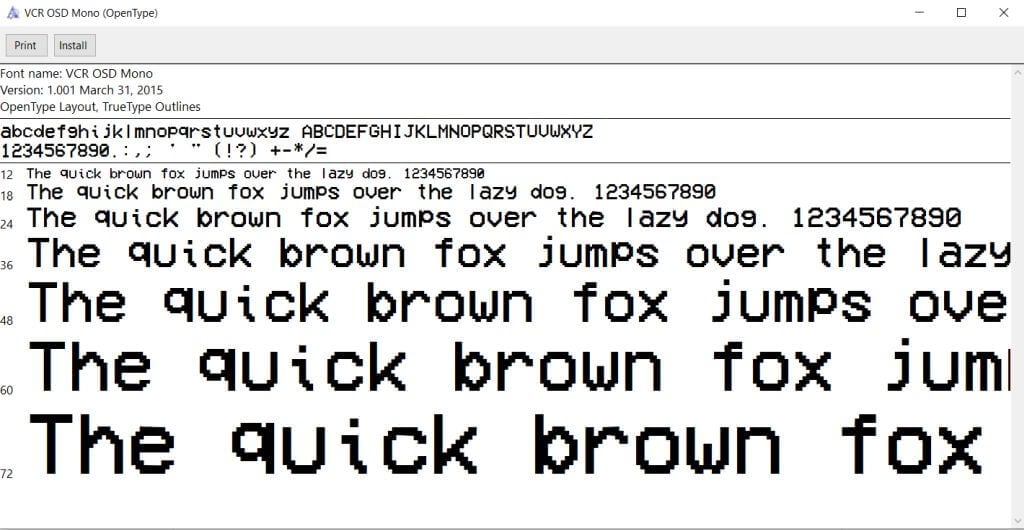
- You’ll see an example of the font in a new window. In the top-left corner, select the Install button.
- Once installed, you can close the window.
Install the font before opening Premiere. If Premiere is already open when you install the new font, you may have to restart Premiere for the program to detect the new font.
Add New Fonts Through Adobe Fonts
Another way to quickly add fonts to use in Premiere projects is by downloading them through Adobe Fonts, previously called Typekit. This is a feature you can use in the Creative Cloud app, and you can use your downloaded fonts throughout all Adobe apps.
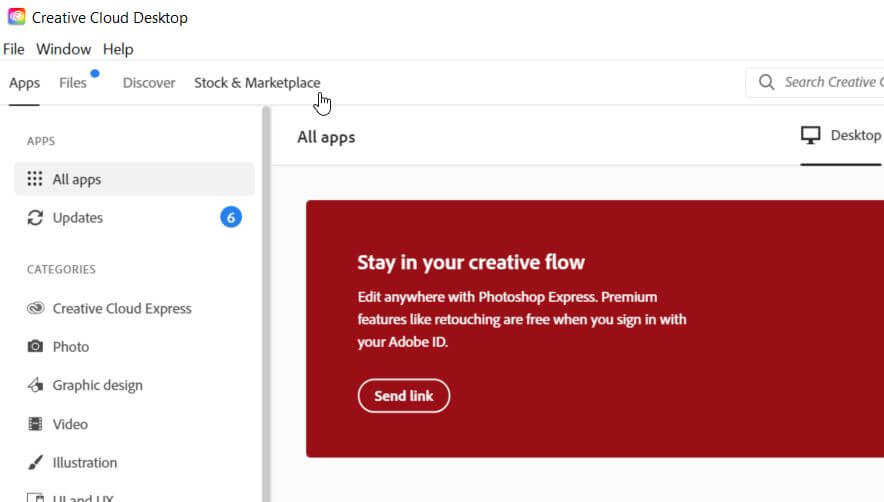
- Open Adobe Creative Cloud and go to Stock & Marketplace.
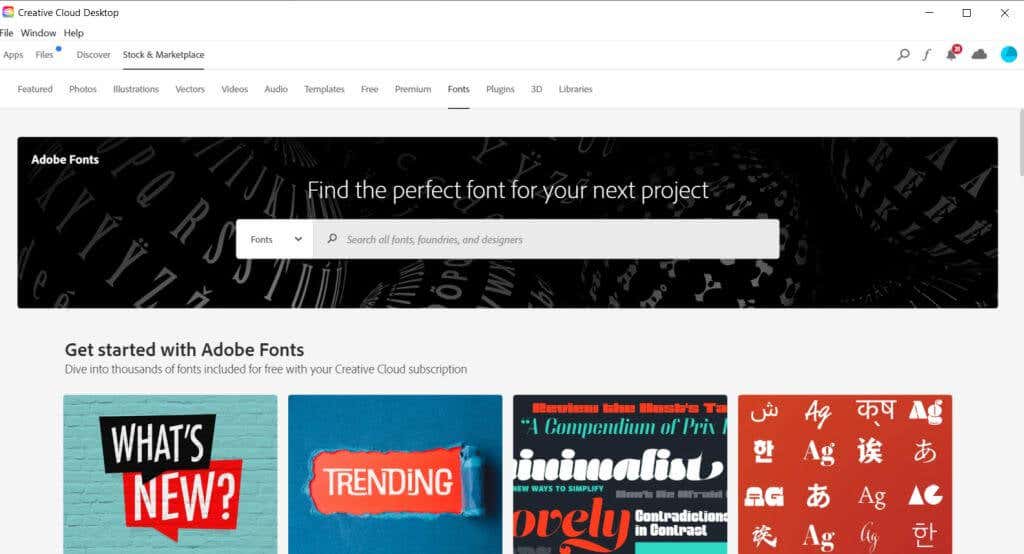
- Select Fonts from the top menu bar.
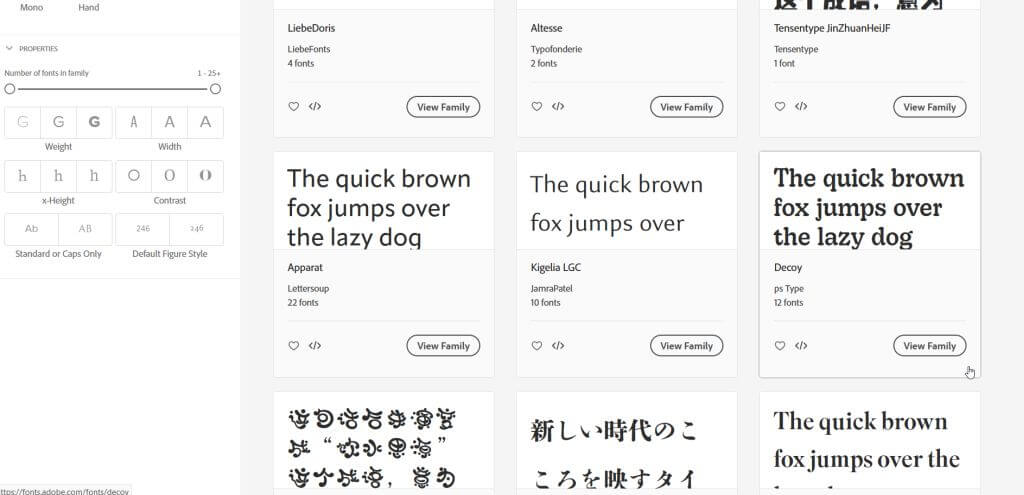
- Browse to find the font you’d like to use. You’ll be taken to the Adobe Fonts website.
- Click on the font you want to download.
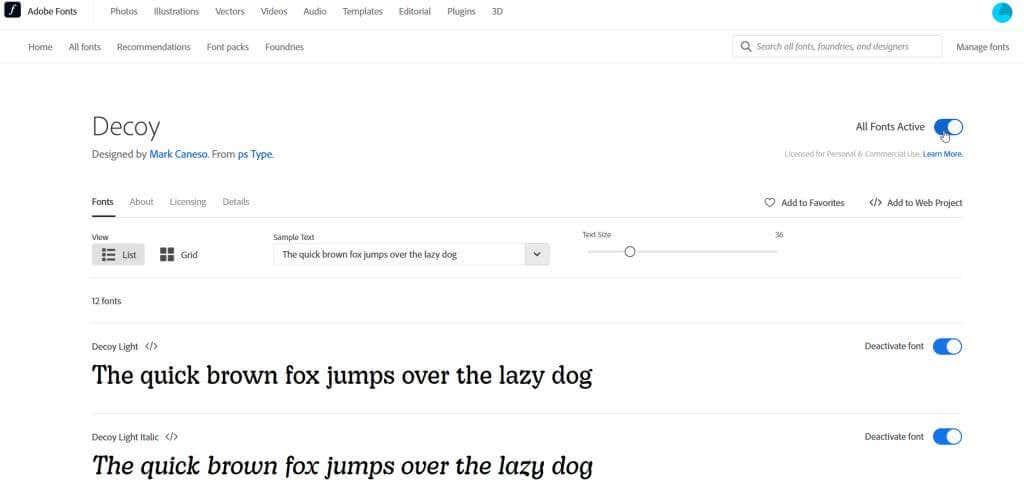
- To the right of the font name, you can click on the Activate Font slider to add it to Creative Cloud. It will now be available in Adobe Premiere.
- If the font has multiple styles, you can scroll down and activate only those you wish to use.
You can see your downloaded fonts in Creative Cloud by going to Apps in the top menu bar and then Manage Fonts in the sidebar. Once you open Premiere, you can use your new fonts using the methods outlined below.
Using New Fonts in Adobe Premiere Pro
Now that you have your new font downloaded, you can open Adobe Premiere to use it in your project. Here’s how to use it in a few different ways.
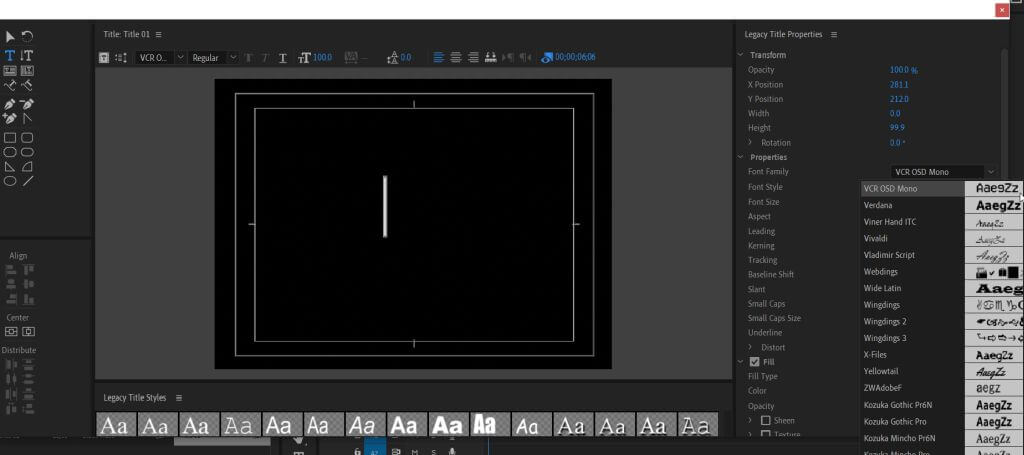
- When using the Legacy Title feature, you can select the Font Family dropdown and select the new font you have just installed.
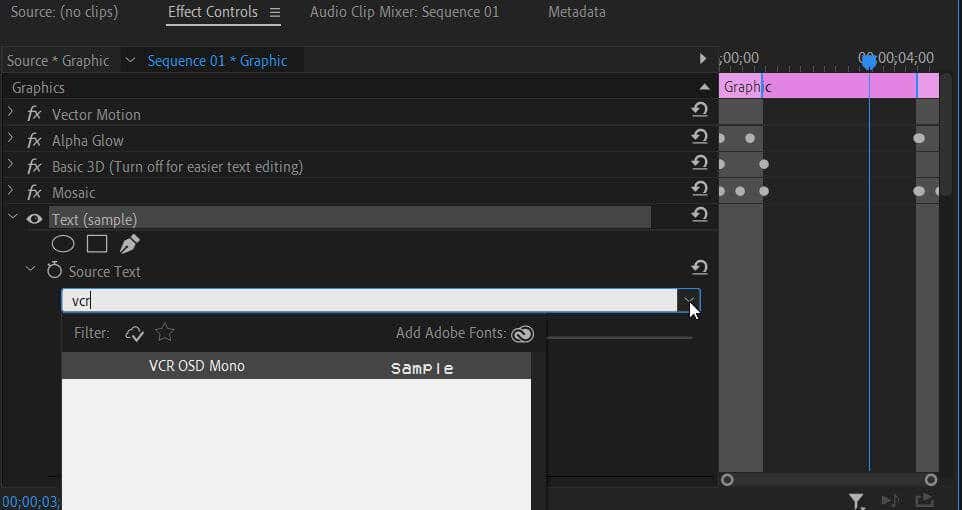
- When using Essential Graphics panel templates, go into the Effect Controls panel. Open the Text dropdown, then the Source Text dropdown. Click on the box just beneath to change the font.
- If you use the Type Tool, you can follow step 2 in the Effect Controls panel.
Your newly installed font should appear in the dropdown selection when using text. If you can’t find it, try typing the font’s name into the box and selecting it that way.
Why Won’t My Font Show Up in Adobe Premiere Pro?
If you’re having trouble with adding a new font to Premiere, there are a few things you can do to solve the problem. If your font isn’t showing up in the font selection dropdown boxes, even after you search for it, try some of these steps to fix it.
- Make sure you installed the font correctly. You can see if a font is installed by opening the source .ttf file. Click on the Install button in the top-left corner. If you get an error message saying the font is already installed, try a different fix. You can also choose to replace the installed font and install it again.
- Restart Adobe Premiere. Make sure to save, then go to File > Exit. Then, open Premiere again and your video project.
- Restart your computer. If Premiere still isn’t picking up the new font, restarting your computer may allow it to do so.
These fixes should allow Premiere to recognize your newly installed font so that you can use it in your project.
Make Your Videos Stand Out by Adding Fonts
An important part of establishing a look or feel in a video can certainly include the fonts you choose to use and how you use them. Font design can play a pivotal role in the message you’re trying to get across. So why not get it just right and add the perfect font for your project using this guide.
