Syncing audio to a video while editing in Adobe Premiere Pro can be frustrating. If you’re trying to match up words to someone speaking, or the audio of someone singing, it can get especially difficult to do precisely. And, if you don’t sync them well, you may end up with some awkward footage.
If you had to record audio and video separately, and have two different files you want to edit together, there are a few ways to do this in Adobe Premiere Pro.
You can do a more automatic sync, or you can sync the files manually. Synchronizing audio to video manually is what you may want to do if Premiere is finding it difficult to match up the audio itself. Otherwise, automatic syncing is easy and works more often than not.
How to Automatically Sync Audio to Video
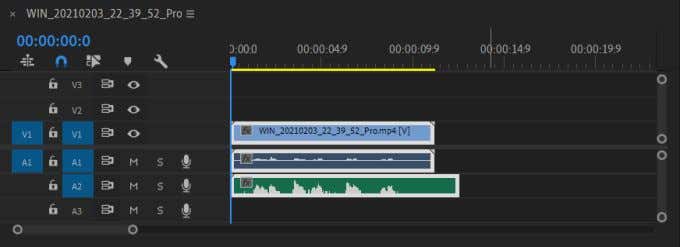
In order to automatically sync audio to video in Adobe Premiere Pro, first you’ll need to have both the audio file and video file that you want to sync up on your timeline in Premiere. The video file will need to have its original audio, as this is what Premiere will use to synchronize the separate audio file.
Once both files are on the timeline, select both clips.
Then right-click on the video file and select Synchronize.
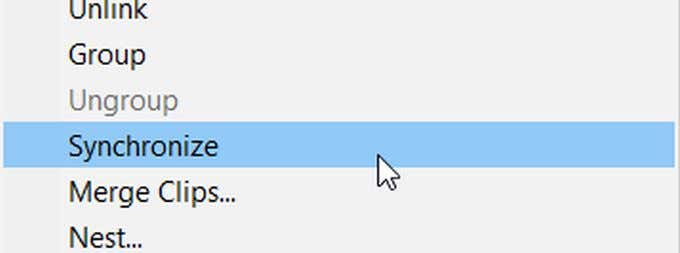
In the next window that appears, you’ll want to select the audio file to sync it. Then select OK. The audio should now be synced up to your video.

There is also a second method to automatically sync up audio and video if you want to try another route instead.
To do this, you’ll be merging together both files and Premiere will sync the audio up. First, find the audio and video files you want synced, and hold Ctrl (PC) or Command (Mac) and select them. Then choose Merge Clips.

In the Merge Clips window, select Audio. Then select OK. You’ll get a new file of the merged audio and video together in your imported media. You can drag this onto your timeline to use it.
How to Manually Sync Audio to Video
If Premiere didn’t sync your audio and video as precisely as you wanted, or you’re running into any issues with the automatic methods, you can also sync your audio manually.
For manual syncing, first put both the original video and the audio you want to sync to the video on your timeline. In the audio channels, drag the slider handlebars on the right-hand side of the timeline to widen the video file’s internal audio and the external audio.
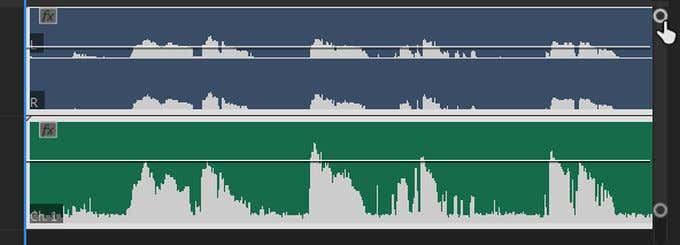
This way, you’ll be able to see the peaks of the audio. Look for the similarities between the internal and external audio, and line them up so they match. Then, you can replay the video to see if the audio matches up the way you want it to. Once you’re happy with it, you can delete the internal audio so the external, new audio will be the only track playing.
Tips for Syncing Audio to Video In Adobe Premiere
If you want to easily sync your audio up to a video in Adobe Premiere Pro, there are some tips you can follow that will make the process go much more smoothly.
1. Create an Audio Sync Point
To make syncing easier for both the automatic and manual methods, you can create a point near the beginning of your audio when you are actually filming that will make it easy to match up internal and external audio.
The term for this is “clapping,” and in many productions a clapboard is used for this. However, any loud, sudden sound that will create a high peak in your audio waveforms will work. This makes it simple to match up audio from differing sources, as you can just locate that first large peak. It also makes it easier for Premiere to synchronize your audio.
2. Use Audio Time Units
Another way to make audio syncing easier when you’re doing it manually is to change the time units at the top of your timeline. To do this just right-click on the timecode above your timeline and select Show Audio Time Units.
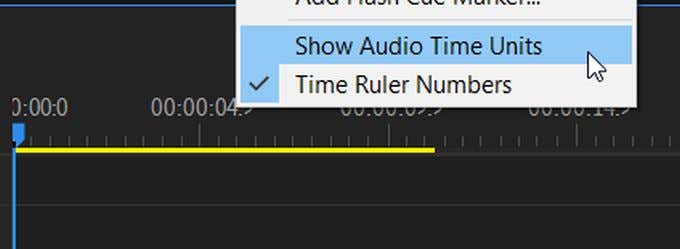
This will give you the ability to move your audio files in much smaller increments, allowing you more precise synchronization.