Todoist is one of the most functional online to-do services that allows you to be as productive as possible with your limited time.
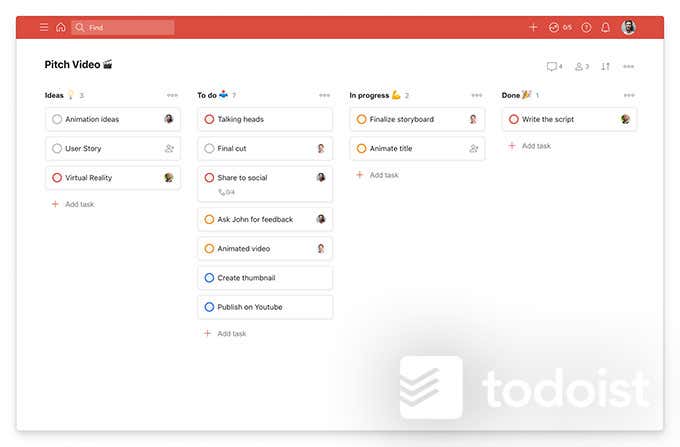
While we’ve previously discussed using Todoist alongside the Getting Things Done (GTD) methodology, many people don’t realize that Todoist lets you lay out your lists using Kanban boards.
In this article, we’ll show you how to use Kanban boards in Todoist, and how it can further enhance your time management and productivity.
How to Use Kanban Boards in Todoist
If you’ve used Trello before, then you know just how useful the Kanban “lists” approach is. It lets you lay out each phase of a project or a process in individual lists. Then, you can slide items from that workflow across the process as each task on the item gets completed.
Each project in Todoist uses the layout format that you select when you first create the project. The default is the list format you’re probably used to if you’ve used Todoist for a while.
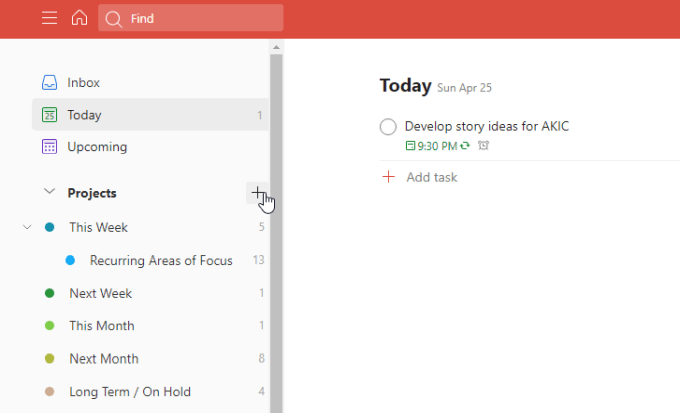
To create your first Kanban board, you’ll need to create a new project. Next to Projects in the left menu, select the plus icon.
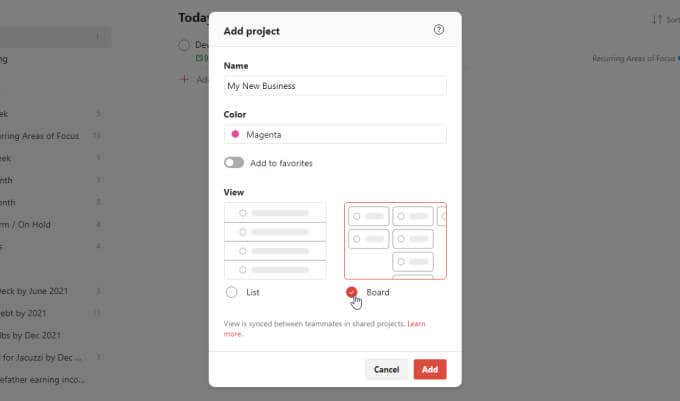
In the Add project dialog box, once you set the name and the color, just change the View to Board. Select Add.
This will create the new project in the left menu. But now, instead of using the list format, you’ll see that the project is laid out using the Kanban board format.
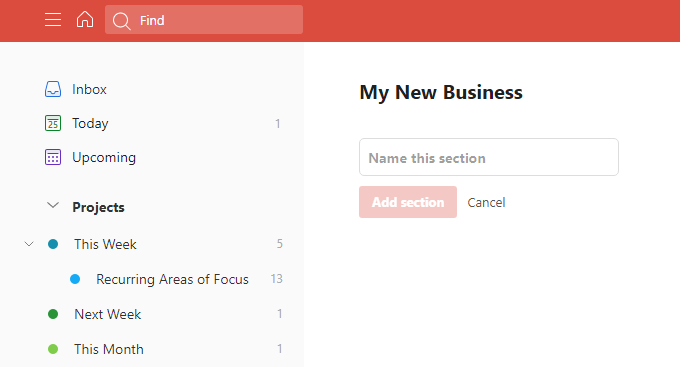
At first, it won’t look like a board, because you’ll need to build it by defining “sections”.
Before you start doing this, it’s important to put some thought into the workflow or “steps” in your project.
How to Lay Out Your Project’s Kanban Board
Give some thought to your project plan. Or, if you’ve created this new Kanban board for an at-home project, then think about the steps you’ll need to go through from start to finish of your project.
In this example, we’re going to build a board for creating a new website business. Thinking through the larger stages of that project, we’ll create sections for each of those stages.
- Preparing accounts and resources for building the website
- The entire website design process
- Getting the business finances and online shop set up
- Preparing marketing and advertising
- Launching the website
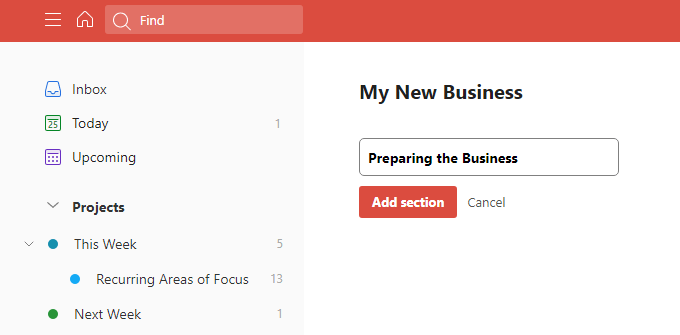
With these major stages of your project in mind, name each of the sections something descriptive.
Fill in the title field under each section and select Add section.
Continue this for each step or major area of your project. These don’t need to be the actual steps in the project. But they should contain all of the major focus areas in some logical way that makes sense to you.
Once you’re done, your empty Kanban board in Todoist should look like below.
Now it’s time to fill out your board with the smaller items in your project plan. Think of these as the sub-projects that package up major milestones.
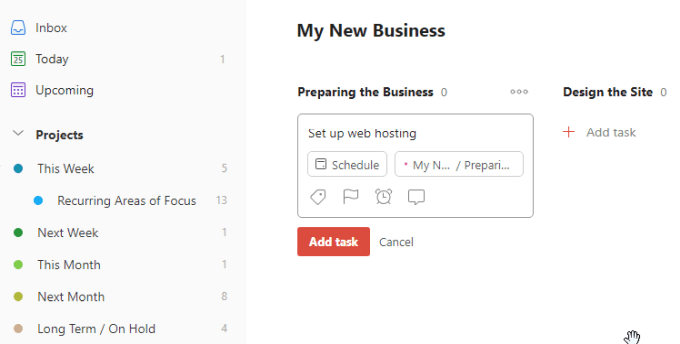
To add this under a section, just select Add task to add that sub-project card.
You don’t need to add any details yet. Right now, you’re just outlining the project and major steps. You’ll be able to add additional items later as they come up. You’ll also be able to add sublists and schedules later for each of these as well.
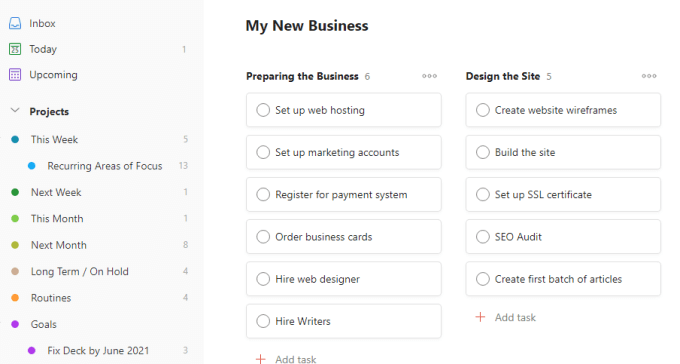
Just select Add task as you’re finished naming each one. When you’re done you should have a preliminary board that contains your entire initial project plan.
Once you have all of these sub-projects set up, you’re ready to dive into each of those and break them down further into more specific tasks.
Working With Todoist Kanban Board Cards
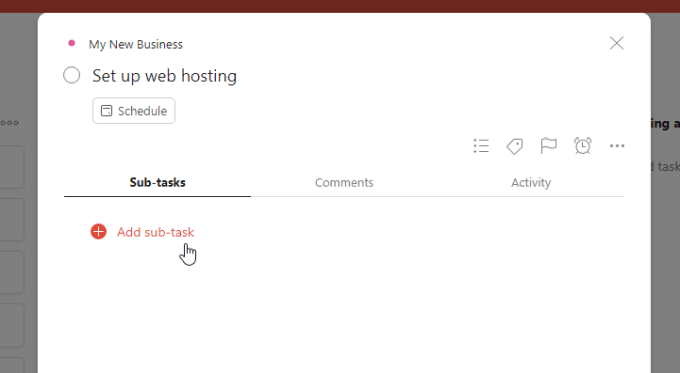
If you select each of these sub-project cards, you’ll see everything you can set up to plan these out.
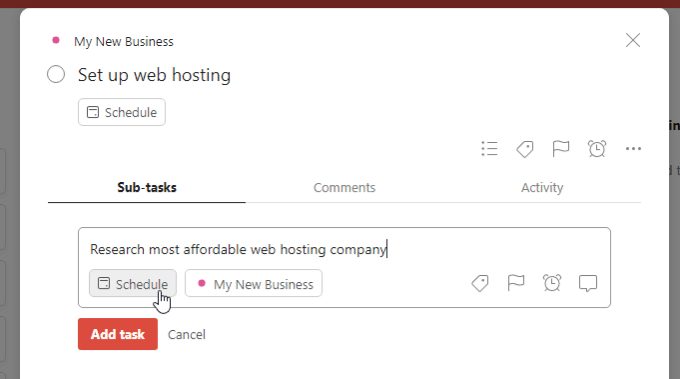
Most importantly, you can plan these out into sub-tasks. To do this, select Add sub-task.
Write out the task in the description field. Select Schedule if you’re ready to put the task on your calendar, or you can leave it to plan out later.
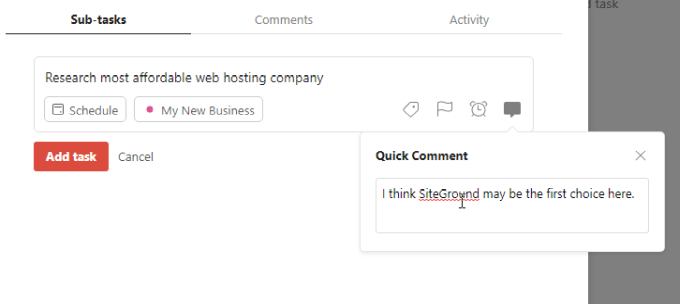
Select the comment icon on the right of the task to add any comments or notes that’ll help you once you get started working on that task.
Once you’re done setting up the task, just select Add task.
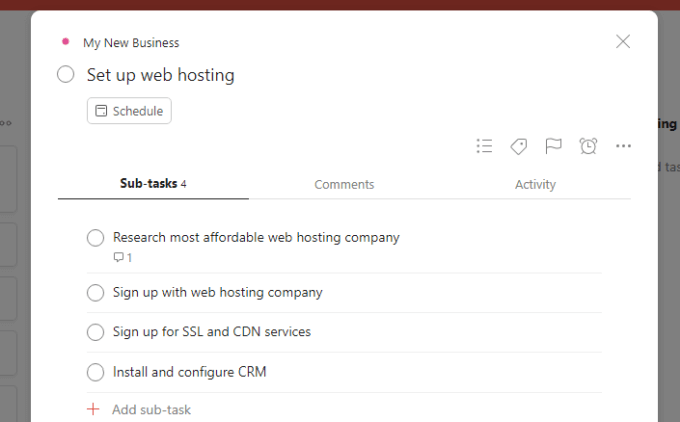
Once you’re through setting up all of the tasks, you should have your sub-project pretty well planned out.
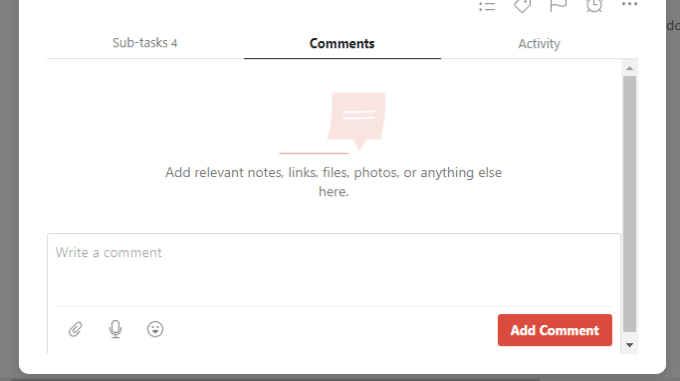
Select the Comments tab to add any task-related notes or comments you’d like to include. These apply to the entire subproject as a whole and not any of the subtasks.
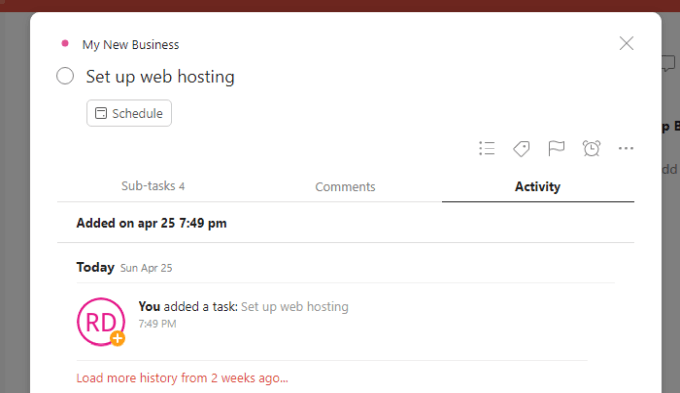
If you’re working with a team, the Activity tab comes in handy because you can see who’s working on what, and when.
As you can see, the Todoist Kanban approach lets you plan and organize an entire project using less space and in a more logical format.
Using Kanban for GTD
One last thing to touch on is using the Kanban layout for the GTD approach to time management.
Using Todoist Kanban boards for this is tailor-made for GTD workflows. This is because ideally in GTD you’ll have a project set up for the following timeframes:
- Goals
- Routines
- Long Term / On Hold
- Next Month
- This Month
- Next Week
- This Week
You can set up a Kanban board in Todoist with This Week on the furthest left, and then all of the other time frames flowing into it. This would look something like this.
Now, add the tasks under the correct time frame list, moving them from right to left as they get closer to when you’re going to assign them to yourself.
You can then just assign a due date as you add them into This Week, and add that item to your schedule during weekly planning.
As you can see, Todoist Kanban boards are useful for many things, and they give you a more holistic view of your entire plan or schedule. No matter how you want to use it, GTD time planning, or project planning, Kanban boards are worth trying.
