With two-factor authentication enabled for your online accounts, you have peace of mind knowing that nobody else can access your accounts. When you configure this mechanism for your accounts, you should also configure the backup and recovery options for two-factor authentication.
That way, if you ever get locked out of your accounts and don’t have access to your two-factor authentication code generators, you can use your backup option to access your account.
In this guide, we’ll show you how to set up recovery and backup options for two-factor authentication on your Google, Microsoft, Apple, Facebook, and LastPass accounts.
Set Up Recovery and Backup Options for Two-Factor Authentication on Google
In your Google account, you can add a secondary email address or a phone number that acts as a backup option for two-factor authentication. If you ever get locked out of your account, you can use one of these options to regain access to the account.
For two-factor authentication, you can generate and save backup codes to your computer. This way, you can access your account even if you can’t obtain a code yourself.
To add a secondary email address or phone number to your Google account:
- Open a web browser on your computer and access the Google Account site.
- Select Security from the left sidebar and choose Recovery email on the right pane. Select the Recovery phone option instead if you want to add a recovery phone number.
- Google might ask you to enter your account password. Do so and continue.
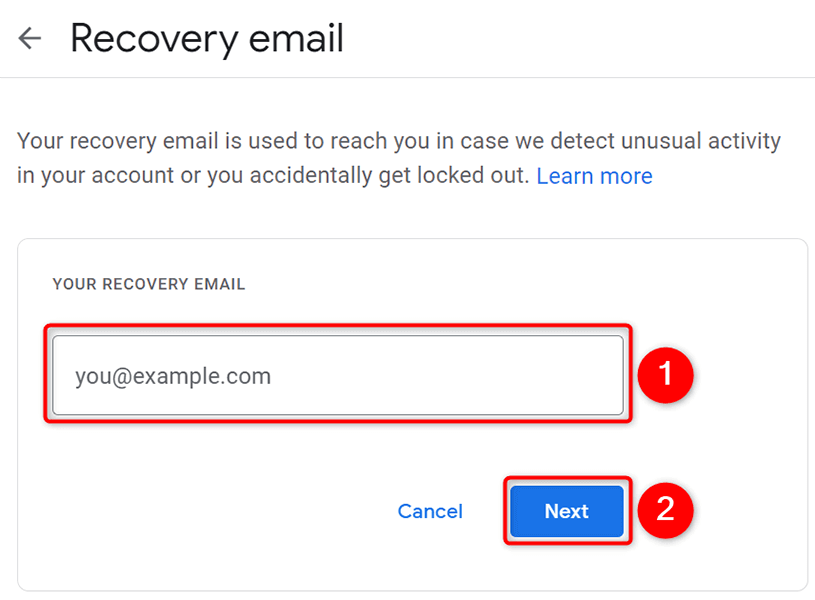
- Enter the email address you’d like to use as a recovery option for your Google account. Then, select Next and finish the process.
To generate backup codes for two-factor authentication:
- Access the Google Account site in a web browser on your computer.
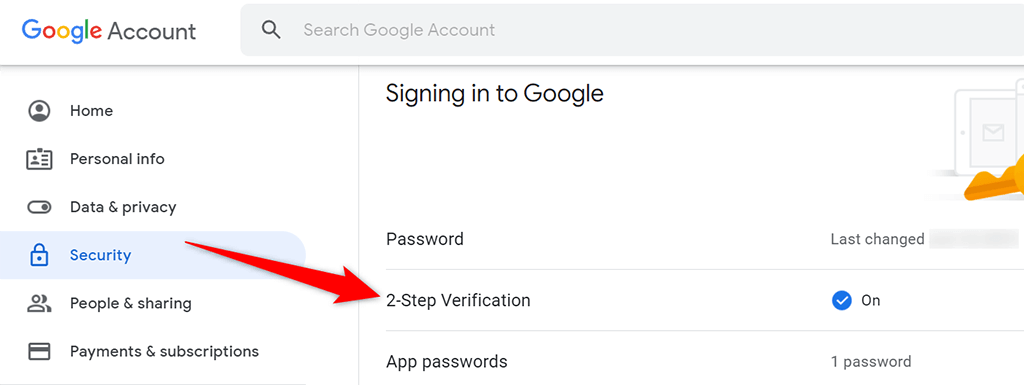
- Select Security from the left sidebar and choose 2-Step Verification on the right pane.
- Enter the password for your Google account when prompted.
- Select the Backup codes option on the 2-Step Verification page.
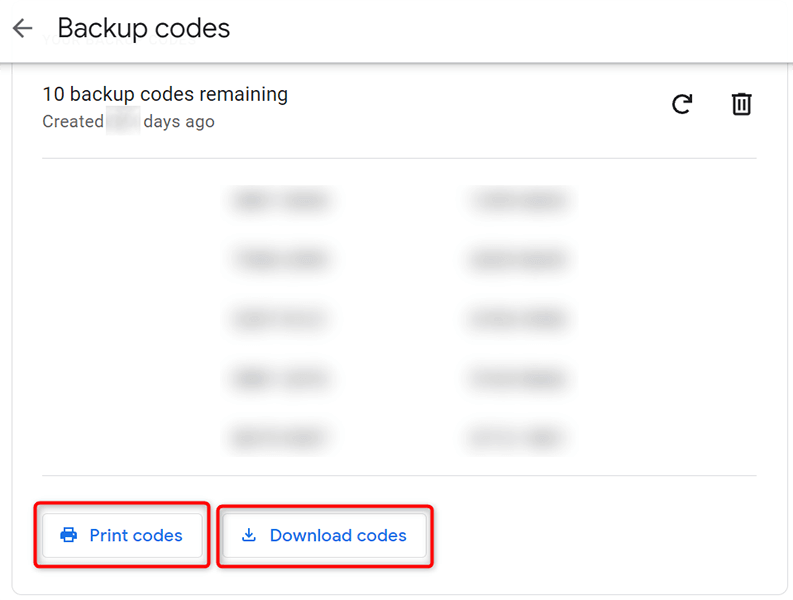
- Your backup codes will appear. Select Print codes or Download codes at the bottom to print or download these codes.
With these backup codes at your disposal, you can now access your Google account even if you can’t receive codes on your phone or you can’t use an authentication app on your phone.
Set Up Recovery and Backup Options for Two-Factor Authentication on Microsoft
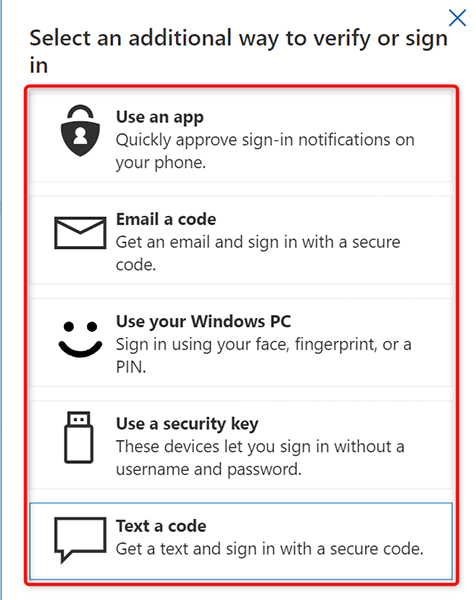
Like Google, you can add various recovery options to your Microsoft account. This includes an email address, phone number, authentication app, and even a security key.
To add a recovery email address or phone number to your Microsoft account:
- Access the Microsoft Account site and log in to your Microsoft account.
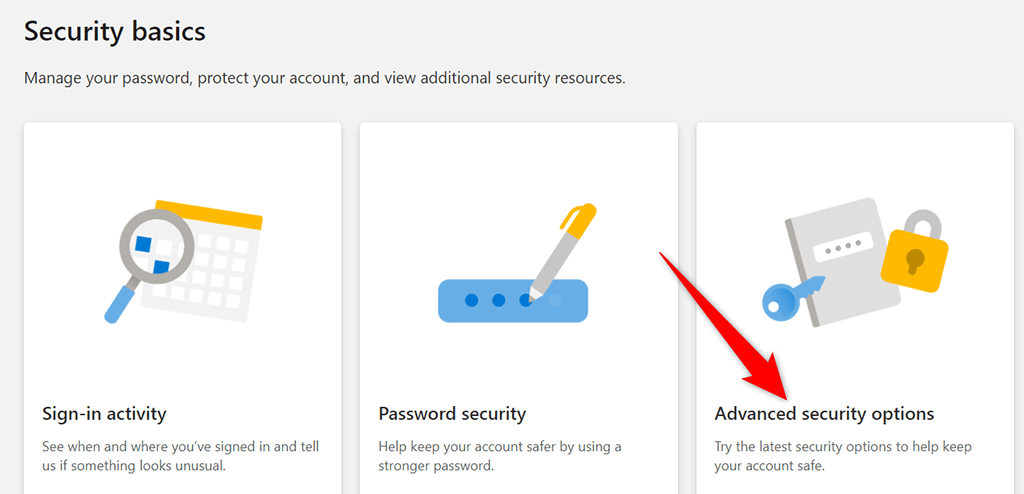
- Select Security from the menu bar at the top and then choose Advanced security options.
- Select the Add a new way to sign in or verify link.
- Select the recovery option you’d like to add to your account and follow the on-screen instructions.
To generate a recovery code:
- Log in to your account on the Microsoft Account site.
- Select Security at the top and then choose Advanced security options on the page.
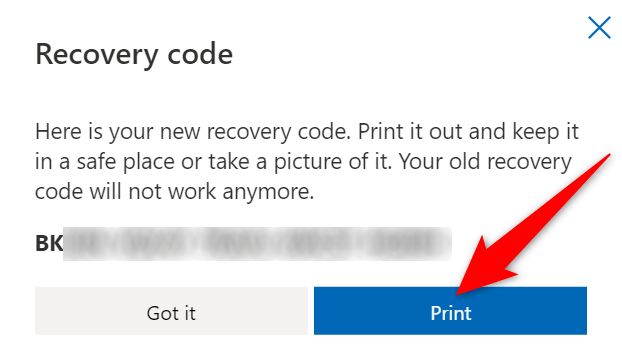
- Scroll down the page and select Generate a new code in the Recovery code section.
- Select Print in the Recovery code box to save the recovery code to your computer.
Set Up Recovery and Backup Options for Two-Factor Authentication on Apple
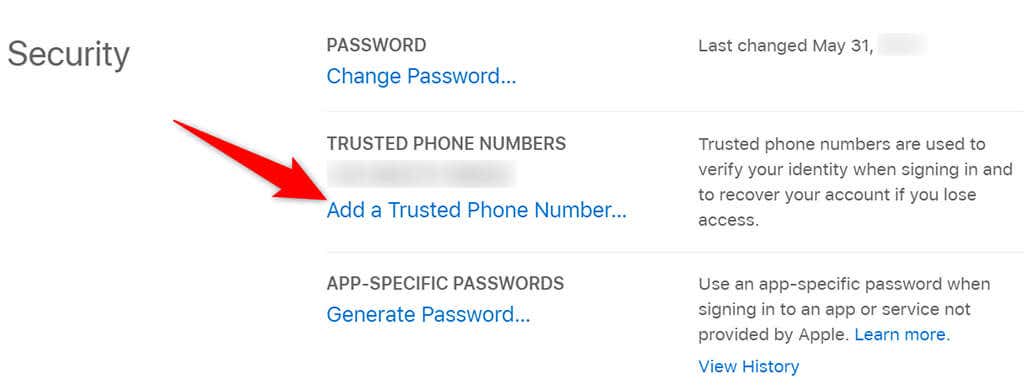
In an Apple account, you can add a trusted device or a trusted phone number for recovery purposes. To add a trusted device, all you need to do is sign in with your Apple account on your Apple devices, like an iPhone, iPad, or Mac. You should have two-factor authentication enabled when you do this.
To add a trusted phone number to your Apple account:
- Access the Apple ID site in a web browser on your computer. Sign in to your Apple account on the site.
- Select Edit next to Security.
- Select Add a Trusted Phone Number.
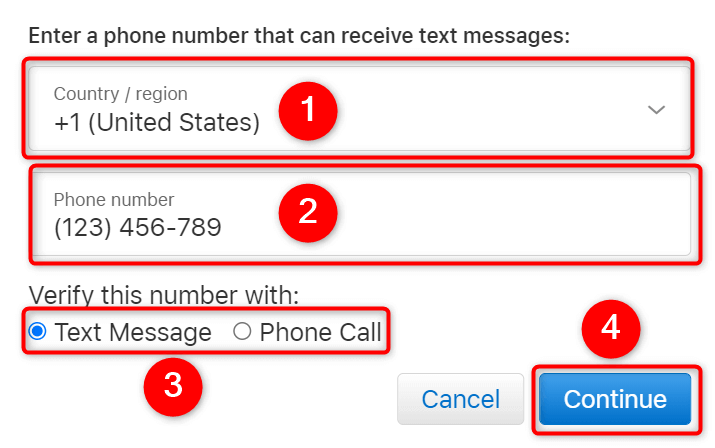
- Choose your country, type your phone number, select a verification option (text message or call), and select Continue.
- Once you confirm your phone number, Apple will send authentication codes to that phone number.
Set Up Recovery and Backup Options for Two-Factor Authentication on Facebook
When it comes to recovery options, Facebook works pretty much the same as Google. For example, you can add a secondary email address or phone number to your Facebook account, and Facebook will use these details to help you access your account.
You can also print backup two-factor authentication codes in your Facebook account.
To add a recovery email address or phone number:
- Open Facebook, select the down-arrow icon at the top-right corner, and choose Settings & Privacy > Settings.
- Select Contact on the General Account Settings page.
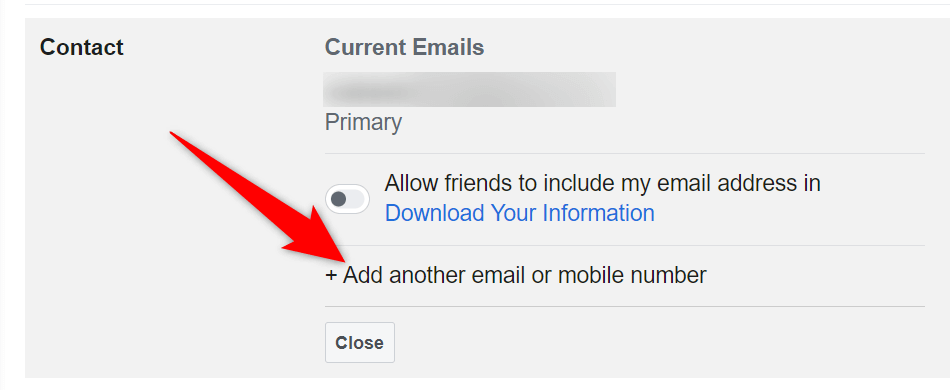
- Select Add another email or mobile number.
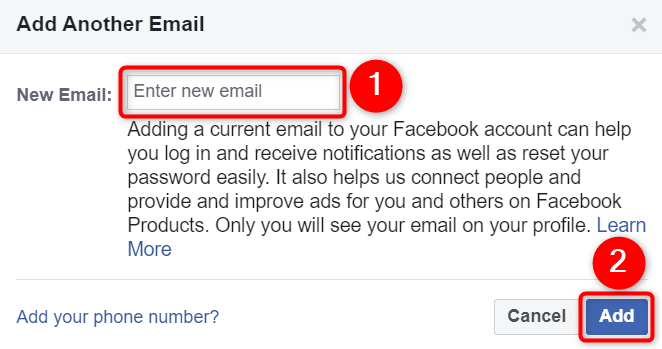
- Type your email address in the New Email field and select Add.
- If you’d like to add a phone number, select the Add your phone number option.
- Confirm your email or phone number with Facebook.
To generate backup codes:
- Launch Facebook and access the Settings & Privacy > Settings page.
- Select Security and Login from the left sidebar.
- Choose Use two-factor authentication.
- Enter your two-factor authentication code to continue.
- Select the Show Codes button next to Recovery Codes.
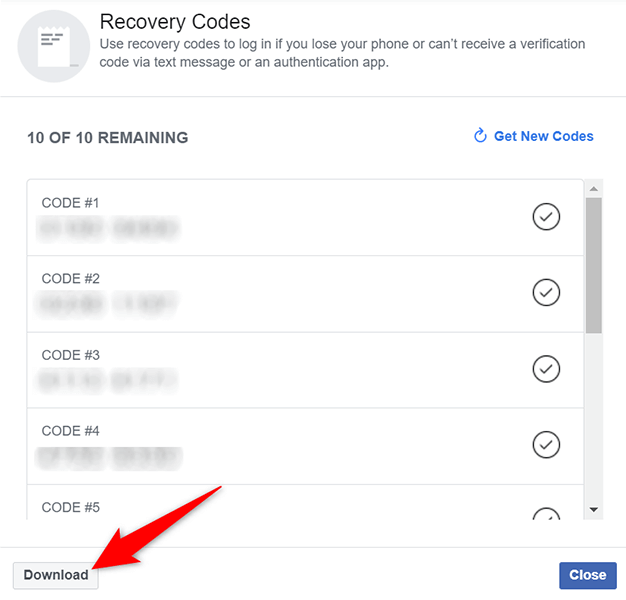
- You’ll see your Facebook recovery codes. Select Download at the bottom to save these codes to your computer.
Set Up Recovery and Backup Options for Two-Factor Authentication on LastPass
Like most other services, LastPass supports email addresses and phone numbers for recovery purposes. You can add one or both of these to your account to make the account accessible even when you have difficulties logging in.
To do so:
- Launch the LastPass site and log in to your LastPass account.
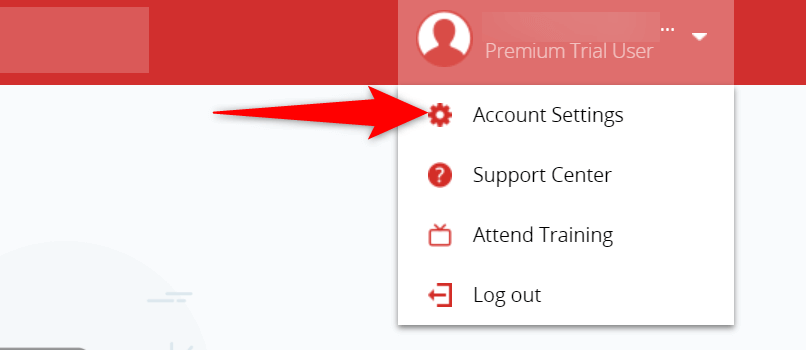
- Select your email address at the top-right corner and choose Account Settings from the menu.
- On the Account Settings page, select Update Phone to add a phone number to your account.
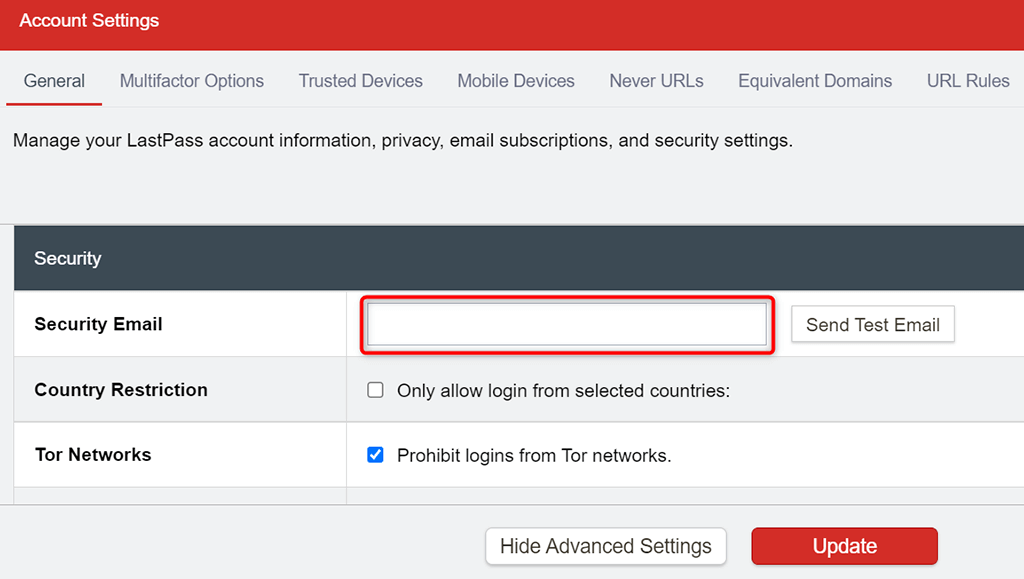
- If you’d like to add an email address, select Show Advanced Settings and enter your email address in the Security Email field.
- Lastly, select Update at the bottom to save your changes.
Backup and Recovery Options Help Regain Access to Your Accounts
To ensure you don’t get locked out of your online accounts forever, you should add at least one recovery option to your accounts. This way, the site can contact you at your recovery option and help you gain access to your account again. We hope the guide above helps you sort out this critical part of securing your online accounts.
