Ever wonder how those long GIFs you see on sites like Imgur are created? A lot of times, the creators take a video, convert the whole thing into an animated GIF, and then superimpose text to make it entertaining.
Now this post isn’t going to teach you how to create those fancy GIFs from start to finish, but it will teach you how to take a video and at least convert it to an animated GIF. I’ll write up another post on how you can add text and graphics to your GIF.
I’ll be using Photoshop CC for this tutorial because it allows you to have more control over the final product in terms of size, quality, frames, etc.
Convert Video Before Importing
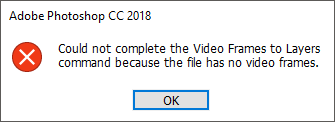
Before you start, you may need to convert your video to a file format that Adobe Photoshop will support. For instance, I took a video from my iPhone and downloaded it onto my computer. I then tried to import the video into Photoshop, but got the following error:
Could not complete the Video Frames to Layers command because the file has no video frames.
The video was a MOV file, but the codec that Apple uses is not supported in Photoshop. In order to fix this type of problem, you need to download a program like HandBrake to convert the video.
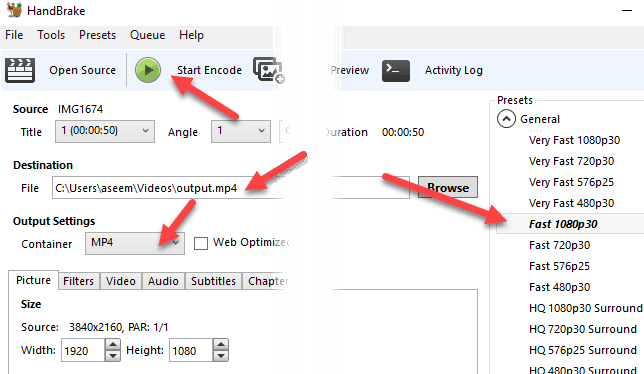
It’s very easy to use HandBrake. Just click on File – Choose Source and pick your video file. At this point, all you really have to do is click the Start Encode button. By default, it will use the Fast 1080p30 preset that you see listed on the right. They have many presets, so choose the one that works for you. Note that you can reduce the resolution of the GIF in Photoshop later on, so you don’t have to do it in HandBrake.
Once it has been converted to an MP4 file using the H.264 video codec, we can now import it into Photoshop.
Import Video and Create GIF in Photoshop
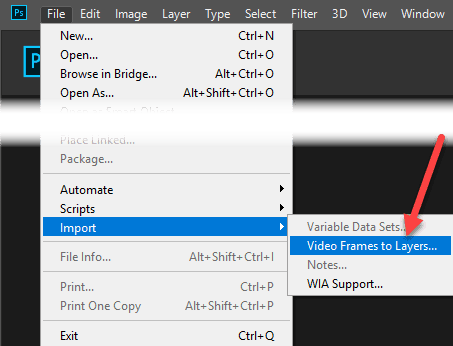
Open Photoshop CC and click on File, then Import and then Video Frames to Layers.
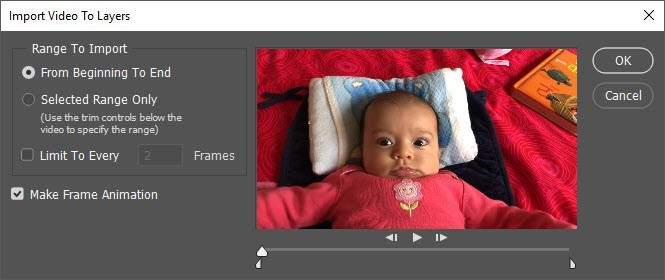
Pick your video file and click Open. This will bring up a dialog with a small preview of the video and a couple of options.
Now if you want the entire video as a an animated GIF, go ahead and leave the radio button to From Beginning to End. If you only need a portion, choose Selected Range Only and then use the trim controls below the video to pick the range.
In addition, to reduce the size of the final GIF as much as possible, you can also limit the number of frames. For example, if you check the box and leave it at 2 frames, that means Photoshop will remove every other frame from the video.
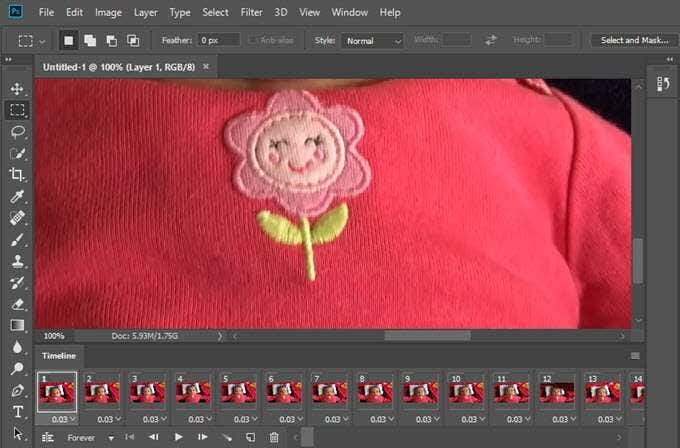
Lastly, you need to make sure the Make Frame Animation box is checked. Click OK and your video should be imported as a bunch of frames in Photoshop. If the program crashes, you may need to reduce the quality of the video even further before trying to import.
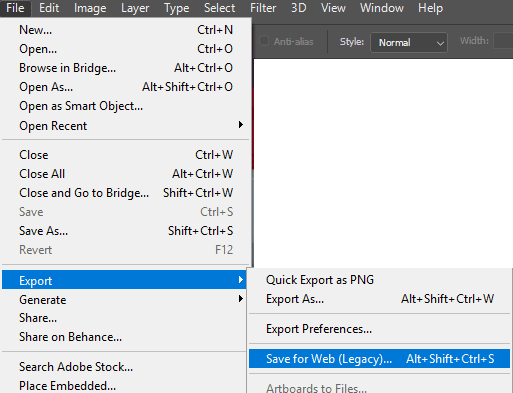
Now all we have to do is save the frames as an animated GIF. To do this in Photoshop CC, you need to click on File – Export – Save for Web (legacy). Note that before saving it out as a GIF, you can edit and delete frames as desired.
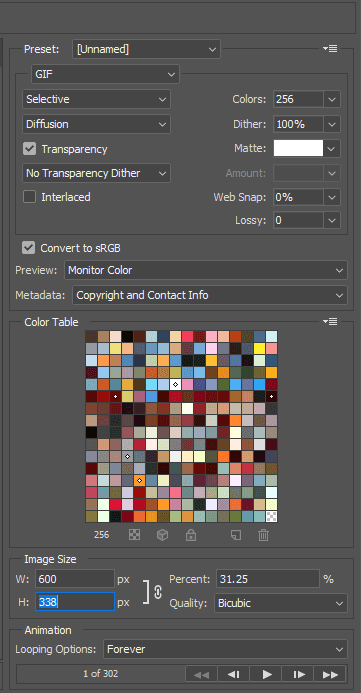
On this dialog, there are a bunch of options that you will have to play around with. Most of them will affect the quality of the GIF, which you will be able to see in the preview area on the left. The right pane is where you will make most of the adjustments.
Up at the top, you’ll see a dropdown called Preset. You can click on that and choose one of the presets or you can adjust the values yourself. Choosing one of the presets will reduce the quality of the GIF, but will make it smaller also. Make sure that GIF is selected in the dropdown below Preset.
At the bottom under Image Size, you can adjust the final output resolution for your GIF. So if you video was 1920×1080 or 4K, you probably will want to reduce it significantly here. Under Animation, you can choose Forever, Once or Custom for Looping Options. By default, the GIF will loop continuously. You can use the controls at the bottom to play the GIF to see how it looks.
Click Save and choose a location to save your GIF. That’s about it. Photoshop makes it very easy to create animated GIFs from videos and allows you to tweak the settings to get it just right. Also, read my posts on how to create animated GIFs from images using Photoshop. Enjoy!
