Google Calendar enables users to choose which of many different calendars they want to see on the same interface. You can maintain a work, personal, family, or any other type of calendar that you want to create.
This article is a tutorial about how to combine multiple Google calendars to one calendar display.
What Are The Benefits Of Google Calendar?
Easily share all or only part of your calendar with family, friends, co-workers, and clients. Other benefits include:
- Access calendars anywhere with an Internet connection
- Attach documents or invitations to calendar events
- Coordinate meeting dates and times with others using Google Calendar with the Find a time feature
- Locations and maps can be attached to a calendar event
- Includes a fast search feature
- Syncs with many free scheduling tools
Add a New Calendar
New calendars can only be set up from a browser and not from the Google Calendar app. After you create it, you can access it from the app.
- From your computer, log into your Google account and go to Google Calendar. Check the time zone in the pop up to make sure it is correct.

- On the left side, click on the + sign to the right of Other calendars > Add other calendars.
- Click on Create new calendar from the options that pop up.

- Give your calendar a name and description and then click Create calendar.

Combining Other Google Calendars
In addition to adding your own, you can combine multiple Google calendars.
- If you want to add someone else’s calendar to yours, choose the + sign next to Other calendars and click on Subscribe to calendar.

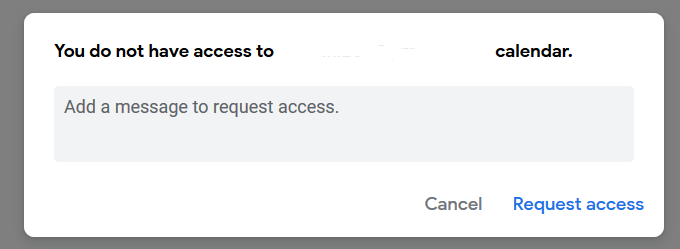
- Enter the Gmail address and see a popup message that says you don’t have access to that calendar. Use the form to request access.
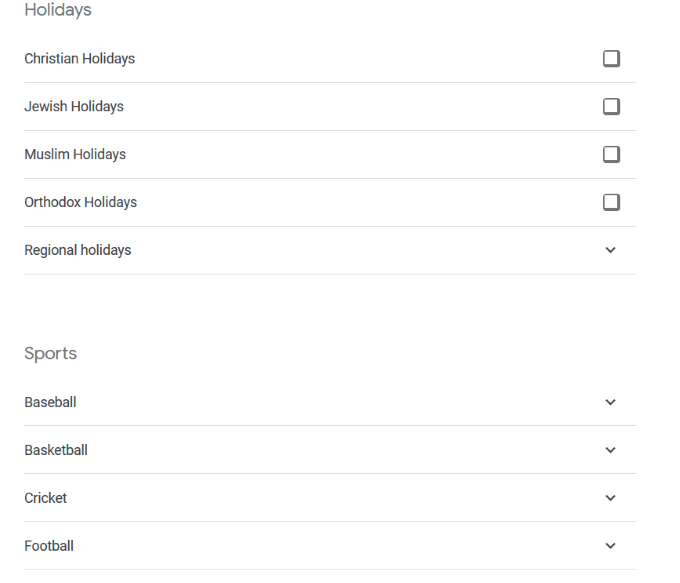
- You can also add public calendars such as sports and religious holidays. Use the same steps as above, this time clicking on Browse calendars of interest. These events will show up on all instances of your calendar, Including your Android calendars.
- You can also add birthdays of the people in your Gmail contact list. Look on the left side of your Google Calendar for Birthdays. Click on the eye icon to show or hide from view.

How To Configure Calendars
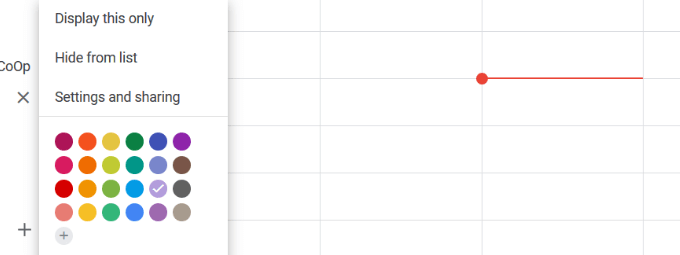
Customize your calendar by adjusting its settings. Hover over the calendar’s name on the left-side and click on the three-dots.
A pop-up opens with the following options:
- Display this only: only see this calendar in the viewing window
- Hide from list: to hide this calendar from the viewing window
- Setting and sharing: to change other advanced settings options
Sharing Your Calendar
In Google Calendar, you can create multiple calendars that each have different sharing settings. Below are several options for sharing:
- Share your schedule with a specific person or people
- Add a new calendar that allows different people to edit it
- Delegate permissions to someone who can schedule and edit events for you
Keep in mind that giving full permission to anyone will allow them to share your calendar with others, edit and create events, and respond to invitations.
Share an Existing Calendar
Following these steps or read more on how you can easily share your Google Calendar.
- Open Google Calendar on your computer (you can’t use the app to share)
- Choose the calendar you want to share from the left side and expand it by clicking on it
- Click on Calendar settings
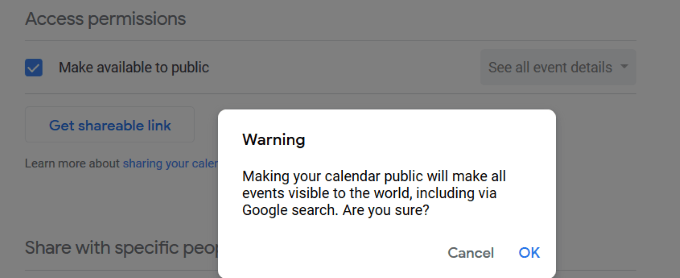
- Under Access permissions, you can make the calendar public if you want (Notice of the warning that making your calendar public will make all events visible to anyone)
- Under Share with specific people, click Add people by their name or email address
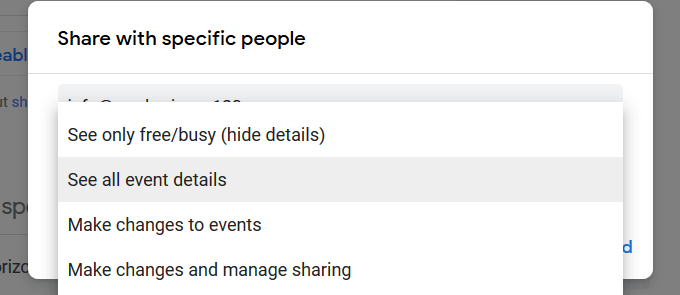
- Click on the dropdown menu to set permissions and then click Send
- The people you send an invitation to must click the link in the email to add your calendar to their list of calendars
You can only share your calendar with someone who has a Google account.
Permission Settings
Like the share settings in other Google applications, you can decide how those you share your calendar with find or make changes to your events.
The screenshot above shows the four permission settings. Here is what each of them means and what you are allowing others to do with your shared calendar.
Find only free/busy (hide details)
Others will only be able to see when an event is booked and when there is free time. They will not see the details of your event.
See all event details
This permission setting allows others to see all the details for events (except private ones), including time zone settings.
Make changes to events
When you use this permission setting, others can edit and add events, find details about every event including private ones, and permanently delete or restore events from Trash.
Make changes and manage sharing
This permission allows others to add and edit events, change sharing settings, permanently delete the calendar or restore from trash, and find details for all your events, including private events.
How To Sync All Your Calendars
If you want to see all your events in one calendar, you can sync them together by following the steps below:
- Open Google Calendar
- Click on the gear near your profile picture in the upper-right-hand corner, then on Settings

- Under the General tab, click on Import & export > Export

- Export one calendar and save it on your desktop
- Go back to your main calendar
- Click on the gear, then Settings
- From Import & Export, choose Import your calendar

To differentiate between events from different calendars, devise a color-coding system. For example, use green for work events and pink for personal events.
How To Sync Your Google Calendar To Your iPhone
To sync your Google Calendar with your iPhone, follow the steps below:
- Go to Settings > Passwords & Accounts
- Click on Add Account
- Select Google
- Click Continue after popup that asks if Settings can use google.com to sign in
- Enter your Gmail email address > Next
- Type in your Gmail password > Next
- Sync Calendar contacts, events, and emails
Now you will see your Google Calendar events on your iPhone calendar.
How To Sync Google Calendar with Your Android Phone
Android devices easily connect and sync all your calendars with your Google account. Use the Google calendar app or with the calendar app that came installed on your phone.
- Open the Settings app
- Scroll to Accounts
- Tap Add account
- If you have already connected your Google account, select it from the list of accounts
- Choose your Google username
- Make sure the box next to Calendar is checked
- If you are not already connected to your Google account, choose Google from the list
- Choose Existing
- Log in with your Google account email and password
Combining multiple Google Calendars can help you stay organized. You can choose to see all your events on one calendar or select which one you want to see at any time.