Google Sheets makes it easy to set a custom area as the print area in your workbooks. You can select single or multiple cells, a worksheet, or even an entire workbook to be printed.
To do that, you’ll have to first learn how to set the print area in Google Sheets.
Set the Print Area to Only Print Select Cells
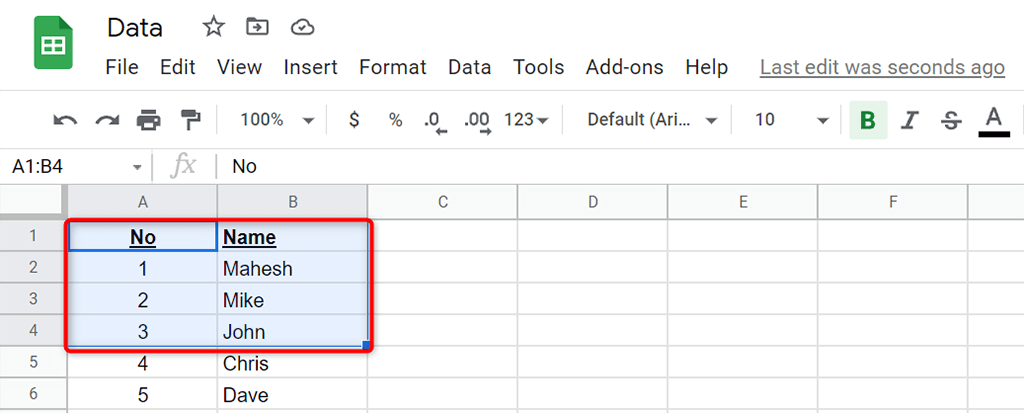
If you have your data only in specific cells in your worksheet, you can configure an option so that Google Sheets only prints those select cells.
- Launch a web browser on your computer, access Google Sheets, and open the workbook you’d like to print.
- Select the cells you want to print in your workbook.
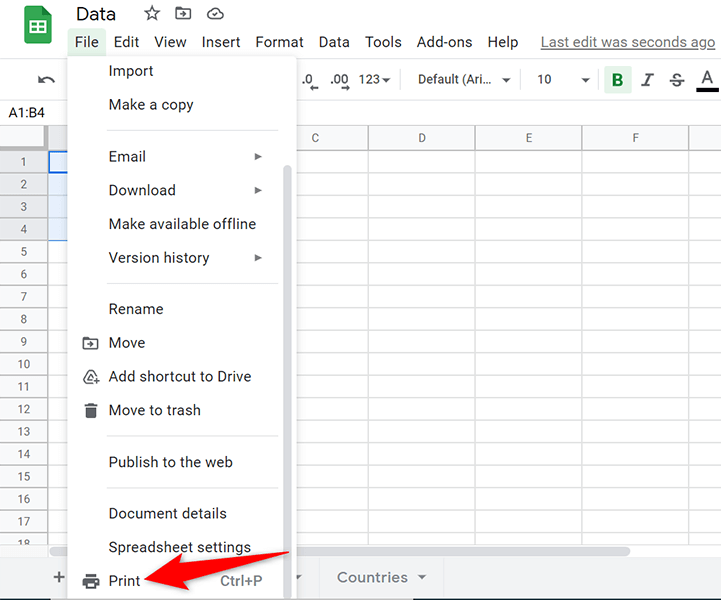
- Choose File > Print from Google Sheets’ menu bar. Alternatively, press Ctrl + P (Windows) or Command + P (Mac).
- Select Selected cells from the Print dropdown menu on the right. This ensures only the selected cells are printed.
- Select Next at the top of the screen.
- Follow the standard print process to print your cells.
Set the Print Area to Print the Entire Sheet
If your workbook has multiple worksheets, and you’d like to print a specific worksheet, you can get Google Sheets to do that.
- Open your workbook with Google Sheets in a web browser.
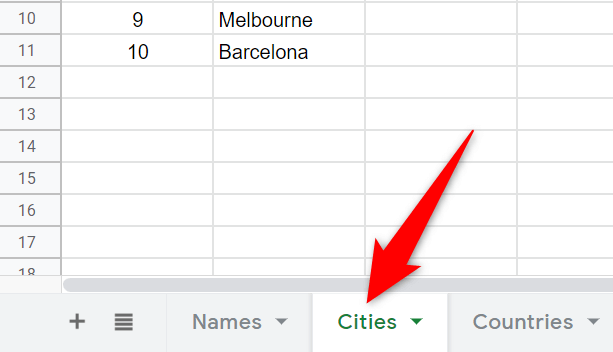
- Choose the worksheet you’d like to print at the bottom of your workbook.
- Select File > Print from Google Sheets’ menu bar.
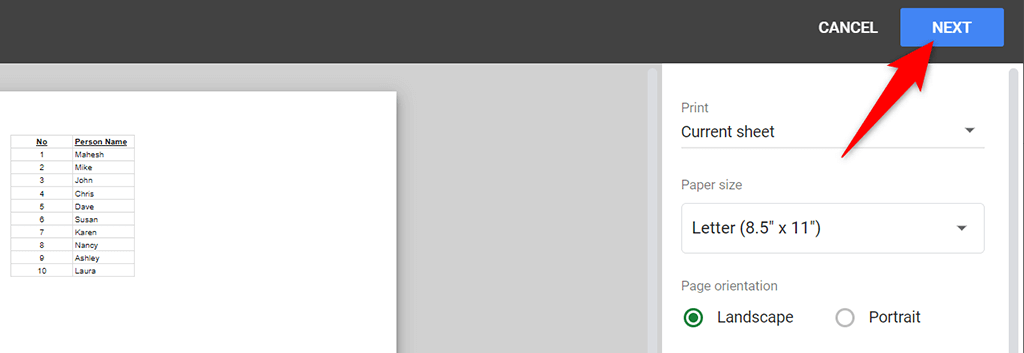
- Choose Current sheet from the Print dropdown menu on the right. You’ll see your current worksheet’s preview on the left.
- Select Next at the top and follow the standard print wizard to print your worksheet.
Set the Print Area to Print the Entire Workbook
Sometimes, you may want to print your entire Google Sheets workbook, which could include multiple worksheets. Google Sheets has an option to do that, too.
When you print an entire workbook, make sure your printer has enough ink to print your data. Also, feed enough paper into your printer’s paper tray to ensure there’s no interruption when you print your workbook.
- Access your workbook with Google Sheets in a web browser.
- Choose File > Print from Google Sheets’ menu bar.
- Select Workbook from the Print dropdown menu on the right.
- Choose All sheets from the Selection dropdown menu.
- You’ll see a preview of your entire workbook on the left. If this looks good to you, select Next at the top-right corner.
- You’ll then select your printer, choose the paper size, and other options to finally print your workbook.
Set the Print Area to Print Headers on Each Page
If your Google Sheets data is spread across multiple pages, you may want to include the headers on each page that you print. This makes reading the data easier as you know exactly what column is for what data on each page.
To print column headers on each page, you’ll first freeze the header row:
- Open your workbook and access the worksheet you want to print.
- Select View > Freeze > 1 row from Google Sheets’ menu bar to freeze the first row in your worksheet.
- Choose File > Print to configure the print options for your worksheet.
- Select Headers & footers and enable Repeat frozen rows on the right.
- Customize any other options if you’d like. Then, select Next at the top-right corner.
Customize the Print Area With Custom Page Breaks
You can add custom page breaks to your Google Sheets worksheets to let your printer know where to stop printing a page and start a new page.
To add a page break in your worksheet:
- Select File > Print from Google Sheets’ menu bar.
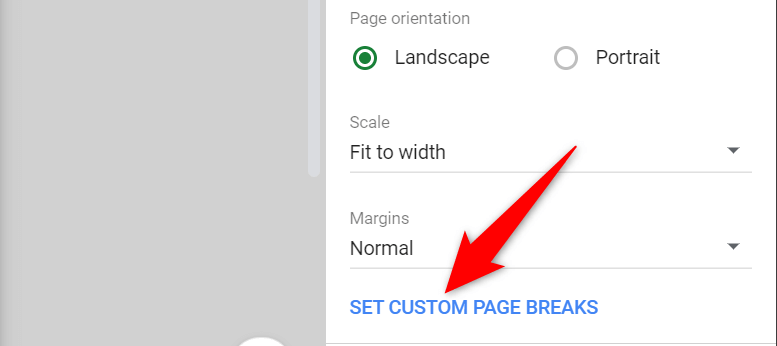
- Choose Set Custom Page Breaks in the sidebar on the right.
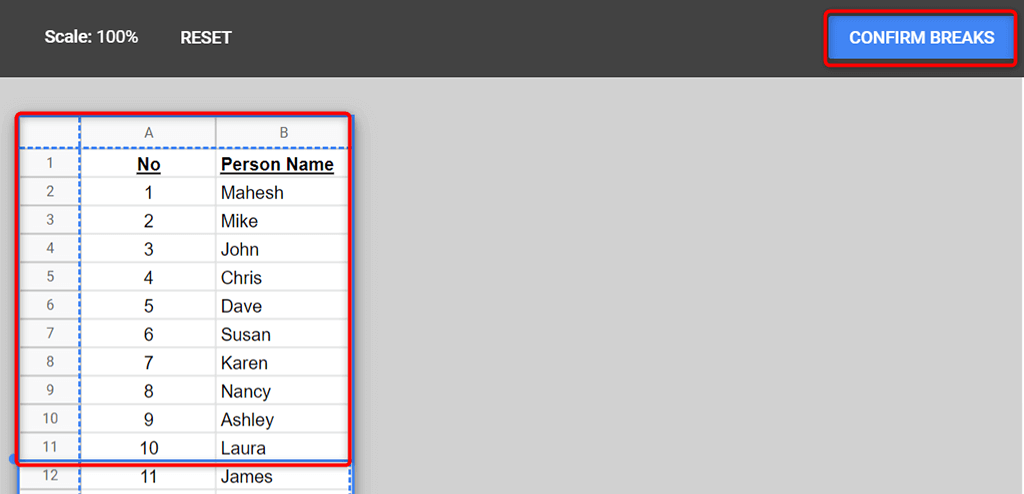
- Drag the blue dotted line in your worksheet to specify a page break. Then, select Confirm Breaks at the top-right corner.
- If you’re not happy with the specified page breaks, select Reset at the top to reset the page breaks.
- Select Next at the top-right corner to continue to print your worksheet with your custom page breaks.
It’s Easy to Customize and Set the Print Area in Google Sheets
Google Sheets offers you the flexibility to print whatever part of your workbook you want. This way, you can focus on the main data that you’d like to print while leaving everything else out. We hope this guide helps you out.

