Quickly find pictures of your spouse, child, sibling, or pet by adding names to faces in Google Photos. Face tagging lets you see all photos with that person or pet, perform a fast search, and keep pictures organized at the same time.
It only takes a minute to include names when you add faces toGoogle Photos. Plus, you can do it on the Google Photos website or in the mobile app.
Turn on the Group Similar Faces Feature
When you visit the Explore or Search section of Google Photos, you should see faces display across the top. This is where you can start adding names to those faces. If you don’t see those photos, enable the face grouping feature.
This feature uses face detection and recognition to combine photos it identifies as the same person (or pet).
Enable Group Similar Faces on the Web
- Visit Google Photos and sign in.
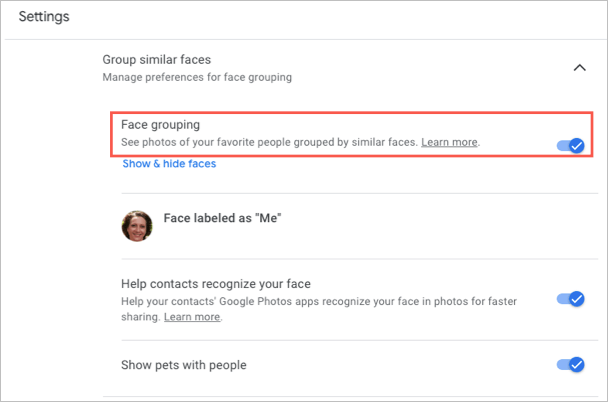
- Select the gear icon on the top right.
- Scroll down to and expand the Group similar faces section.
- Turn on the toggle for Face grouping. Optionally, you can enable the toggles for Help contacts recognize your face and Show pets with people.
Your changes are saved automatically, so you can return to your main Google Photos page or another area using the navigation on the left.
Enable Group Similar Faces on Mobile
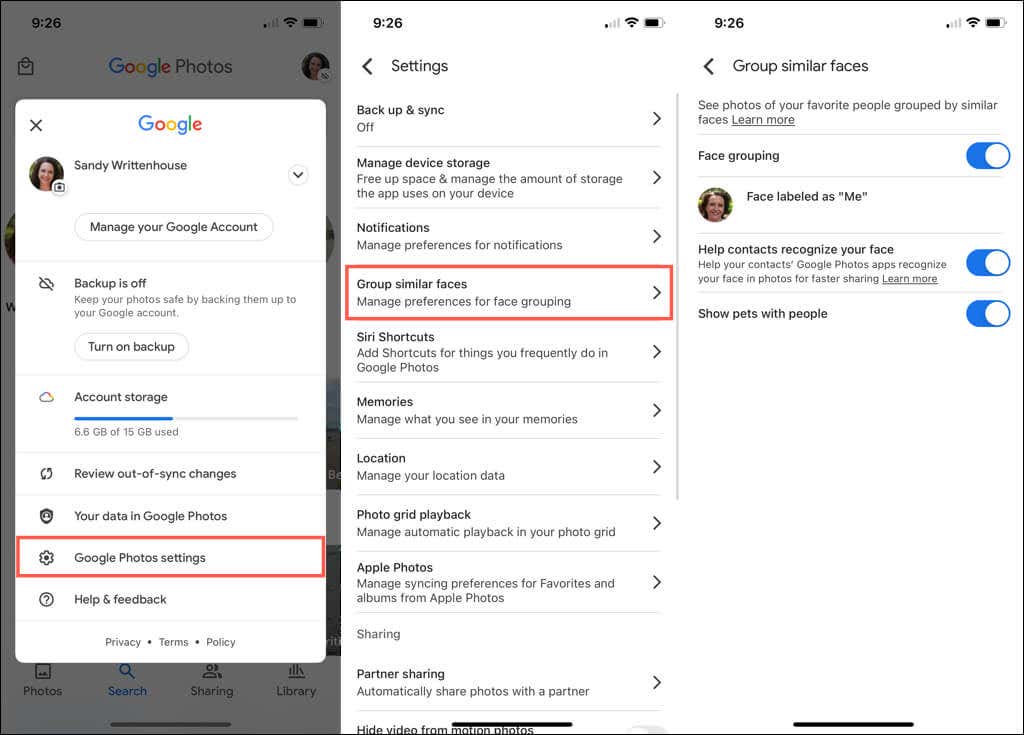
- Open the Google Photos app on your mobile device.
- Tap your profile icon in the top right corner.
- Select Photo settings on Android or Google Photos settings on iPhone.
- Pick the Group similar faces option.
- Turn on the toggle for Face grouping and optionally the other two settings for faces if you like.
You can tap the arrow on the top left to exit this screen and adjust any other settings if needed. Otherwise, tap the arrow again to return to your main Google Photos screen.
Add Names to Faces in Google Photos
You can add names to faces on the Google Photos website or in the mobile app. When you do, your changes sync, so you only have to do it in one spot.
Add Names to Faces on the Web
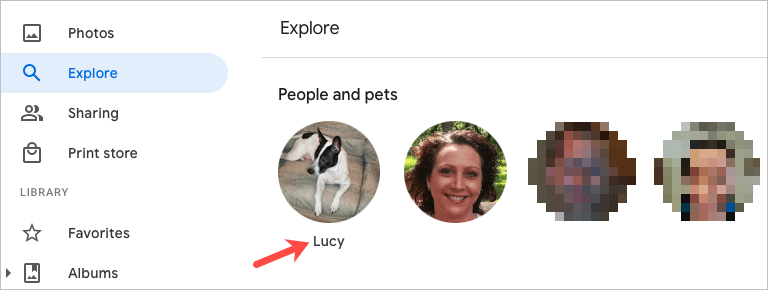
- Select Explore in the left-hand navigation.
- Choose a face at the top below People or People and Pets. You can also use the View all link on the right to see them all.
- On the top left of the next screen, select Add a name.
- Enter a name or nickname for the person or pet.
- Select Done to save your change.
You can select the arrow on the top left to return to the Explore screen. You should then see the name you added below the face at the top.
Add Names to Faces on Mobile
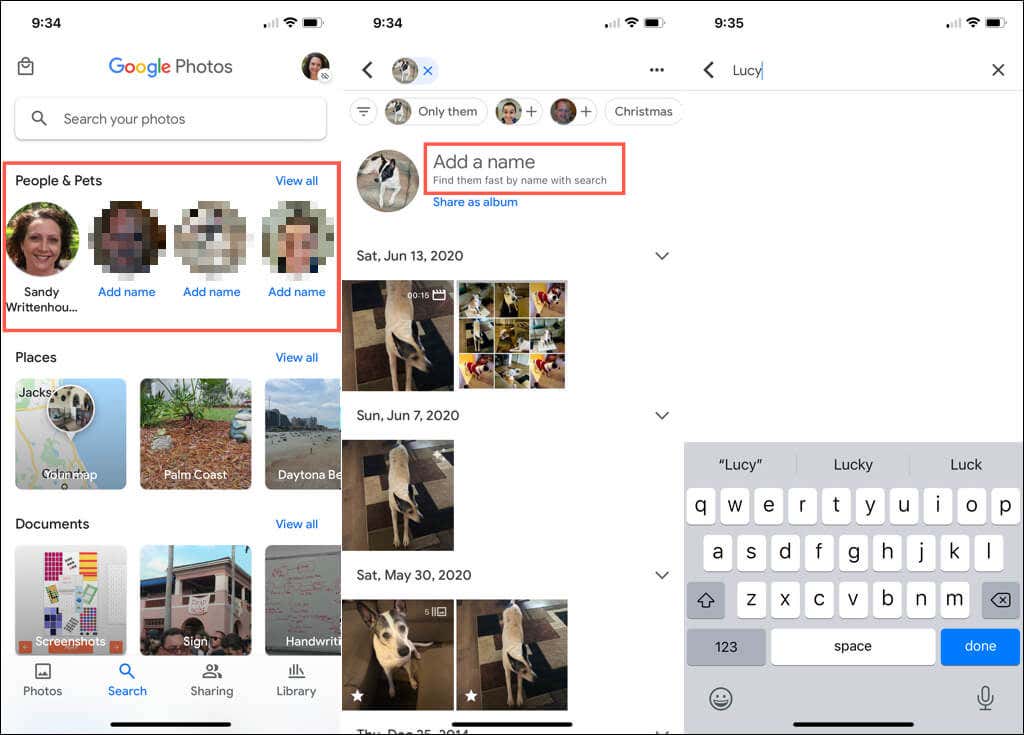
- In the Google Photos mobile app, select the Search tab.
- You’ll see faces at the top below People or People & Pets. You can choose View all on the right to see all faces.
- Select a photo and then pick Add a name.
- Enter the name and tap Done.
Tip: On iPhone, you can also quickly put a name to the face. Tap Add name below the photo. Enter the name at the top and tap Done on the keyboard. For more tips like this, check out our Google Photos tips and tricks!
Edit a Name for a Face
If you want to change a name you’ve assigned to a face, you can do so just as easily as adding one initially.
Edit a Name on the Web
- Choose the photo at the top of the Explore page.
- Hover your cursor over their name on their photos page and select the pencil icon that appears.
- Make your change and pick Done.
Edit a Name on Mobile
- Choose the photo at the top of the Search tab.
- Tap the three dots on the top right and pick Edit name label. You can also select Remove name label to not show a name at all.
- Enter the new name or nickname at the top and press Done on the keyboard.
See Photos With Faces
After you add a name to a face on Google Photos, it’s simple to find pictures of that person or pet.
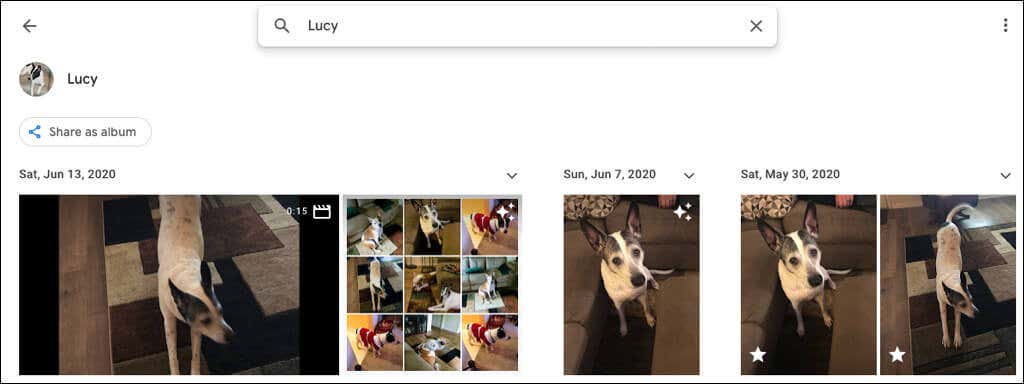
On the web, visit the Explore page and select a photo at the top. You can also use the Search box at the top of Google Photos to enter the name.
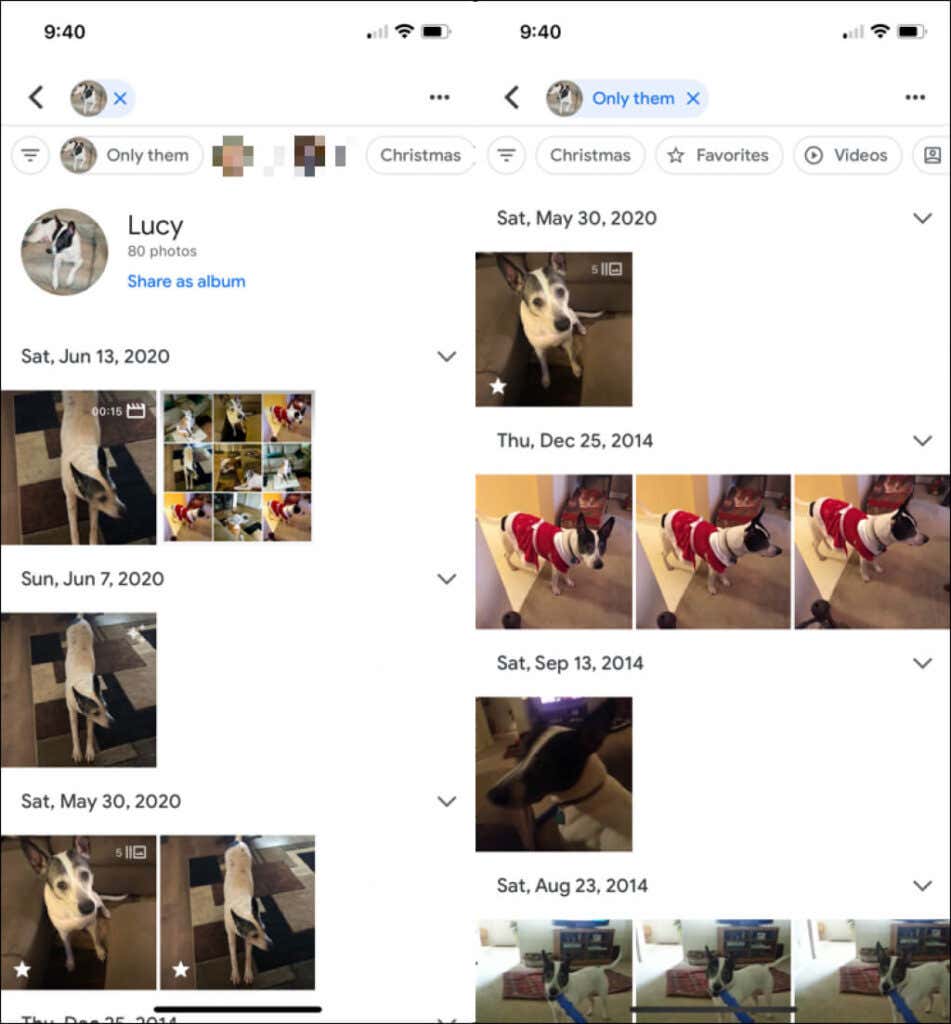
On your mobile device, go to the Search tab and pick a photo at the top. If you have many named faces, pop the name into the Search field instead.
Hide Photos With Faces
We’ve all been there. Photos pop up of people we no longer want to see. Luckily, Google Photos lets you hide pictures of specific people or pets. This doesn’t delete any photos; it simply does not show that face in the Explore and Search sections.
Hide Faces on the Web
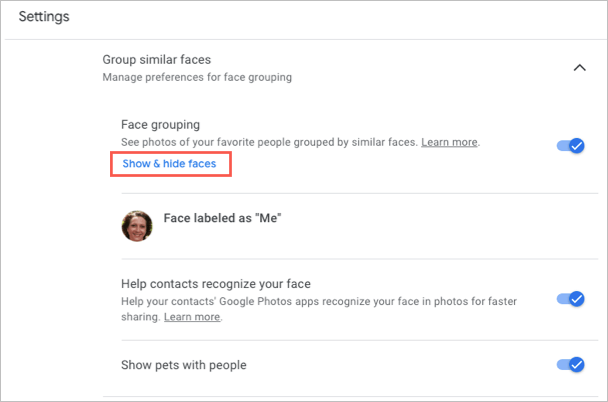
- Select the gear icon on the top right of Google Photos.
- Scroll to and expand the Group similar faces section.
- Choose the Show & hide faces link below Face grouping.
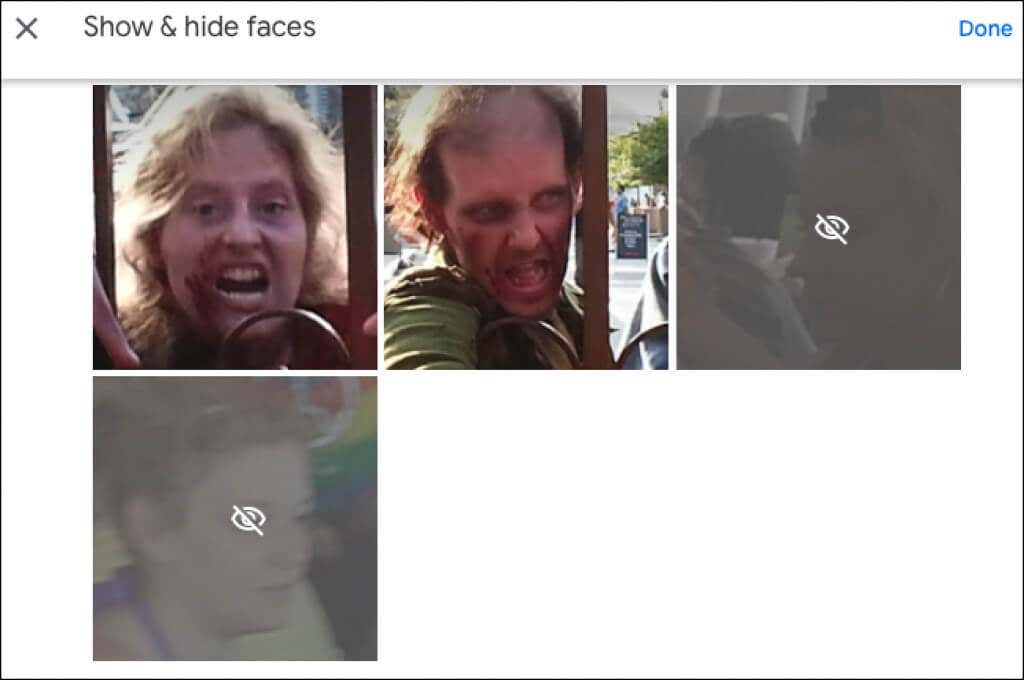
- Select the person’s face you want to hide. This places an icon of an eye with a line through it and dims the thumbnail.
- Pick Done on the upper right when you finish.
If you change your mind later and want to unhide a Google Photos face, follow the same steps to return to this spot. Then, select the face to remove the icon and show the face again.
Hide Faces on Mobile
- Go to the Search tab and select View all in the People section at the top.
- Tap the three dots on the top right and pick Hide & show people on Android, Hide & show faces on iPhone.
- Select the person’s face you want to hide. Like on the web this places a hidden icon on the face and dims the thumbnail.
- Tap Done at the top when you finish.
To unhide a face later, follow the same steps and select the face you want to show again to remove the hidden icon.
When you add faces to Google Photos, consider attaching names to them too. This makes those people and pets easy to find and simple to search for as well.
For more, look at how to download Google Photos photos and videos or how to move photos from iCloud to Google Photos.


