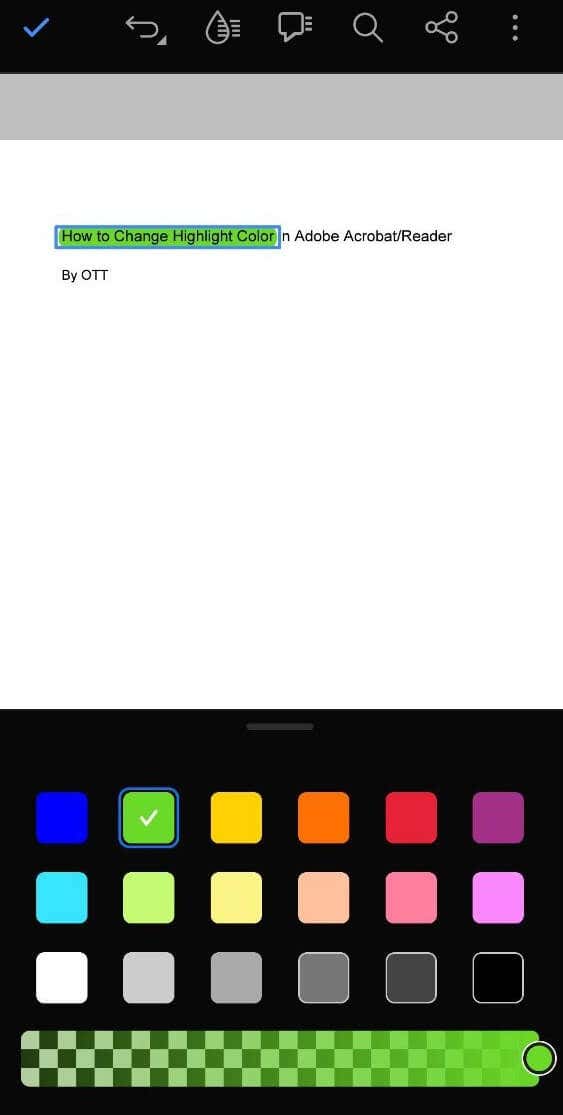
Changing the highlight color in Adobe Acrobat/Reader makes different types of text stand out in a PDF file. This tutorial covers how to adjust highlight colors so you can customize and improve your documents to suit your preferences.
Adobe Acrobat & Adobe Acrobat Reader are versatile tools for all things PDF. The software offers a range of tools that allow you to create, edit, and manage your documents effortlessly.
What the Highlight Feature Does & Why Use it
The highlighting feature in Adobe Acrobat is a handy tool that allows you to mark important sections or points within a document by translucently coloring your text. It serves as an effective method to emphasize key information, making it easier to locate and reference essential details later.
By using different highlight colors, you can categorize or differentiate various sections, enhancing readability and comprehension. This feature is particularly useful for students, professionals, or anyone dealing with extensive documents, enabling them to extract, emphasize, and review critical content efficiently.
How to Change Highlight Color in Adobe Acrobat Reader
Before we look into how to use the highlighter feature in the Adobe Acrobat software, let’s get the difference between Adobe Acrobat, Adobe Acrobat Reader, and Adobe Acrobat Reader DC out of the way.
Adobe Acrobat Reader is the free version of the software that you can use for basic PDF viewing and annotations. Adobe Acrobat, available through Creative Cloud, offers advanced editing and conversion features. Adobe Acrobat Reader DC (Document Cloud) is the latest version of the software which adds cloud-based functions for secure document sharing and storage across devices. The Adobe Acrobat Pro DC version embodies all of the features available in the standard version of the app and also adds premium features like a variety of e-signature tools.
No matter which version of the Adobe Acrobat software you’re using, the steps for using the text highlight tool will be similar (the steps are also the same for Mac and Windows operating systems).
To highlight your text in Adobe Acrobat/Reader, follow the steps from our tutorial:
Step 1. Open the document you want to edit in Adobe Acrobat.
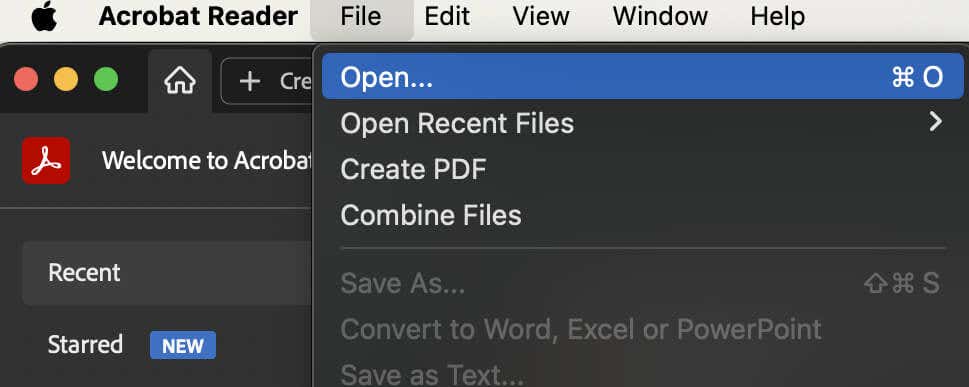
Launch the Adobe Acrobat/Reader app on your computer. Then select File > Open. Navigate to the document you need to edit and add it to Adobe Acrobat.
Step 2. Add highlights to text.
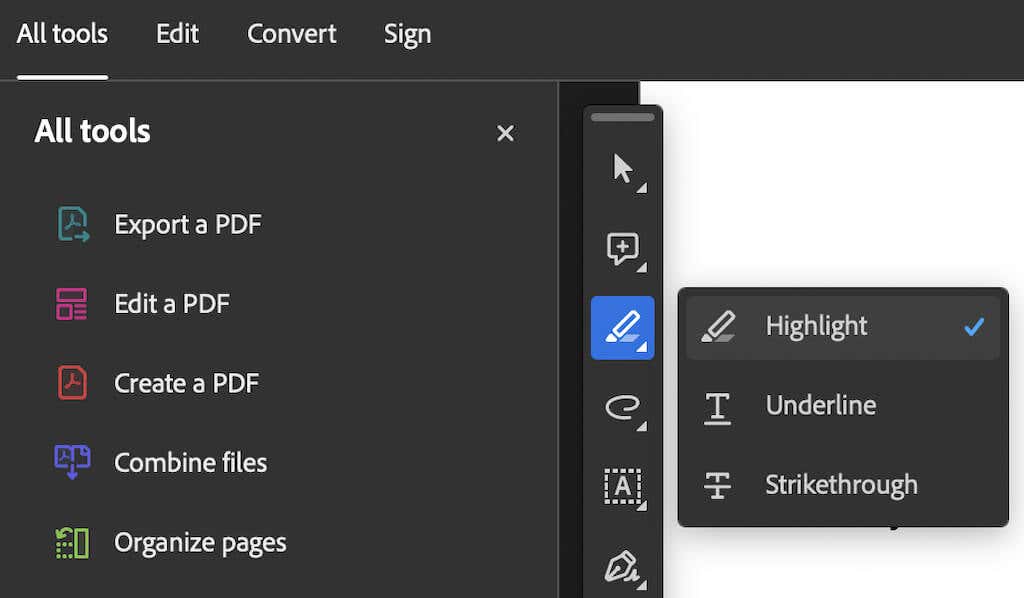
If you need to highlight parts of your document, from the sidebar open Tools > Comment > Highlight or Tools > Highlight, then highlight your chosen text.
Step 3. Select the highlighted text.
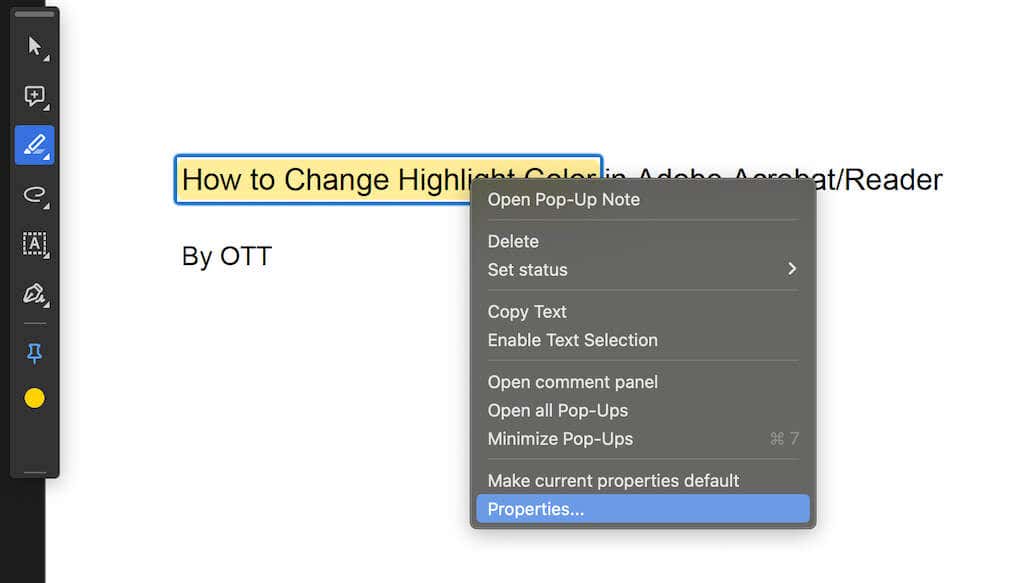
If your document already has parts of the text highlighted: once you open the document in the app, find the place with the highlighted text. Right-click the highlighted text and select Properties (or Tool Default Properties) from the drop-down menu.
Step 4. Change the highlight color.
If you don’t like the harsh yellow that is the default color in Adobe Acrobat, you can change it to your desired color.
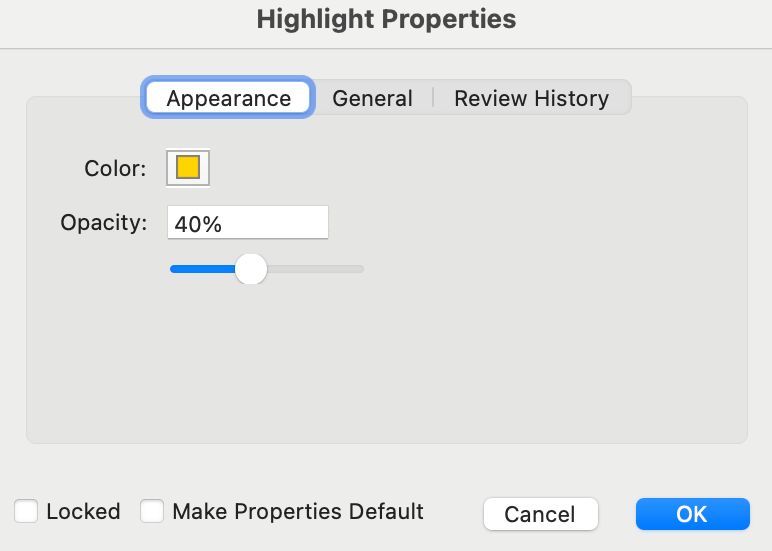
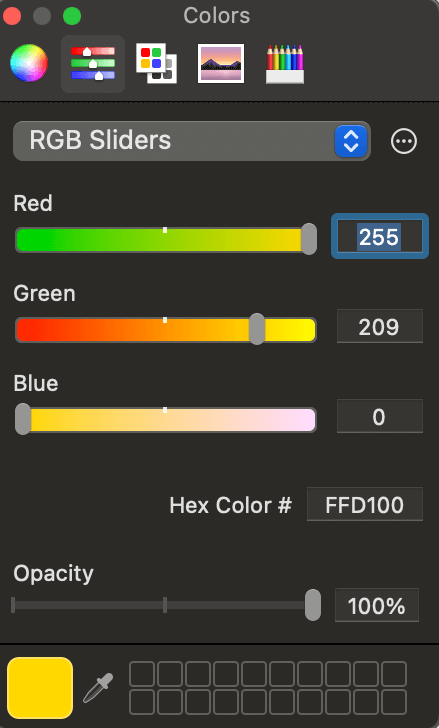
In the Highlight Properties bar, open the Appearance tab, and click on the Color field. This will open a color palette where you can select a different color of the highlighter to suit your needs and to change the color of your selected text. You can also use the color picker tool to get the desired color right from your document.
When you’re happy with the selected color, press OK at the bottom of the dialog box and close the Highlighter tool properties window.
This highlight color will then be changed automatically.
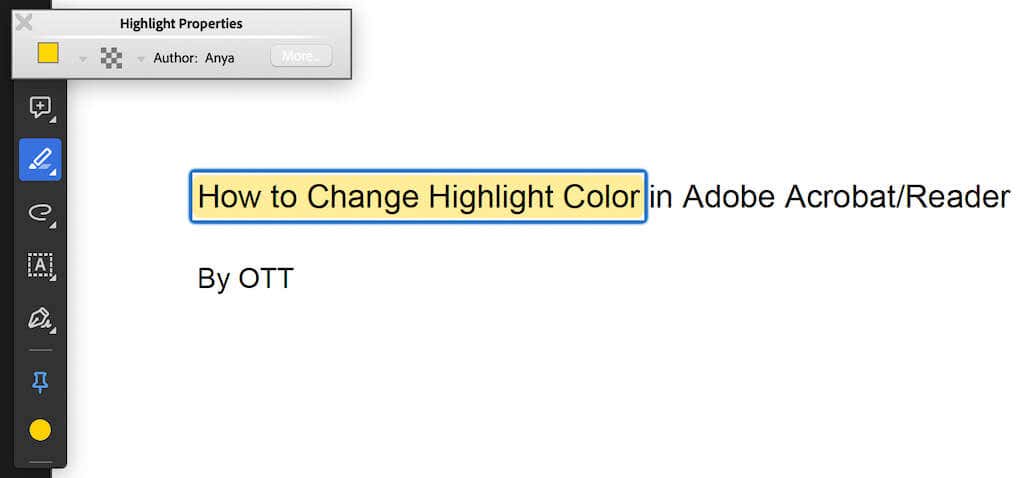
If you’re using a Mac, you can use a keyboard shortcutto change the highlight color of the text in Adobe Acrobat. Press Command (Cmd) + E to access the Highlight Properties pop-up window. There, you can change the highlight color as well as the opacity. You can also select More to open the full-sized Highlight properties window.
On a Windows computer, the Ctrl + E hotkey combination will open the same toolbar.
How to Change Default Highlight Color in Adobe Acrobat Reader
Changing the highlight color from default to something else every time may be time consuming and simply annoying. Instead, you can set a different default highlight color in Adobe Acrobat Reader to the one you like. This will save you time and apply the new color to your highlighted text every time.
To change the default highlight color in Adobe Acrobat, follow the steps below.
Step 1: Highlight the Text in Your Document.
Begin by selecting the text you wish to highlight. Then select the Highlight icon to highlight your text. After that, right-click the text to open the context menu and access the Highlight Properties as shown in the previous section.
Step 2: Set the Default Color.
Within the Highlight Properties menu bar, modify the color of your highlight.
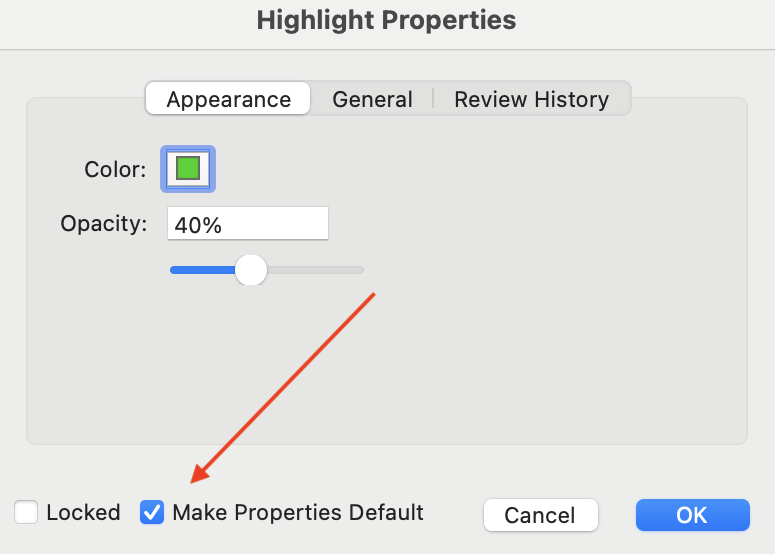
To make the new color the default color for all future edits, check the box labeled Make Properties default in the Highlight Properties window. This ensures that your chosen color becomes the default highlight color for future use.
How to Change Highlight Color in Adobe Acrobat Reader Mobile
Adobe Acrobat offers a mobile version of the app so that you can edit PDFs right from your smartphone. If you don’t have the app installed on your phone already, download it and install it from Google Play or Apple App Store. To change the highlight color using Adobe Acrobat Reader Mobile, follow these simple steps for efficient PDF management on your phone. The instructions are the same for both Android and iOS users.
Step 1: Launch the App
After you download and install the app, open it on your smartphone.
Step 2: Open Your PDF in Adobe Acrobat Reader
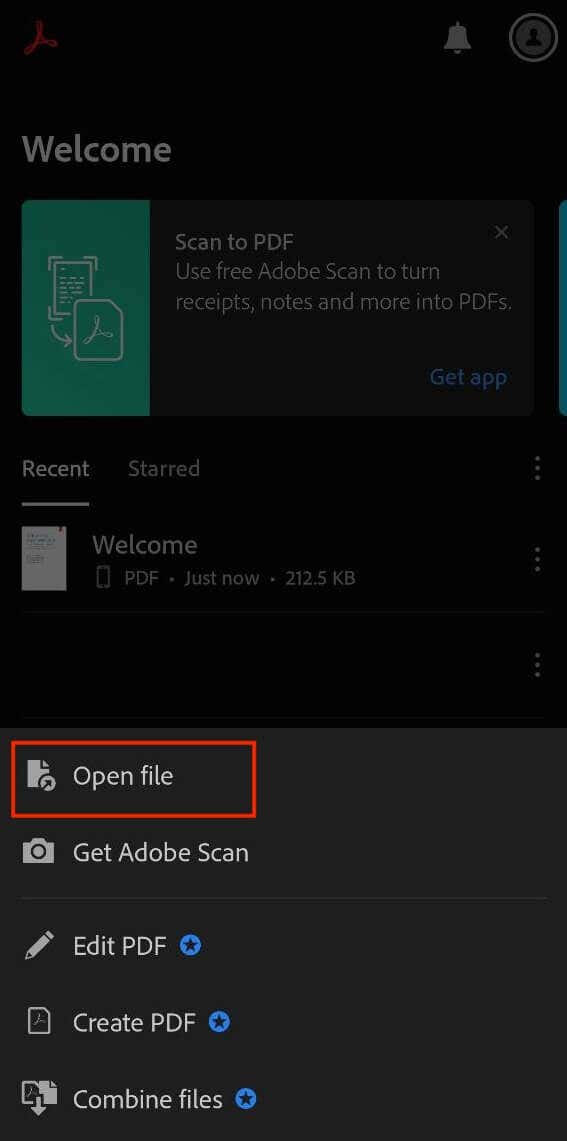
In Adobe Acrobat Reader, select Open File to add the PDF file you wish to edit to Acrobat Reader on your phone. You can import the file from your smartphone and let the app detect it automatically.
Step 3: Adjust Text Highlight Color
Find the highlighted text that you want to change the color of. Long-press the highlighted text to access the Highlighted Text Properties. Select the highlight color to display the color palette and choose your preferred color for the highlighted text.
Step 4: Set Default Color
The recently used highlight color will become the default for future highlighted text. This color will be automatically selected when you highlight text in subsequent use.
After the app saves the changes, you can carry on working on the same document on multiple devices. The mobile app also comes with an array of PDF editing features, including changing the font text color.
What Other Software You Can Use For Highlighting Parts of Your Documents
There are other software options available for highlighting parts of your documents if you’re looking for alternatives. Some of these include:
- Foxit Reader: Similar to Adobe Acrobat, it’s a free PDF reader that allows highlighting and annotating PDF documents.
- PDF-XChange Editor: This software provides basic PDF editing features, including highlighting and annotating texts and images.
- Nitro PDF Reader: A comprehensive PDF reader that offers a free trial with annotation capabilities, letting you highlight texts in your PDF documents.
- Sumatra PDF: While primarily a lightweight reader, it allows basic annotation functions such as highlighting.
These software options offer various functionalities similar to Adobe Acrobat Reader, including the ability to highlight and annotate your documents.
If you don’t have a dedicated PDF editor, you can also use Photoshop to highlight text in your PDFs. Photoshop is primarily an image editing software and doesn’t offer the same ease of use or specialized tools for text highlighting within PDFs compared to dedicated PDF editing software. So the process will be a little different and more complicated compared to using Adobe Acrobat.
Edit Your Documents in Adobe Acrobat Reader Like a Pro
Mastering the art of editing documents in Adobe Acrobat Reader can significantly enhance your productivity. From changing highlight colors to modifying text, this tool offers versatile features that can streamline your document management process.
Whether on desktop or mobile, these tips can help you navigate Adobe Acrobat Reader like a pro and excel at editing your documents, allowing for efficient and effective document editing on the go.
