Notification sounds are definitely useful, but they can start to get on your nerves after a while. If you’re getting tired of your current notification sound, don’t worry – it’s easy to change it.
Luckily, there are plenty of options to choose from, and you can even add your own sounds and customize each app individually. This article will explain how you can change the default notification sound and add your own sounds on your Android device.
How to Change the Default Notification Sound on Android
The method for changing the default sound depends on your phone model and which version of Android you’re using. For that reason, we’ll describe the process for Google Pixel, Samsung Galaxy, and OnePlus below.
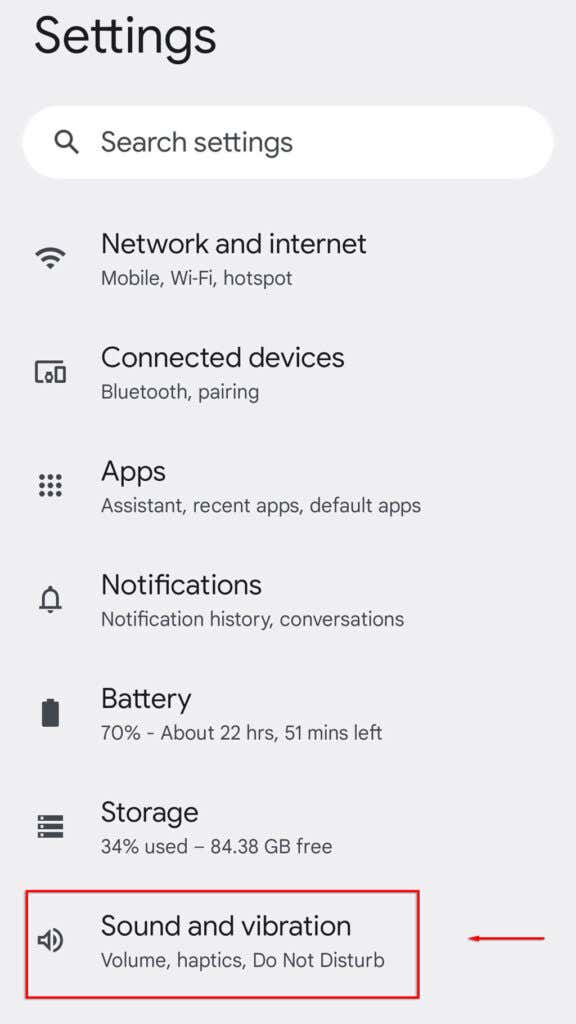
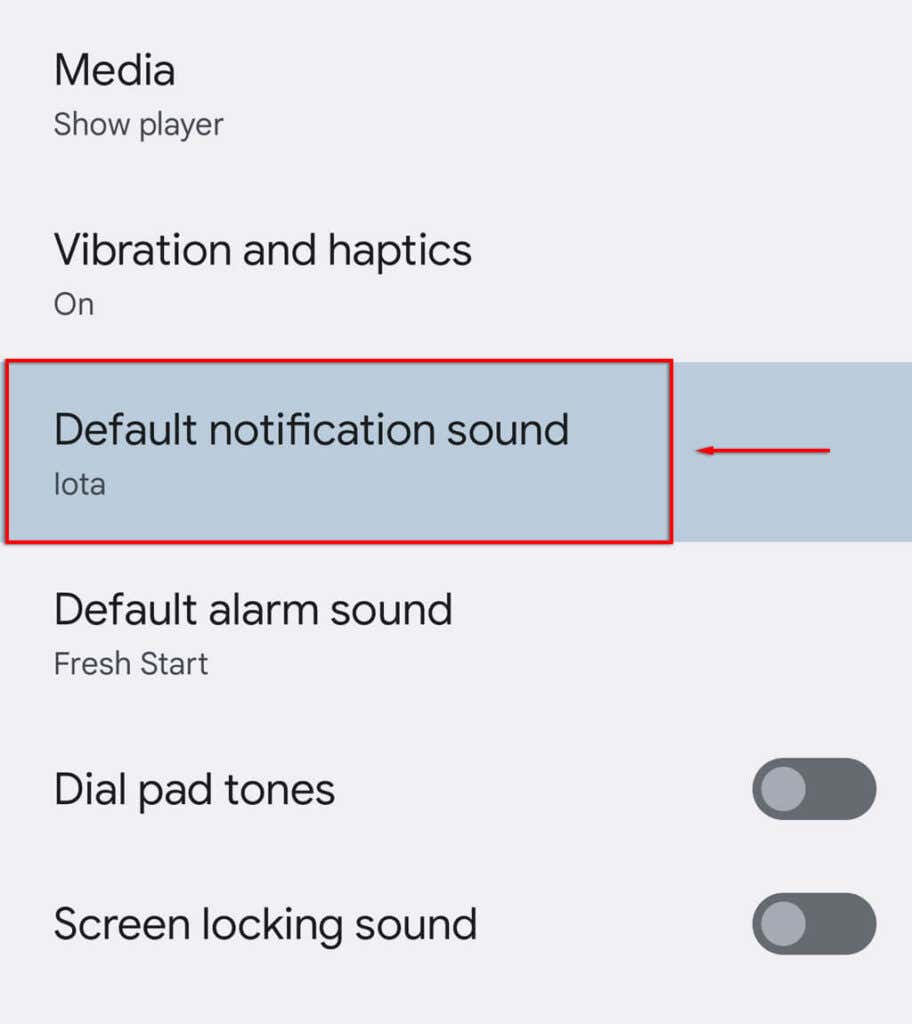
To change your default Android notification sound on a Google Pixel:
- Open Settings.
- Select Sound and vibration.
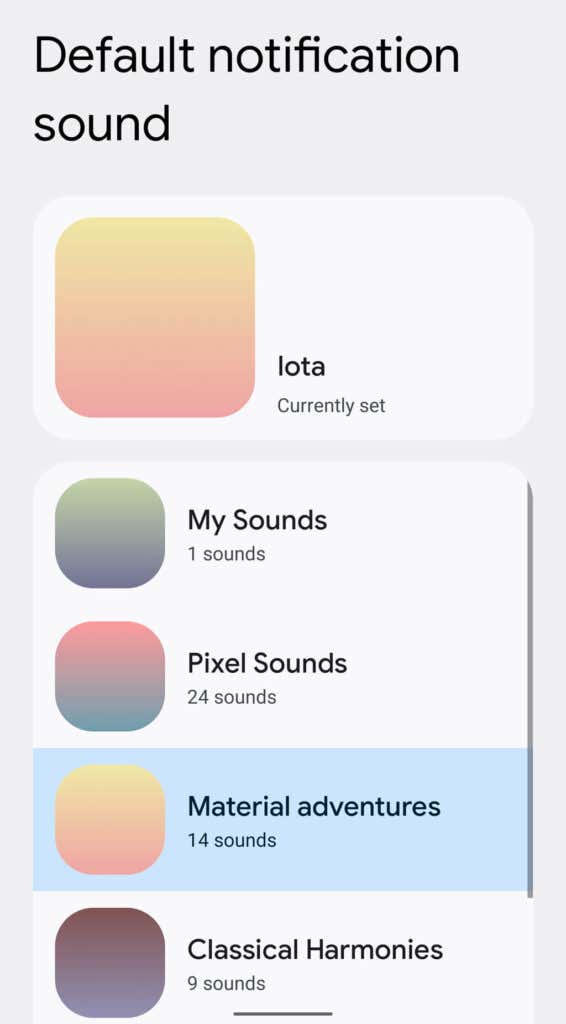
- Tap Default notification sound.
- You should now be able to scroll through the ringtones available by default on your Pixel. Simply tap one to set it to active.
To change the default Android notification sound on a Samsung Galaxy:
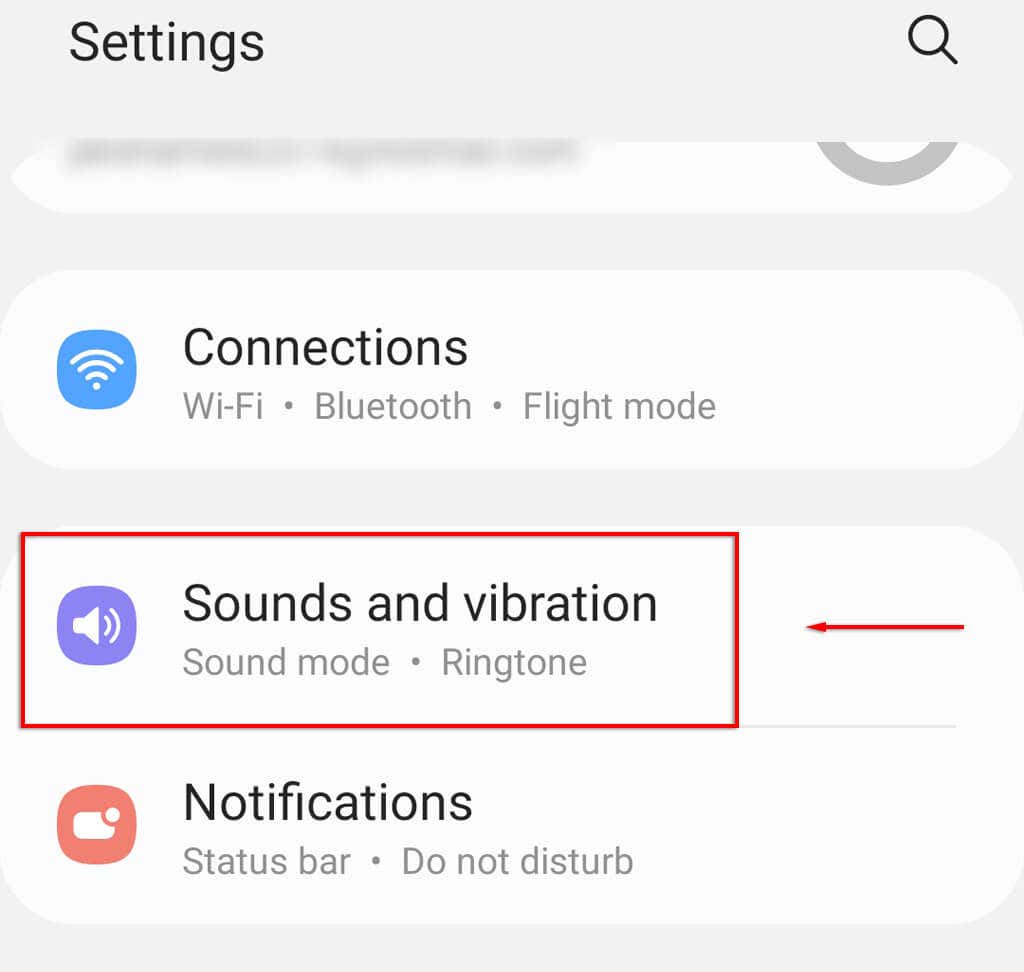
- Open Settings.
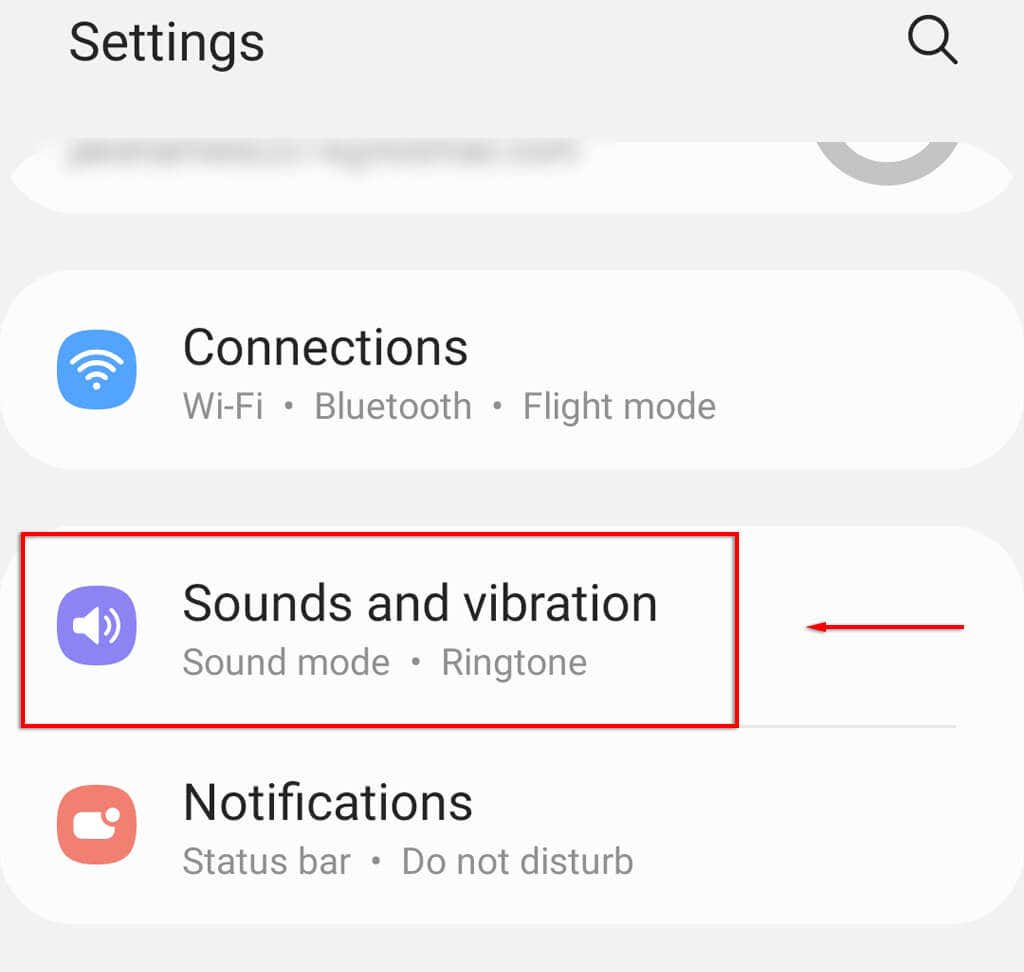
- Tap Sounds and vibration.
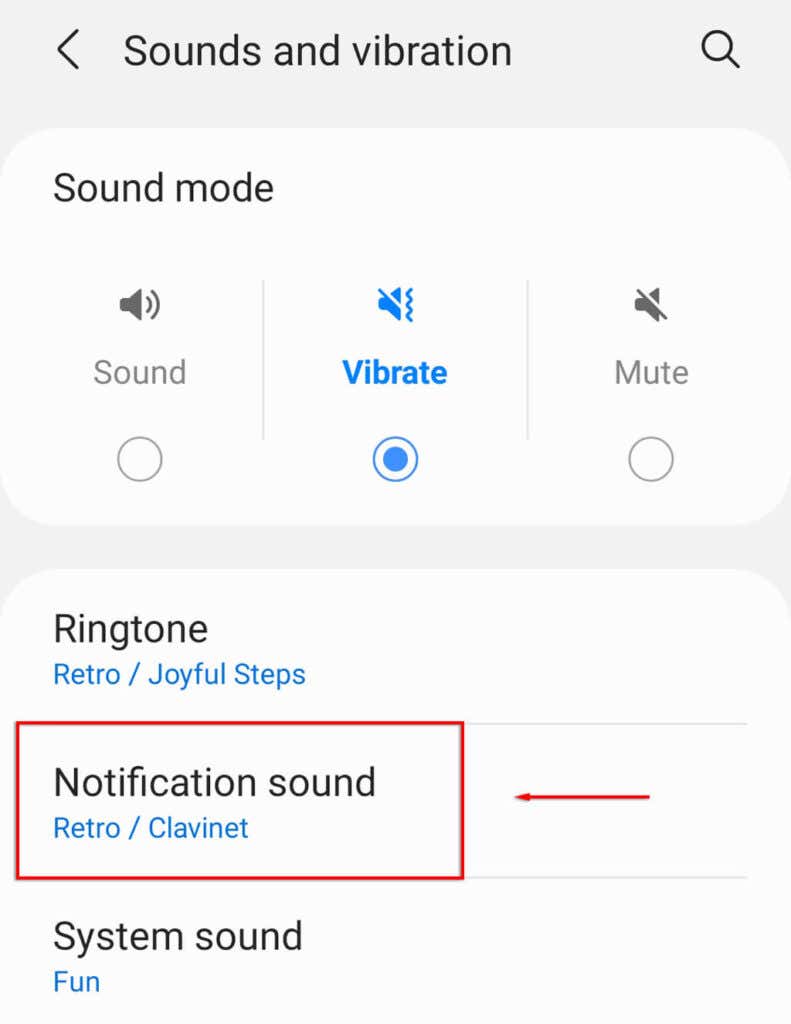
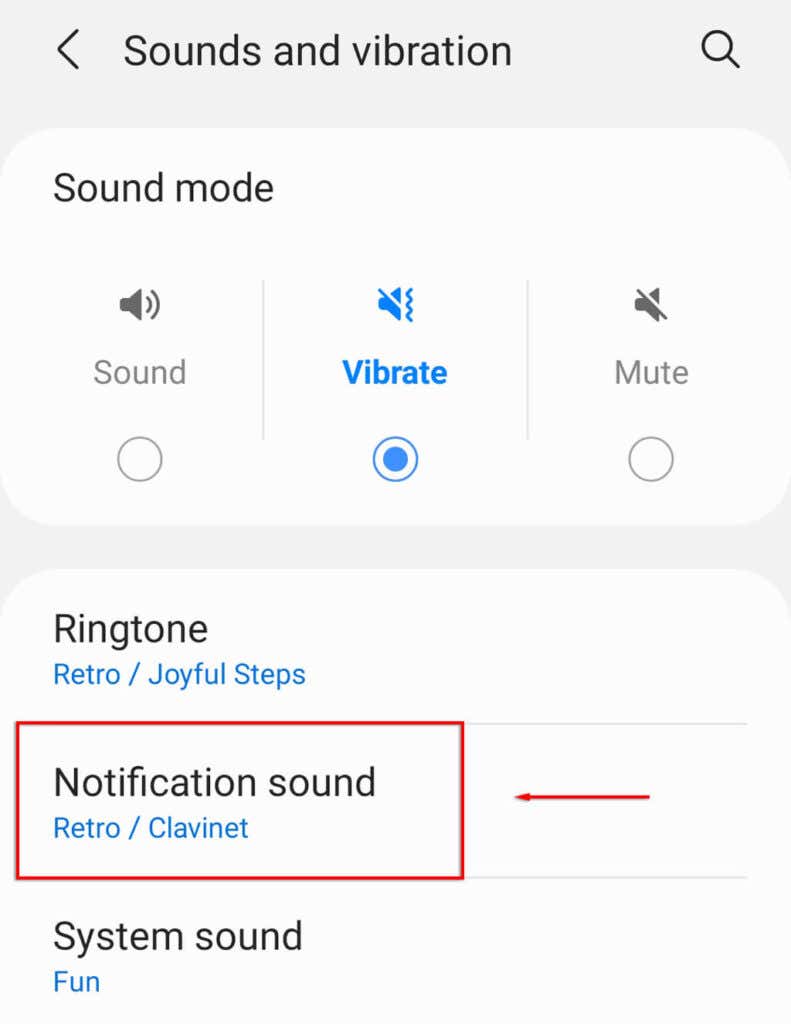
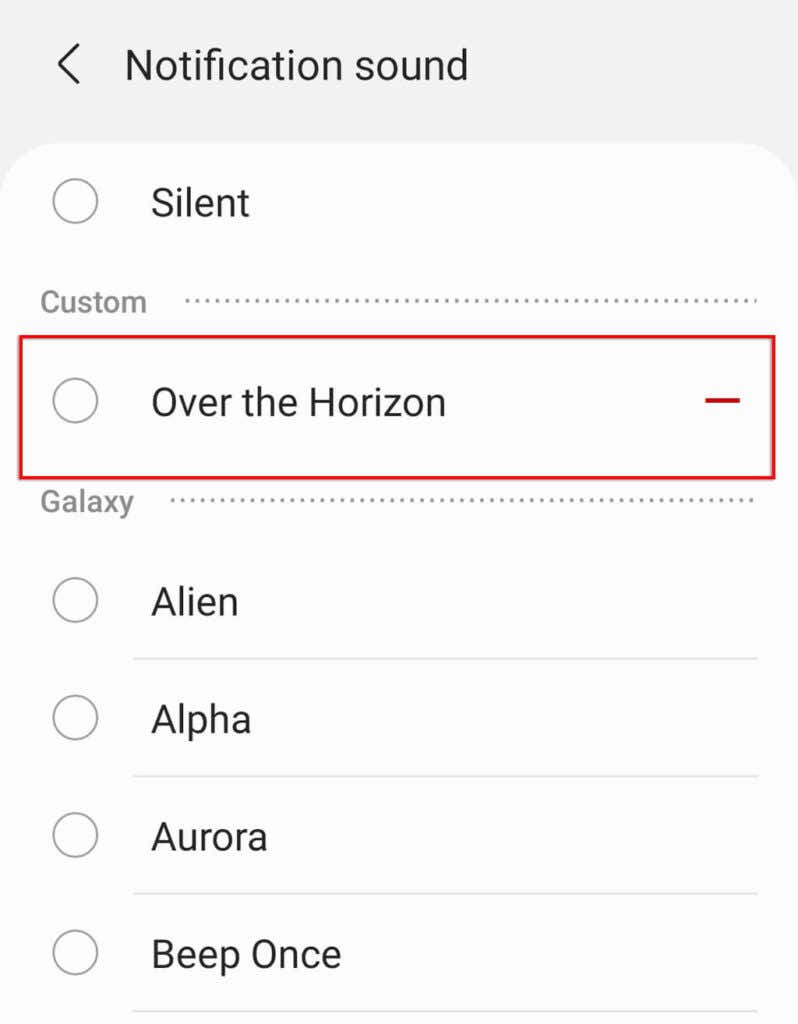
- Tap Notification sound.
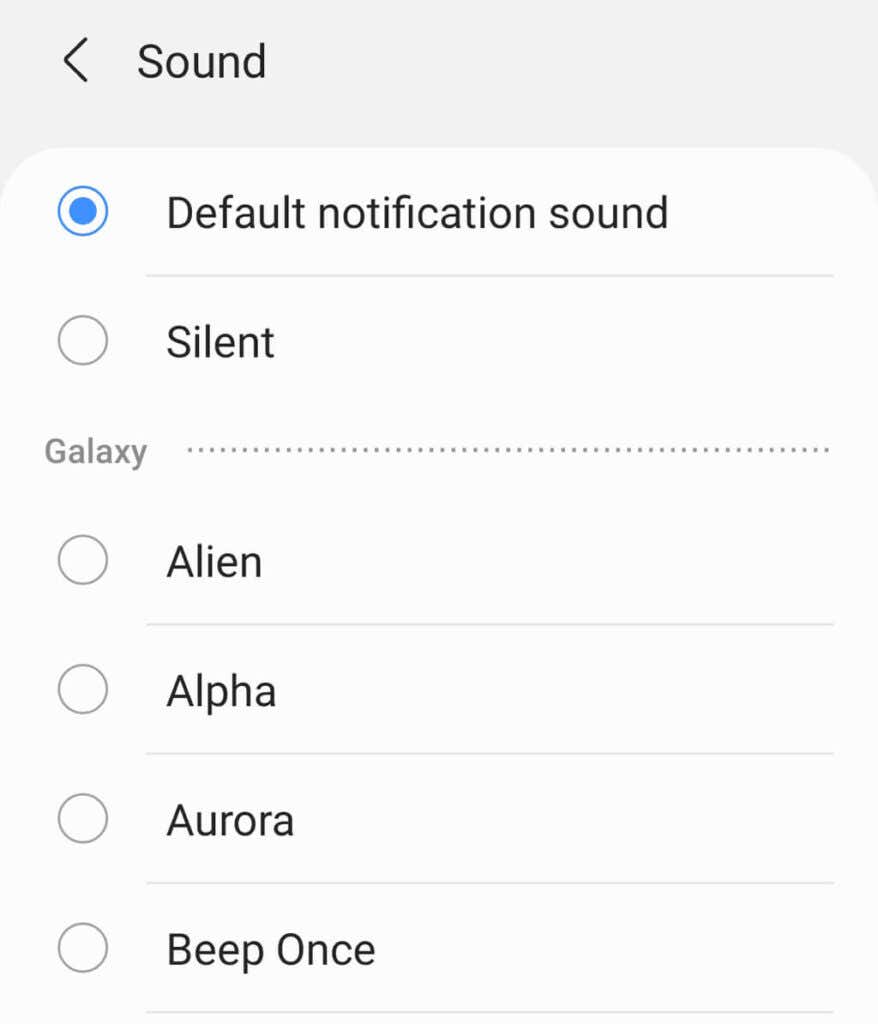
- You should now be able to scroll through the various tones available on your Samsung device. Then, simply tap one to activate it.
To change the default Android notification settings on a OnePlus device:
- Open Settings.
- Tap Sounds & vibration.
- Tap Notification sound and vibration.
- You should now see a list of available noises. Tap one to select it as your active sound.
Note: In these menus, you’re also able to change your default ringtone as well as the system sound option.
How to Change the Default Notification Sound by App
Android phones allow you to change notification sounds for each app individually. This is useful if you’d like a specific app notification sound for different apps (for example, the WhatsApp messenger or text messages app).
To change the default notification tone of an app:
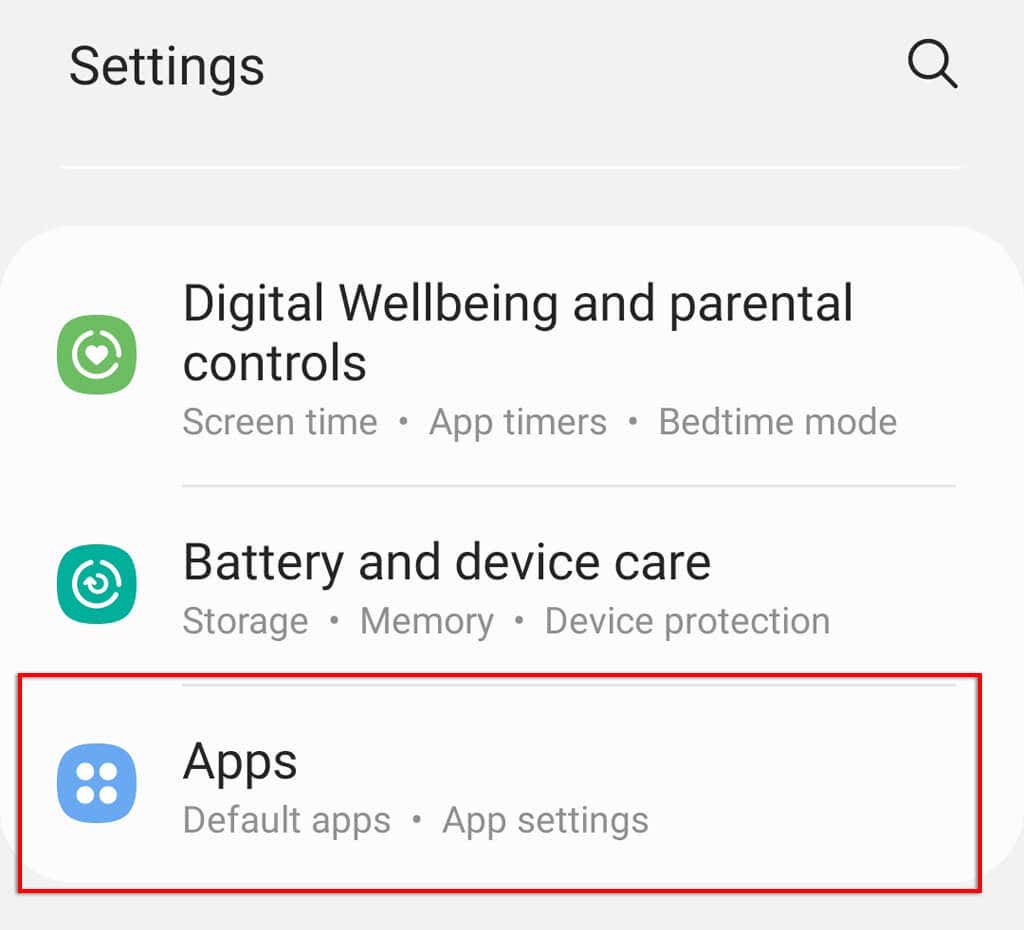
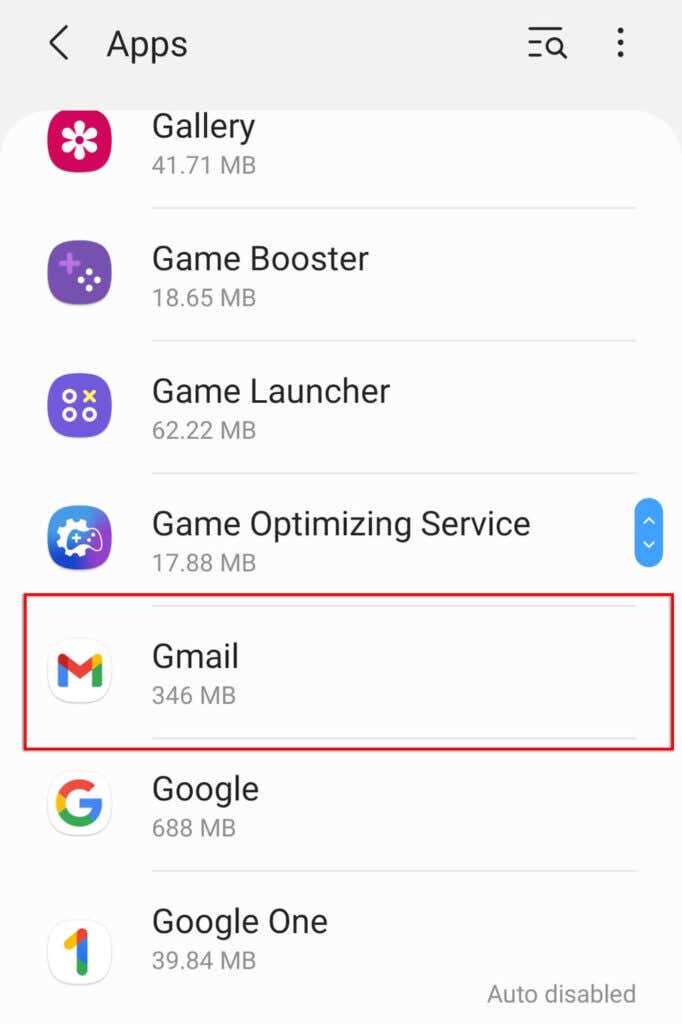
- Open Settings > Apps (you may have to select Your apps depending on your device).
- Select the app you want, for instance, Gmail.
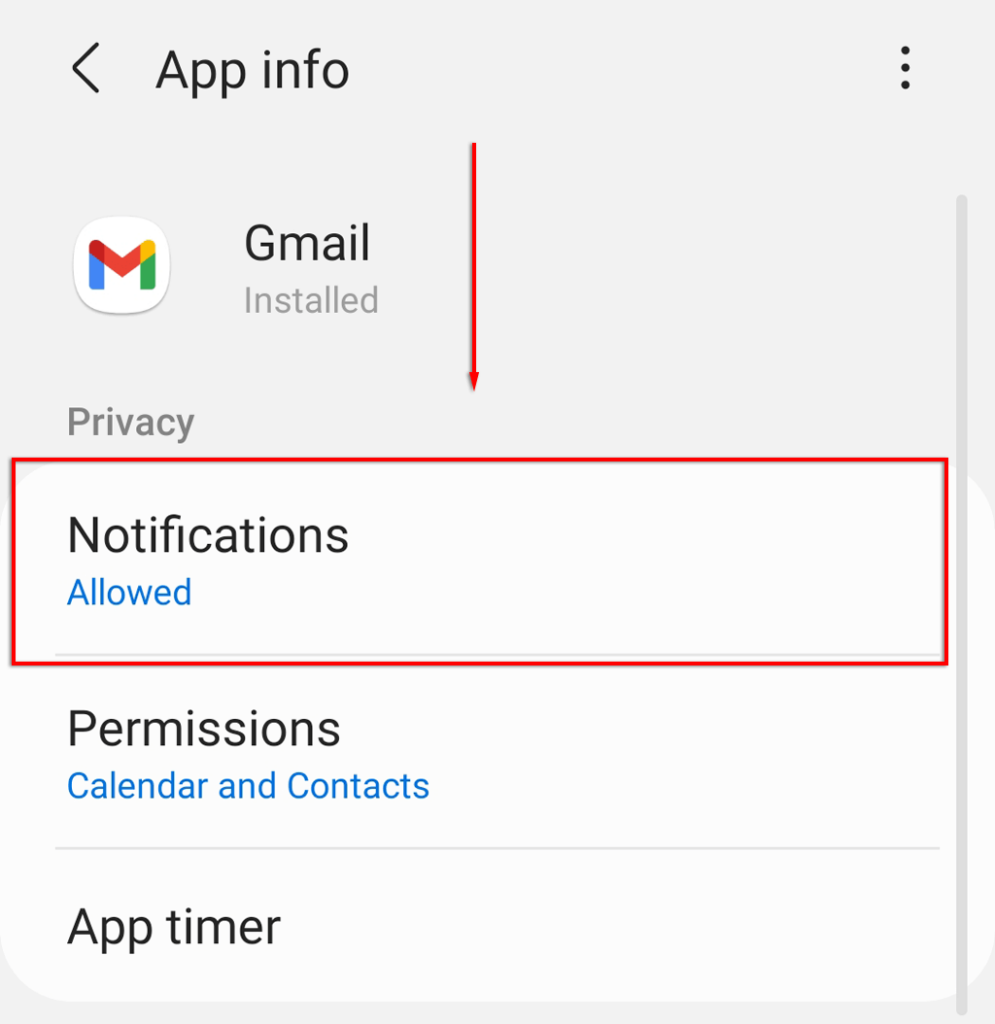
- Tap Notifications.
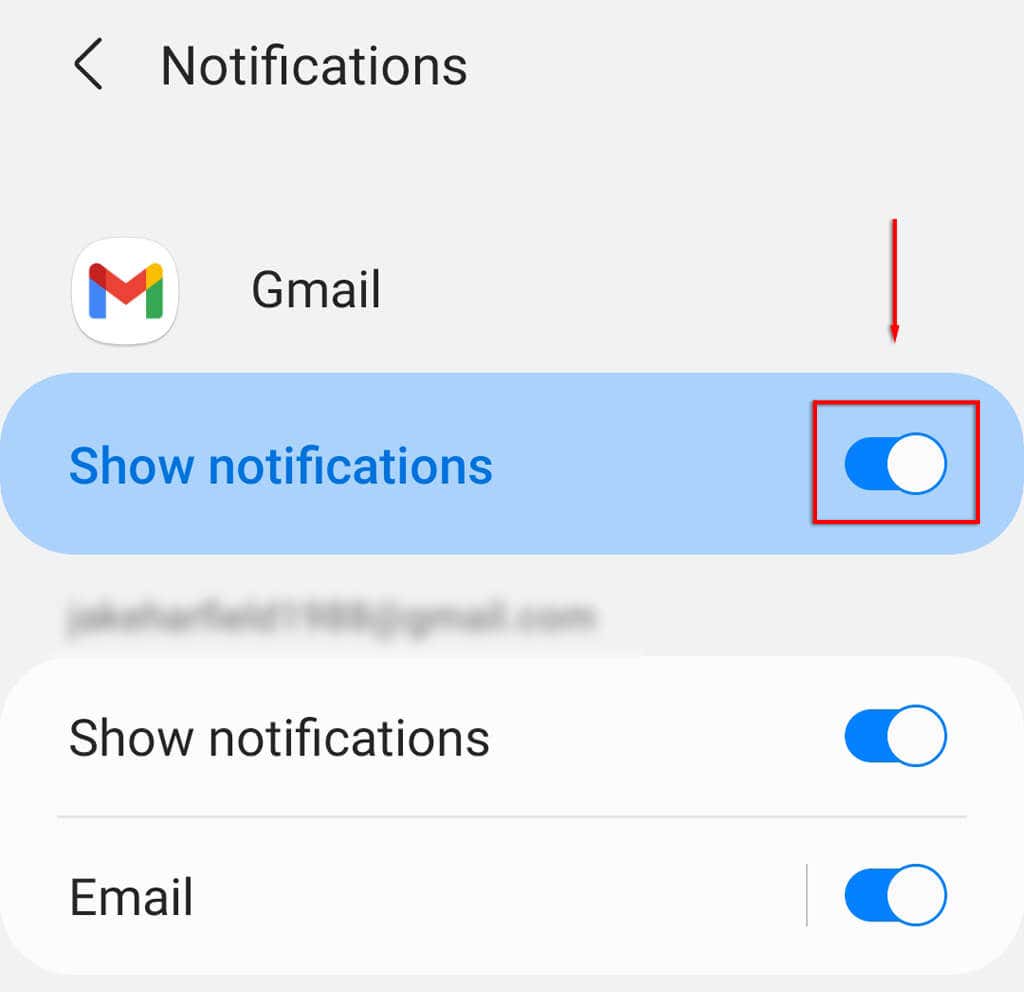
- Toggle on Show notifications if it isn’t already.
- Scroll down to the category you want to change. If you want to change the default notification sound for one of your email accounts, select Email under that account.
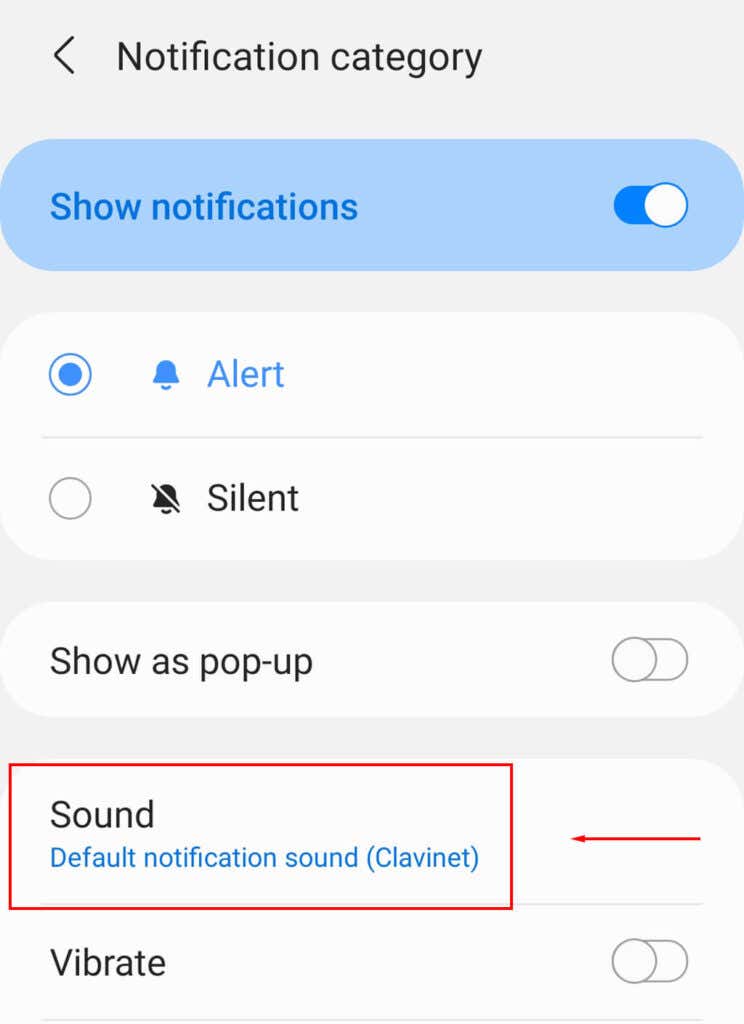
- Select Sound.
- You should now be able to choose your new sound from the list.
How to Set a Custom Alert Sound in Settings
Maybe the default alert sounds just aren’t good enough, or maybe you want a particular sound for your notifications. Either way, Android’s system settings let you use your own notification sounds.
There are two main ways of doing this – using a free ringtone and sounds app such as Zedge, or manually.
How to Use Zedge to Set a Custom Notification Sound
Zedge is the easiest way to find and download different notification sounds. To use Zedge:
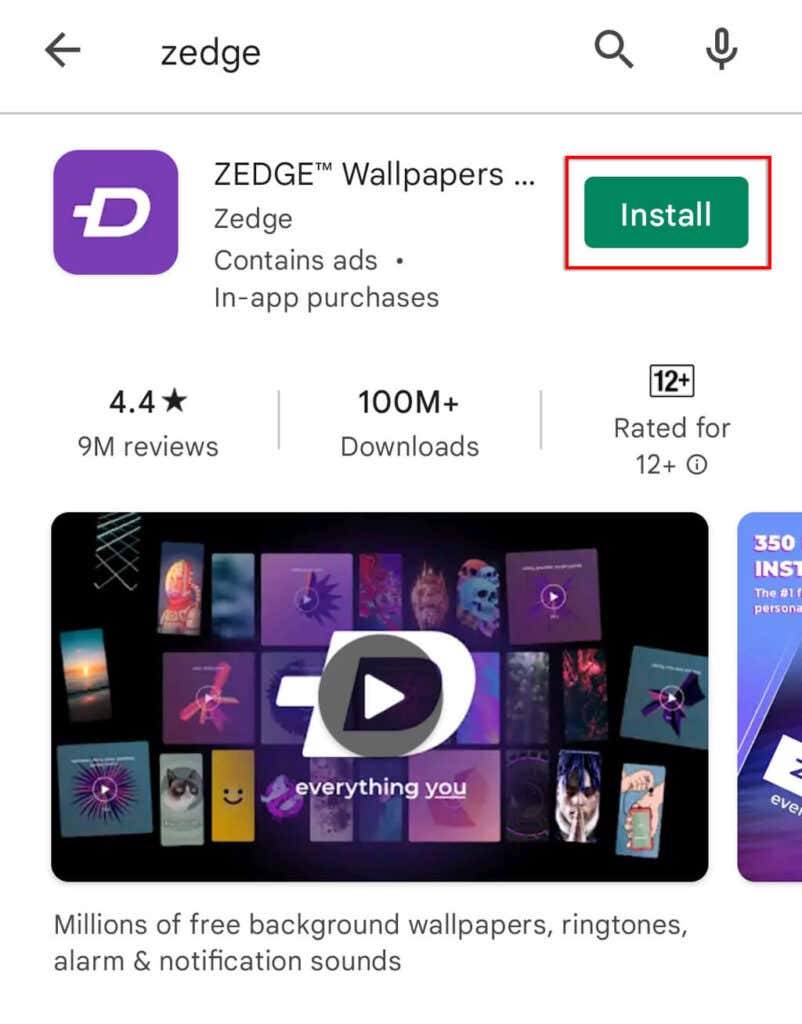
- Open the Google Play Store, and search for Zedge.
- Tap Install.
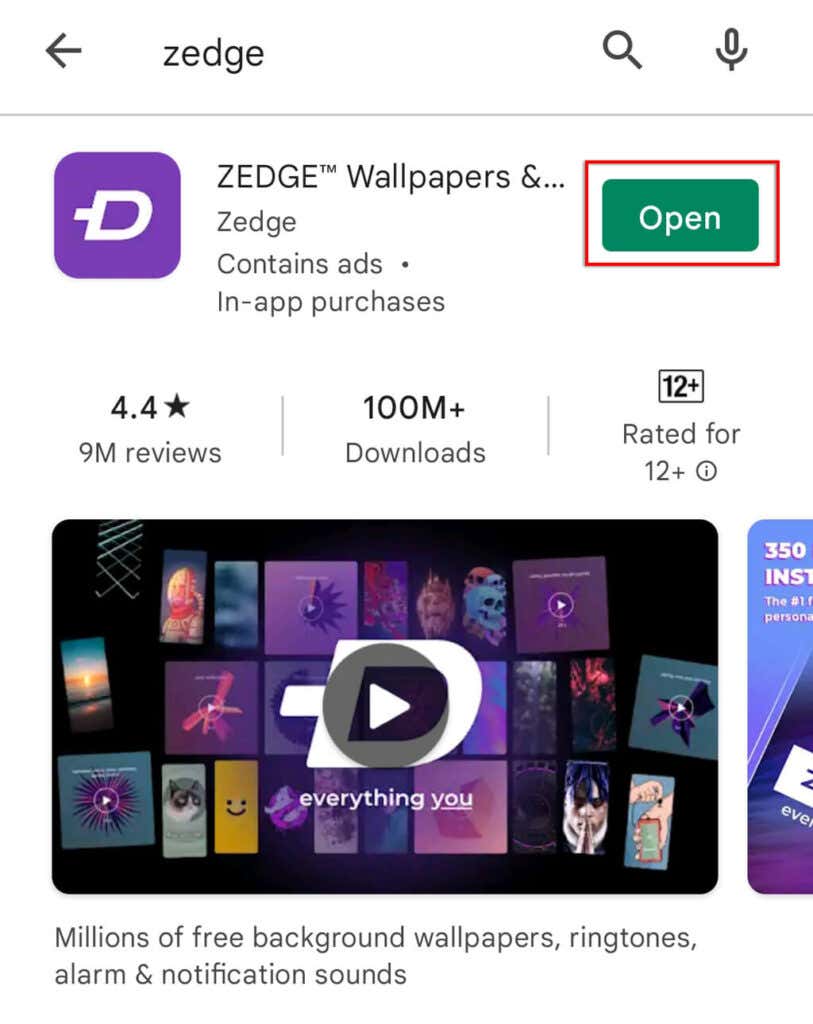
- Once it’s installed, tap Open and give it the necessary permissions.
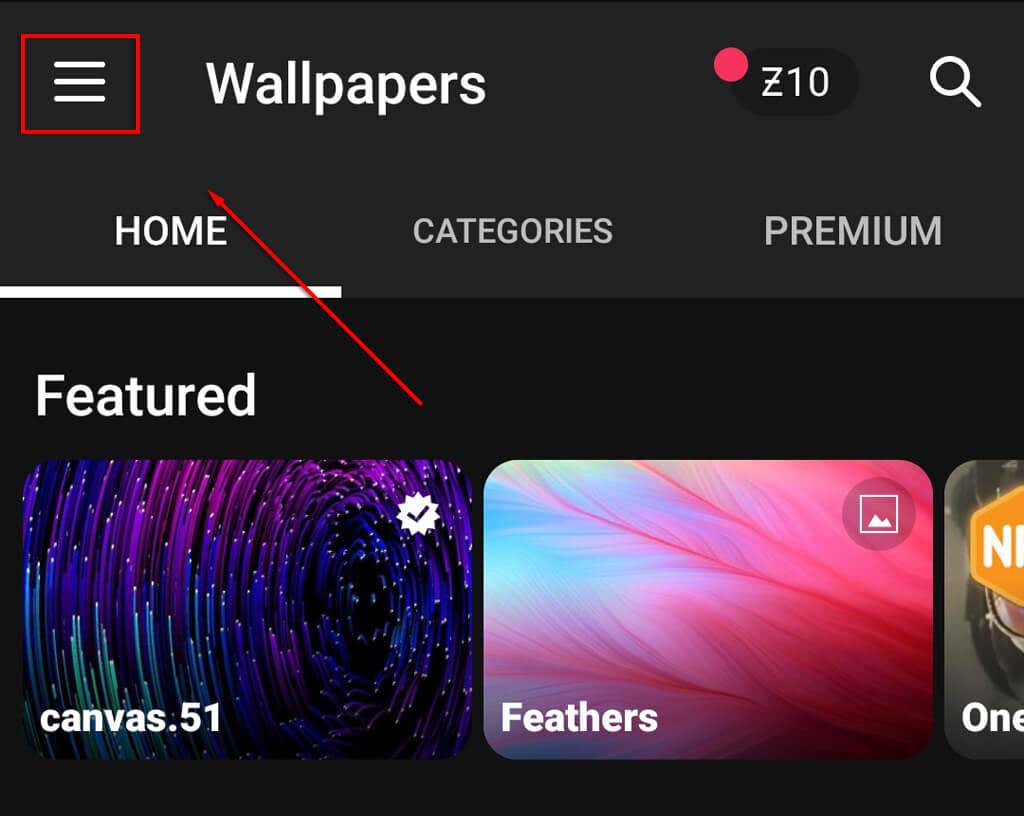
- Tap the three horizontal lines at the top-left of the screen.
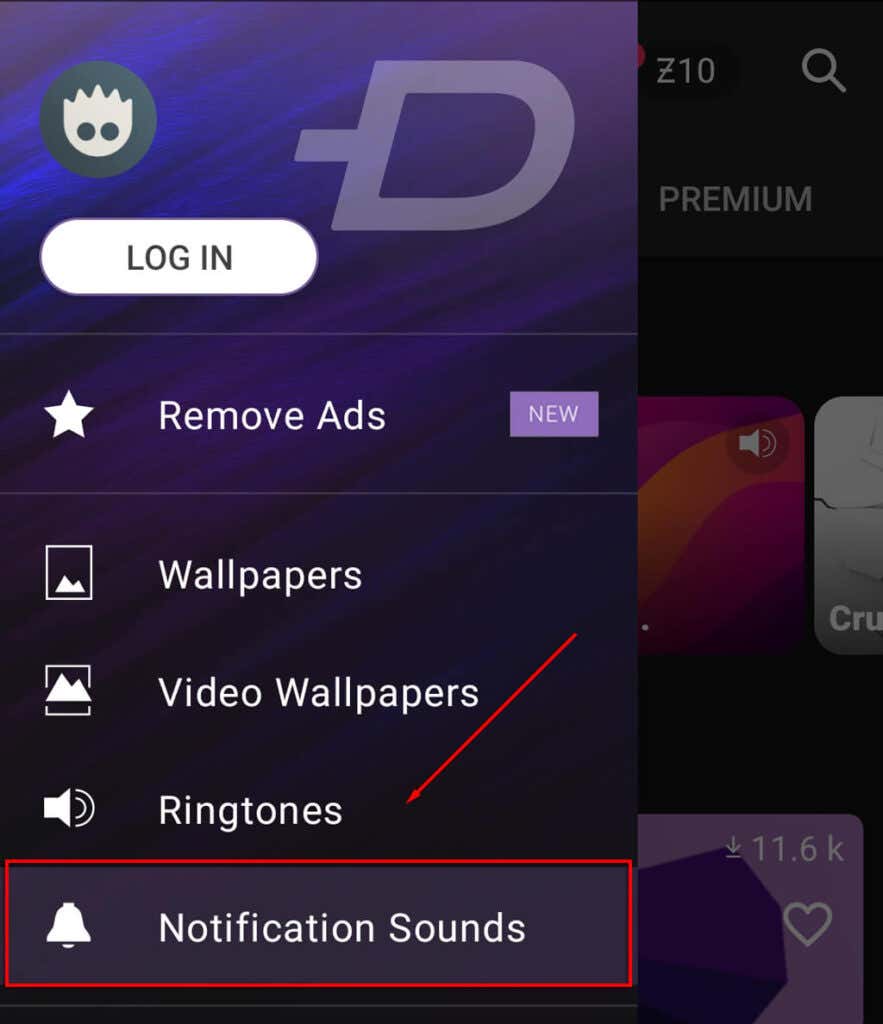
- Select Notification Sounds (you can also change your ringtones here).
- Scroll through the sounds until you find one you like, then hit the download button.
- In the pop-up menu, select either Set Notification to set it automatically.
How to Manually Set a Custom Notification Sound
To manually set a custom notification sound, you need to download or create an MP3 file and ensure it’s in the correct folder. To do this, you need to use Android’s File Manager or any third-party alternatives. Then you need to set that MP3 file as your default sound.
If you’d like to create your own sound file, you can record sounds using an app such as Voice Recorder. You’re then able to cut this into a smaller soundbite appropriate for the notification sound using another app such as MP3 Cutter & Ringtone Cutter.
Alternatively, you can use another app to make a synth beat or whatever sound you like.
Once you have the audio file, you need to do the following:
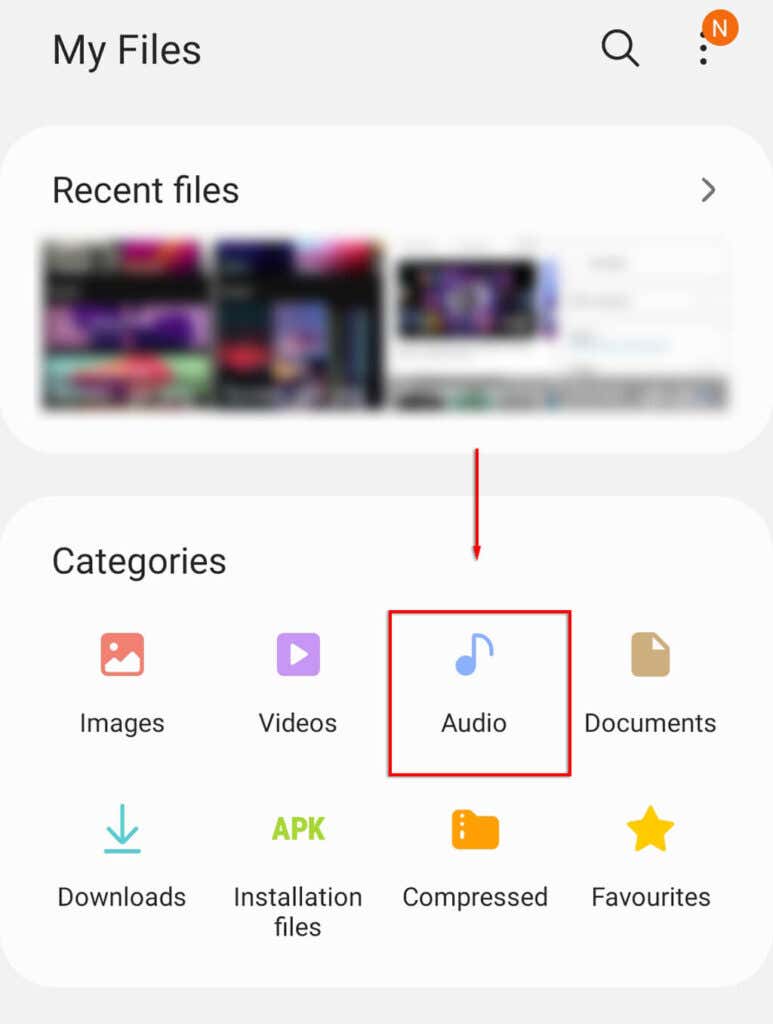
- Open File Manager (or My Files depending on your device) and navigate to your MP3 file. Most likely, you will find this in Audio > Music. If you downloaded the file, it may be in Downloads.
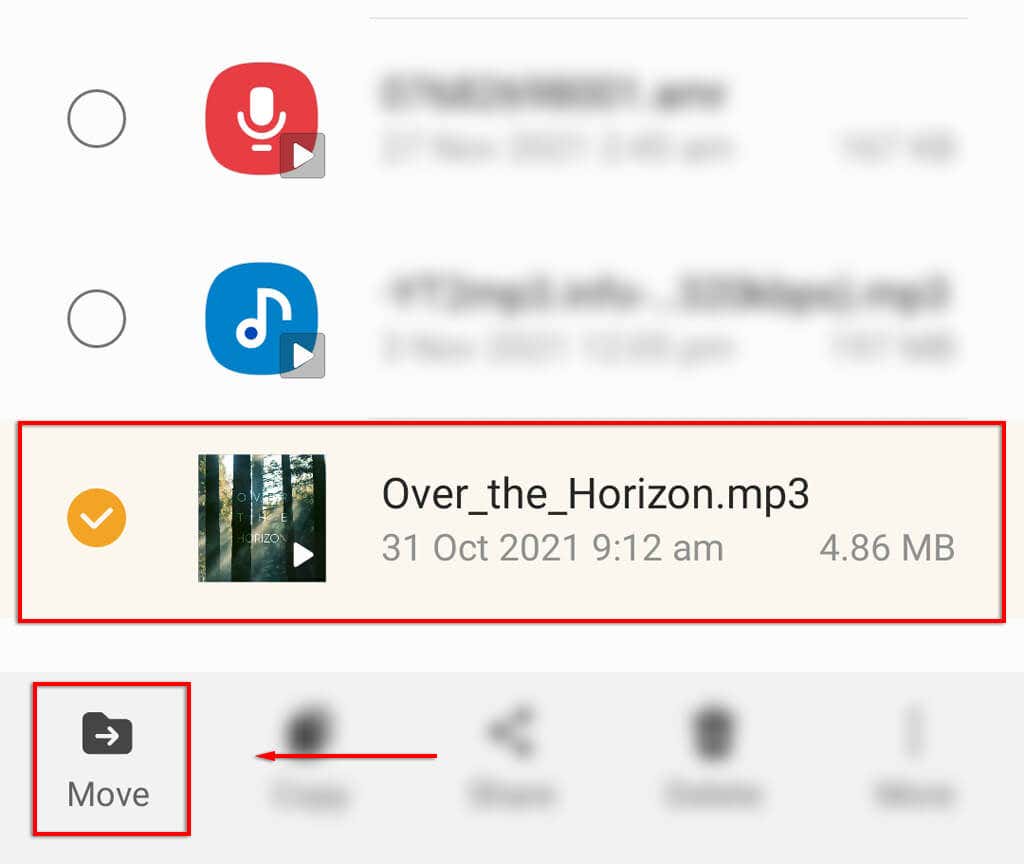
- Tap and hold the MP3 file and select Move.
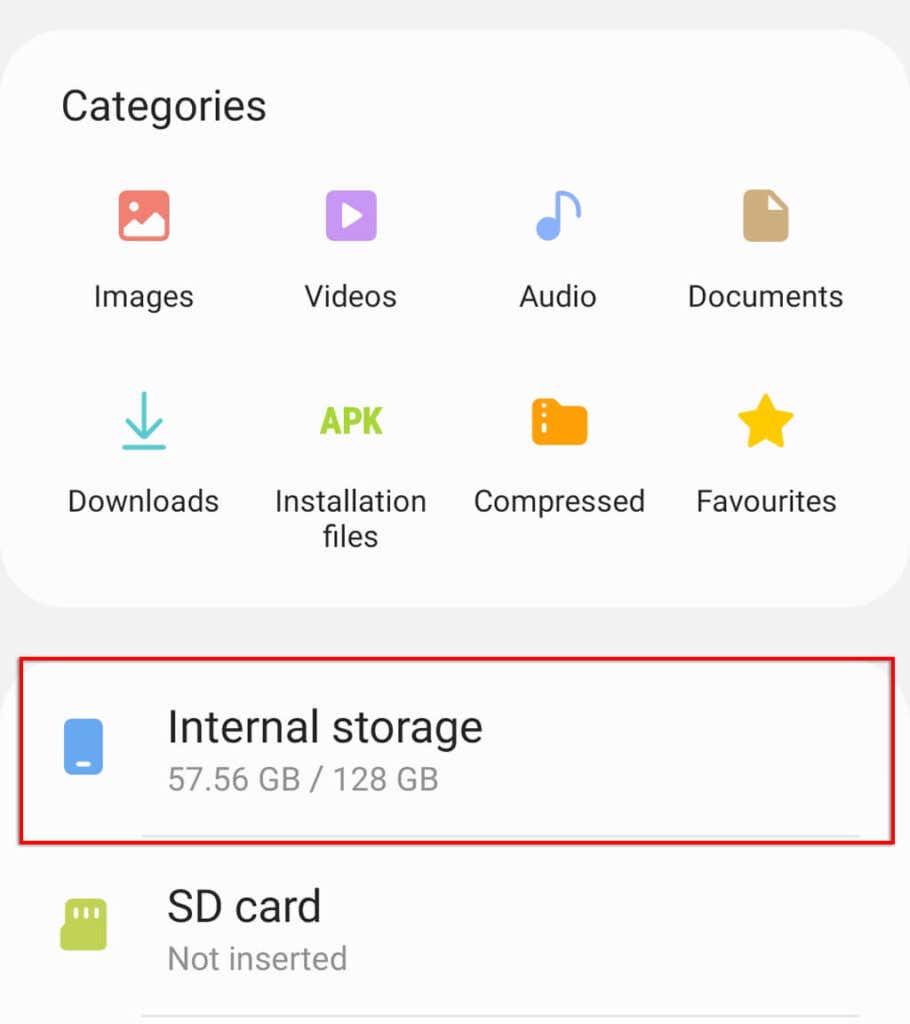
- You then need to navigate back to Internal Storage in My Files.
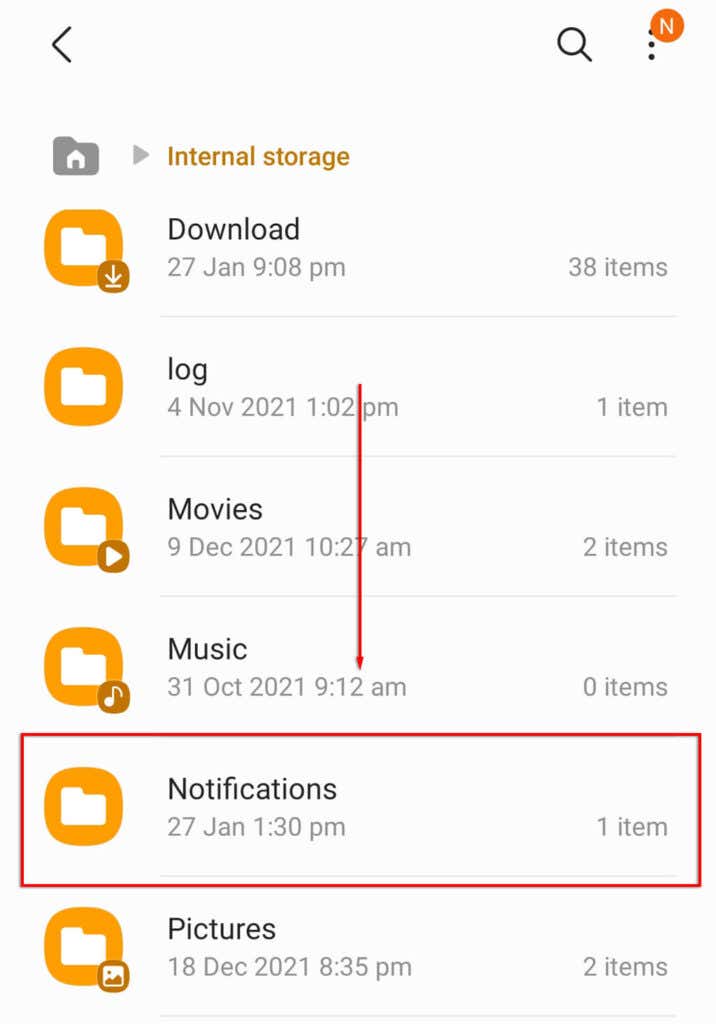
- Scroll down and tap the Notifications folder.
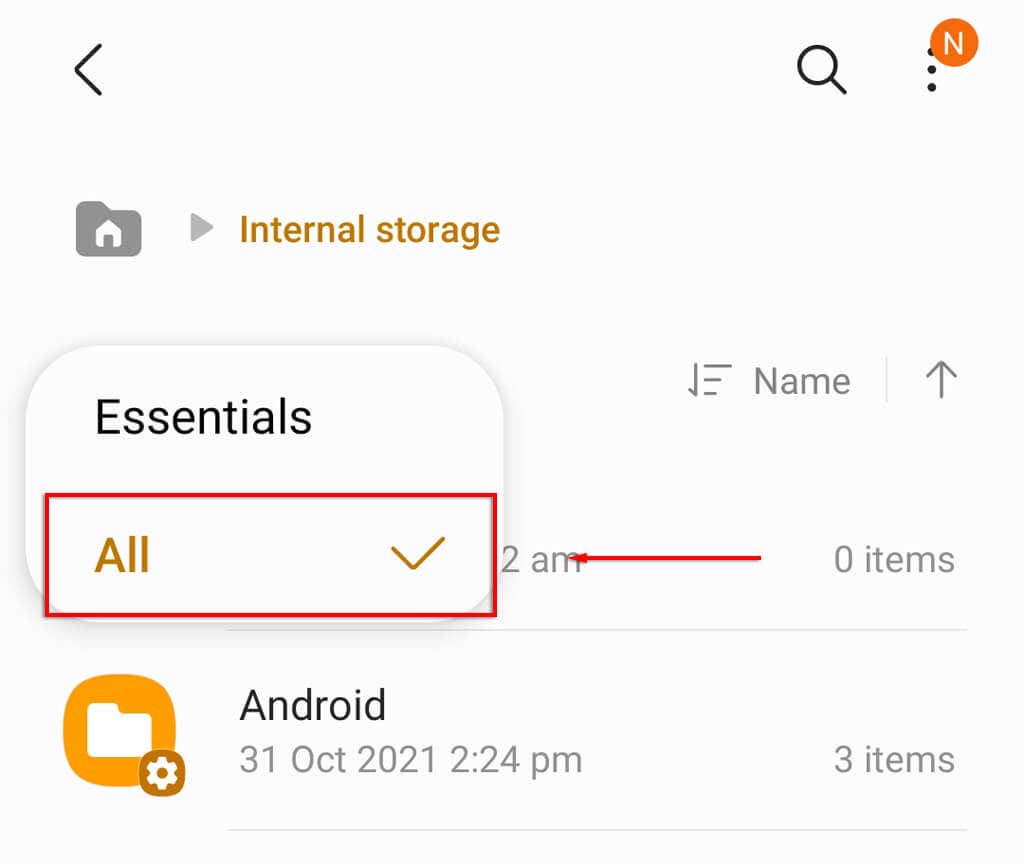
Note: If Notifications isn’t visible, tap the dropdown arrow at the top-left of the screen and select All.
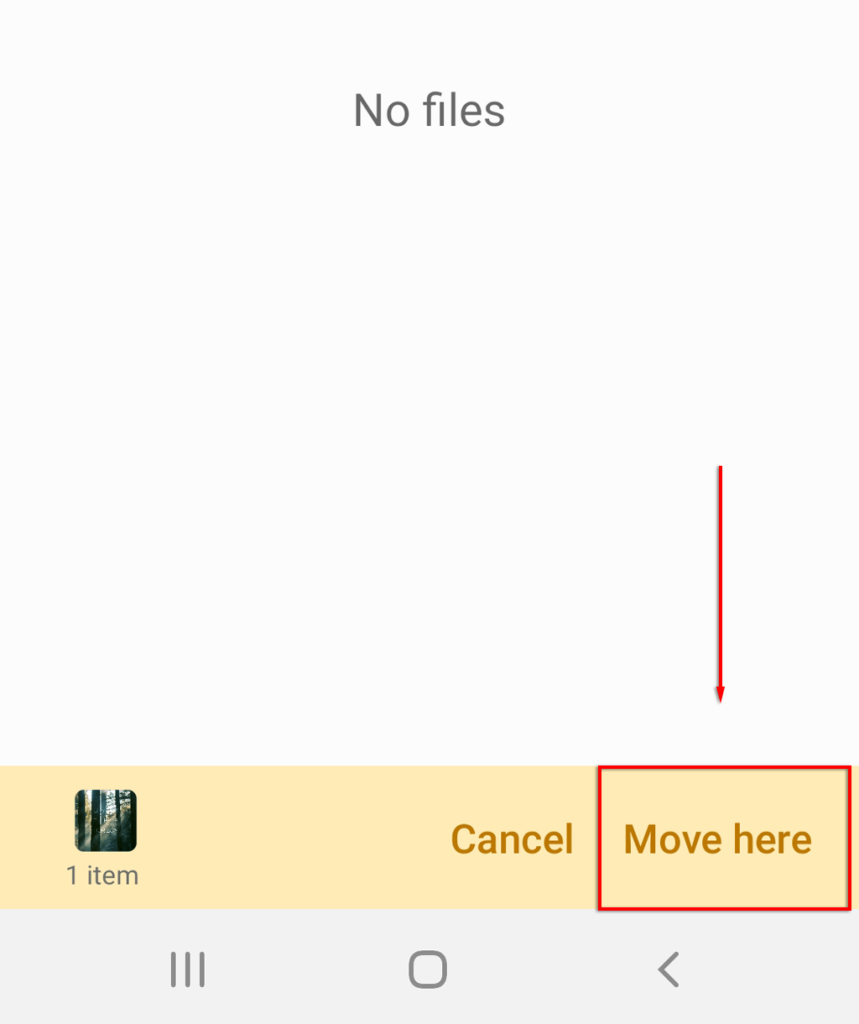
- Tap Move here.
- Open the Settings app and navigate to the Notification sound setting (on Samsung, tap Sounds and vibration. On Pixel, tap Apps & Notifications > Notifications).
- Select Notification sound (Default notification sound on Pixel).
- Your MP3 file should be present under Custom.
Get Notifications Your Way
Notifications seem never to cease, whether it’s from social media or a game. And this is where Android’s customization options come in handy. Personalizing your notifications is a great way to add your touch to your phone and avoid getting sick of hearing the same tune over and over again.
