One of the most popular types of videos people watch on YouTube are gaming videos. If you’re a fan of this type of content, you might be thinking about what it would take to create your own gaming YouTube videos.
You’ll find that, if you truly have an interest in gaming, it doesn’t take much to put this kind of content out there. Having a computer and your favorite games is all you really need to make a basic gaming video.

However, if you want to step up the quality of your videos, there are many ways you can do this. For most of these tips, too, you can implement them for free or very affordably. If you want to have a gaming channel that creates traction on your subscriber count, it’s important to pay attention to how you take and edit your videos.
Screen Record Your Games
If you want your videos to have the sharpest and clearest picture, screen recording your game is a must. Depending on whether you are using a console or PC, this could be extremely easy or difficult to find.

If you are playing your games on a PC, there are a good amount of free screen recorders out there. A popular one is OBS, which many streamers use for their gaming, but it also has screen recording capabilities. You can read our guide on how to install and use OBS on Windows and Mac.
If you use Windows 10, you can also screen record with the Game Bar. To open this, all you have to do is press the Window key + G.
If you’re using a console, your method of screen recording will vary depending on what console it is.
PS4
The PS4 makes recording videos extremely easy. All you need to do is double press the Share button and the recording will start. You can change the length of recording sessions by tapping the Share button once, then going to Sharing and Broadcast Settings > Video Clip Settings > Length of Video Clip.
Xbox One
While playing the game you want to record, press the Xbox button. When the menu is open, press the View button. Then select Record From Now. You can record videos up to 10 minutes long, however if you want longer videos you can use an external hardrive to record videos for up to an hour.
Use a Microphone & Camera
Besides the actual gameplay portion of your video, you’ll also want to decide whether or not you want to add commentary. The most popular gameplay videos usually include this, but it’s up to you.
If you are planning to speak over your gameplay, you may want to think about buying a nice microphone. You can use your computer’s built-in mic, but you definitely will be lacking in audio quality. A good, relatively cheap option are the Blue Snowball microphones.

If you don’t want to buy a microphone just yet, another option is to use the microphone on your smartphone device. Apple iPhones have an app called Voice Memo, which can record any length of audio. For Android users, most devices have an app called Voice Recorder. These apps get the job done pretty well if you don’t have a microphone to use.
If you also want to record your face while playing the game, your computer camera should work fine unless you’re planning on this being more of a focus in your videos. If so, investing in a higher quality camera might be the route to go.
Download Video Editing Software
Once you have recorded all your gameplay and audio, you’re going to need some software to put it all together. There are many free or low-priced video editors out there that you can use. For free options, there is Movie Maker for Windows, or iMovie for Mac users. If you’d like something with more features, Davinci Resolve is free and provides users with a high-end editing software.

Once you’ve found the software you want to use, import all your video and audio recordings. To streamline this process, watch all your captured videos first and decide what you want to keep in and cut out. Also be sure your audio matches up to the gameplay where you want it to.
You can also add effects such as music or text if you wish. Just be sure you don’t overdo your effects, as this takes focus away from the actual gameplay and could make viewers click away.
Create a YouTube Video Thumbnail
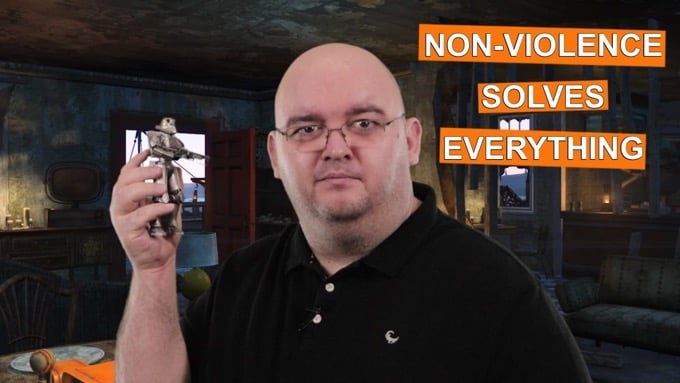
One of the most important things you can do to get more views on your video is to create an eye-catching video thumbnail. You can do this in most photo editing software pretty easily. Here’s an example of one of our own from our YouTube channel.

To make a good thumbnail, include some bright and colorful images related to the game you’re playing, or a good reaction shot of your face if you’re including yourself in your videos. Adding text to your thumbnails can also help, and this should be bright and noticeable as well.
The important part of making a thumbnail is to make your viewers want to click on a video, as if they will miss out on something important if they don’t watch it. Making the thumbnails colorful overall can help indicate that the video is going to be a fun and interesting watch.
Link To Your Channel & Other Videos
When uploading your video, add links to your channel and other videos so that viewers can easily locate them. You can also place clickable links directly in your videos using annotations in YouTube’s video settings.

Just click on the video you’d like to add these to and select Edit Annotations. You should be able to go to any point in your video to add an annotation. Most YouTubers, though, like to add these at the end of the video so they aren’t distracting to viewers during the main content.
By linking to your channel and videos, you’re much more likely to increase your views and subscriber count overall.