Do you get a “SIM not provisioned” or “SIM not provisioned mm#2” error when you insert a SIM card on your phone? Read this article to learn why you’re getting this error message and 8 potential solutions to the problem.
This error tells you one thing: your phone doesn’t recognize the SIM card. Consequently, you’d be unable to send or receive voicemails, use cellular data, or perform other activities that require a SIM card. If this describes your current situation, refer to the troubleshooting steps below.
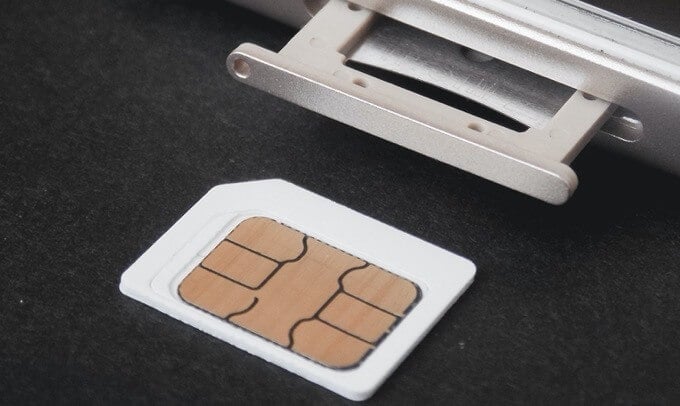
But first, let’s expand a bit on this error and its causes.
What Does Sim Not Provisioned Mean
When your Android or iOS device says your SIM isn’t provisioned, there’s a problem preventing it from connecting to the SIM card’s carrier network. If the SIM card is new, perhaps it hasn’t been registered or activated by the carrier provider.
You may also encounter this error if:
- The carrier network has blocked your SIM card.
- The carrier network is experiencing downtime, particularly with SIM card activation.
- You’re using the SIM card in an unsupported location that’s outside the carrier provider’s coverage area.
So how do you fix this error? Let’s get to it.
1. Enable Airplane Mode
Put your phone in airplane mode, wait for a few seconds, and turn it (airplane mode) back off. That will refresh your device’s connection with your cellular carrier and eliminate the “SIM not provisioned” error.
Open your phone’s Notification Drawer (for Android) or Control Center (for iPhone) and tap the airplane icon.
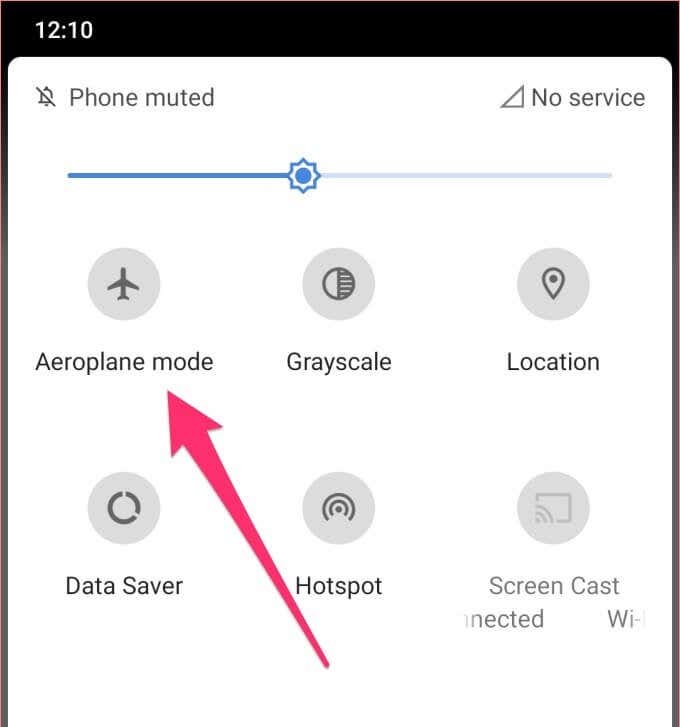
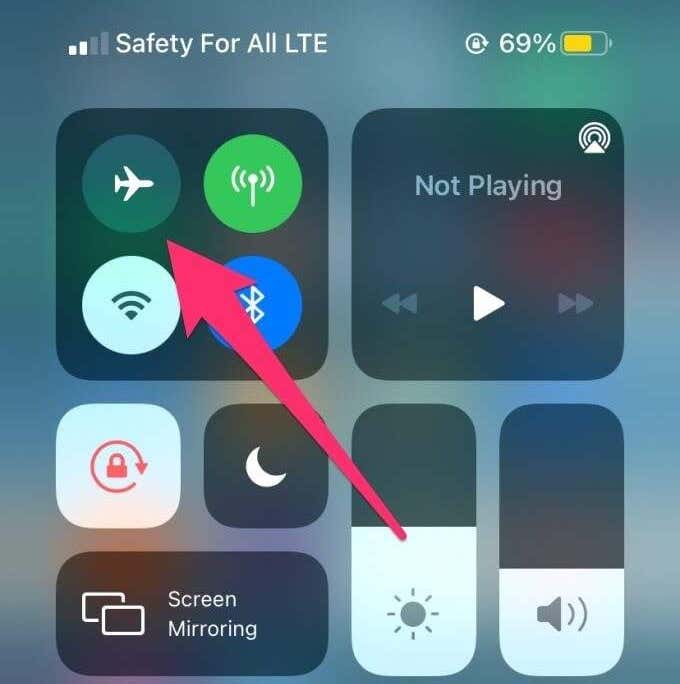
Wait for a few seconds and tap the same icon to disable airplane mode. Try the next trick if your phone still displays the error message.
2. Restart Phone
Rebooting your phone could also fix this problem. When your phone comes back on, wait for a couple of minutes for the SIM to get activated on the carrier network. If this doesn’t resolve the problem, it’s time to get some laundry done.
3. Clean SIM Card and SIM Ports
Your phone may fail to detect and activate your SIM card if there are foreign materials on the SIM tray, SIM slot/port, or on the SIM itself. By foreign materials, we’re talking about dirt, grime, dust, etc. Make sure your SIM card and SIM port are free of these materials.
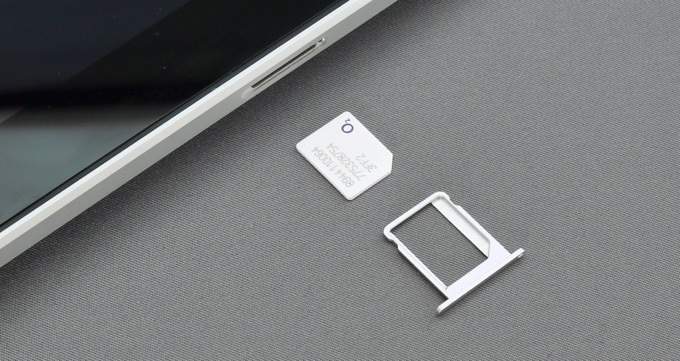
Eject your phone’s SIM tray and clean both the SIM card and the port(s). Before you do that, we recommend powering off your device.
Use a soft and dry cloth to clean the gold contact of your SIM card. Do the same for the SIM card tray and slot. Be as gentle as you can, though; do not exert too much pressure while cleaning the SIM card slot so you don’t break the metal contacts.
For hollow SIM card ports, you can blow off loose dirt using a can of compressed air. Do not blow air into the port with your mouth; water vapor from your breath could damage the port. Reinsert the SIM card and make sure it’s properly fitted on the SIM tray and inserted correctly in the port.
4. Try Another Port or Phone
On some dual-SIM smartphones, the error message indicates the faulty SIM card—for example, “SIM 1 not provisioned” or “SIM 2 not provisioned”. Switch the affected SIM card to a different SIM slot on your phone and check if that resolves the problem.
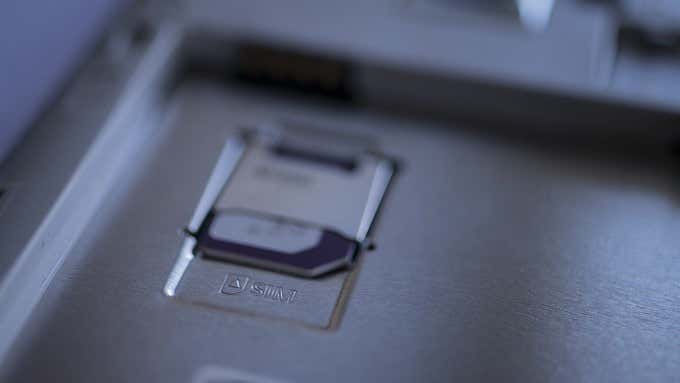
If the error persists, try inserting the SIM card on another smartphone. If it works, then there’s something wrong with your phone’s SIM card slot or cellular antenna. Visit an authorized service center to get your phone examined for potential hardware damage.
However, if other devices also fail to recognize the SIM card, you should contact your cellular carrier (see method #7).
5. Install Carrier Settings Updates
If there’s a carrier settings update for your phone, installing it could help fix the problem. Carrier Settings have a variety of functions. When your cellular carrier introduces new features—Wi-Fi calling, for example— they’re rolled out to your device via carrier settings updates. These cellular settings hold configurations that power basic functions like phone calls, mobile data, SMS, personal hotspot, etc. on your phone.
Bug fixes that patch cellular connectivity issues are also rolled out to your phone via carrier settings updates. Usually, these updates are automatically installed when you insert a new SIM card into your phone. Sometimes, you’ll get a prompt instructing you to install a cellular update.
On some occasions, you’ll have to manually check for cellular settings updates. Follow the steps below to get it done.
Note: Installing carrier settings updates require Wi-Fi or mobile data connection.
Install Carrier Settings Update on iPhone
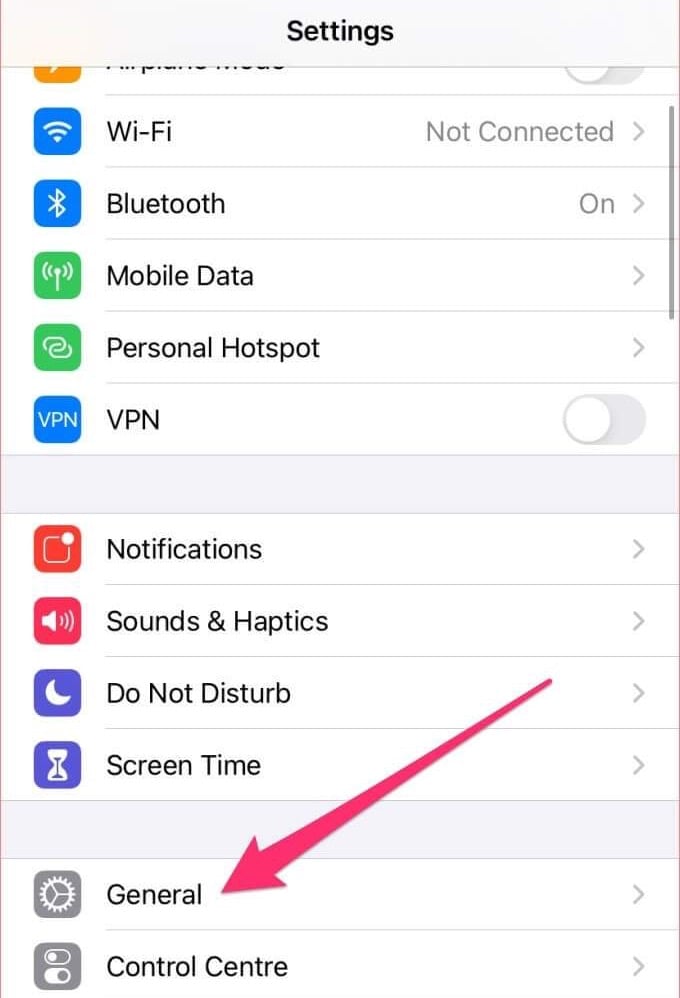
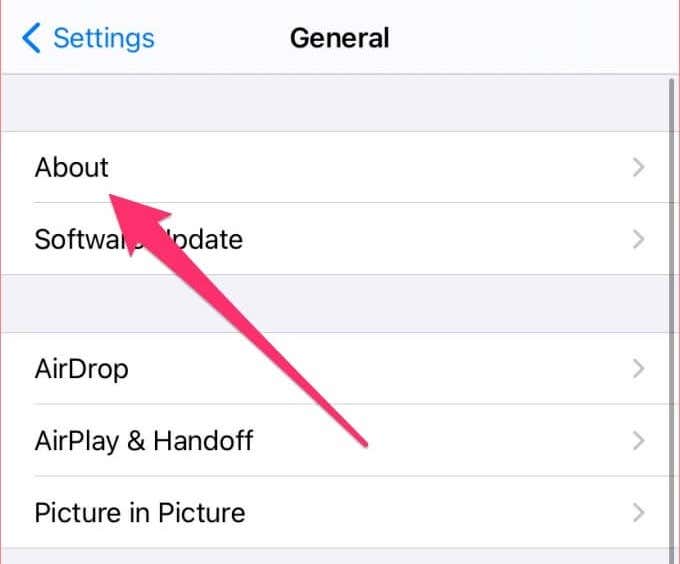
Go to Settings > General > About and check for an option to update carrier settings. If you don’t find this option on the page, your iPhone has the latest carrier settings.
Install Carrier Settings Update on Android
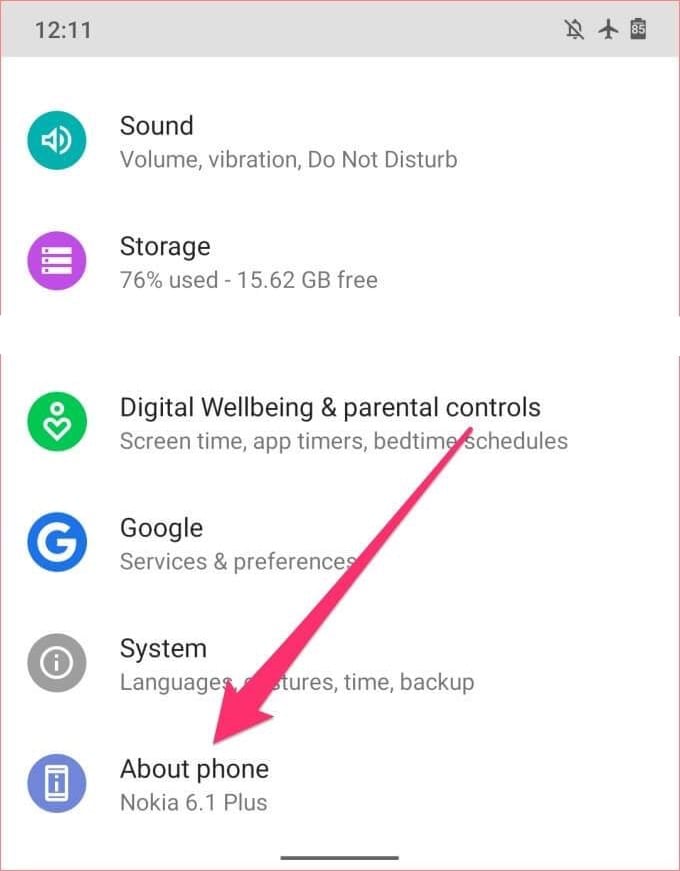
Navigate to Settings > About phone and look out for an Update profile button. On some Android devices, you’ll find this option on the System updates page; go to Settings > System > Advanced > System update.
If you don’t find a carrier settings update on both pages, check if your phone has a dedicated Carrier Settings page. You may find this in Settings > Cellular network > Carrier settings. Better yet, search for “carrier settings” using the search box on the Settings page.
Your phone most likely has the latest carrier settings installed if you don’t find an option to manually update it.
6. Update Carrier Services App (for Android)
The Android operating system has a dedicated app that handles cellular handshake between your phone and your carrier network. It’s called the Carrier Services app. You may get the “SIM not provisioned” error if the app has a bug that’s preventing your phone from communicating with the cellular carrier.
Follow the steps below to update the Carrier services app on your Android smartphone.
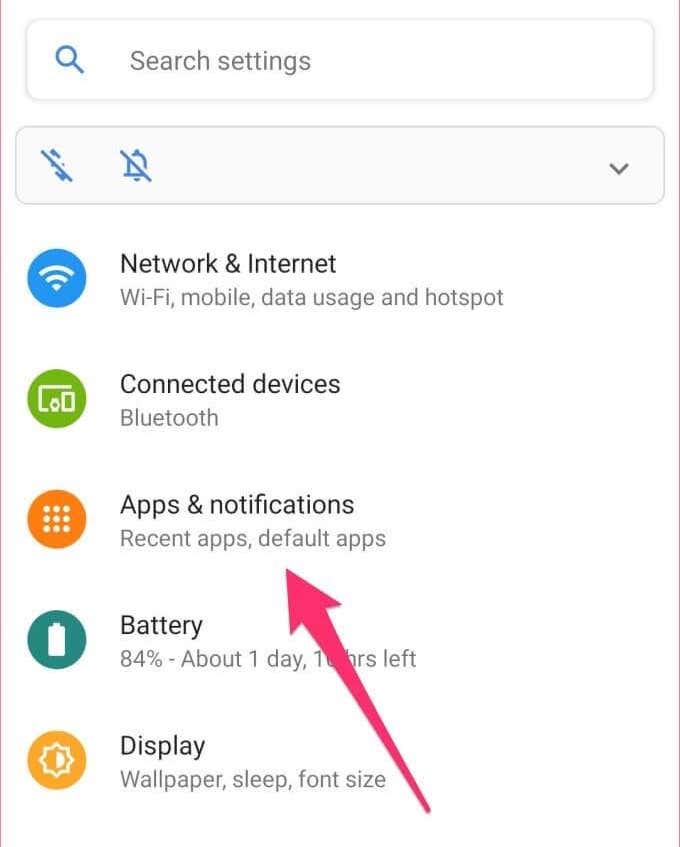
1. Go to Settings and select Apps & notifications.
2. Tap See All Apps.
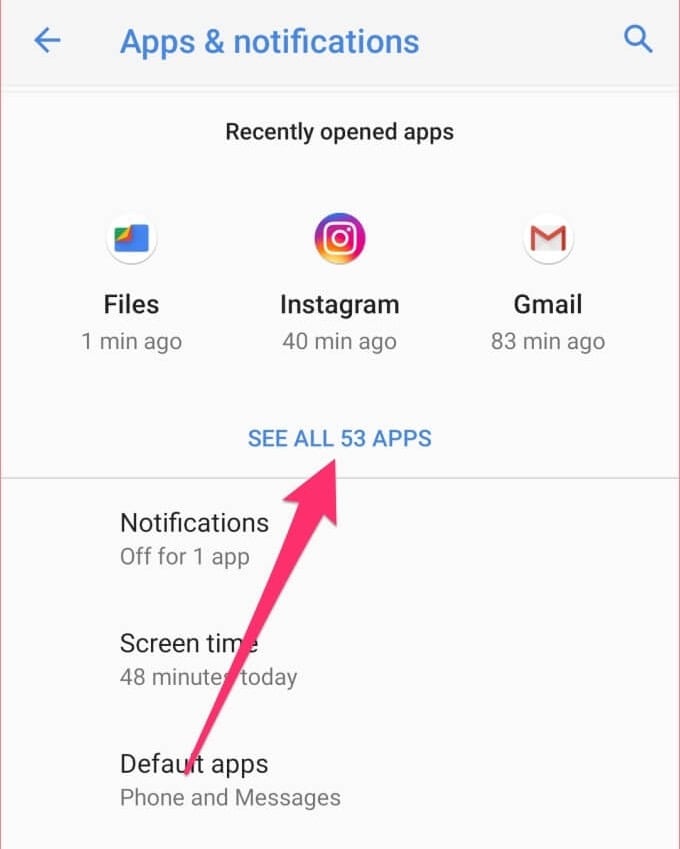
Note: Some Android devices have this option as App info.
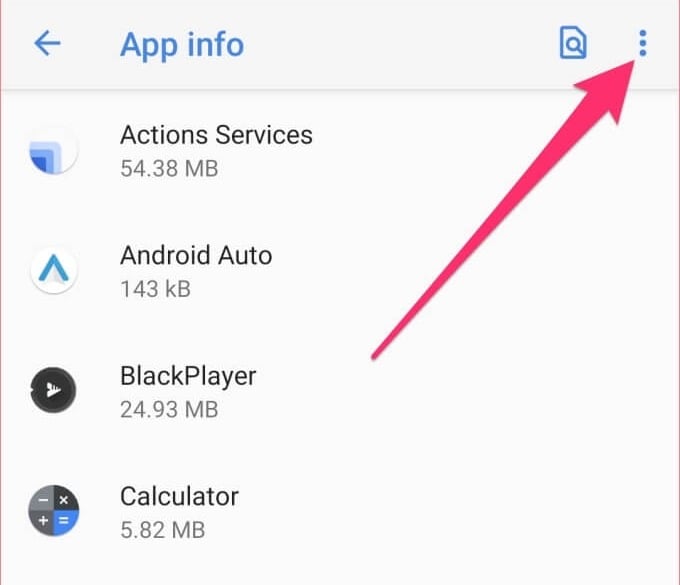
3. Next, tap the three-dots menu icon at the top-right corner of the page and select Show system.
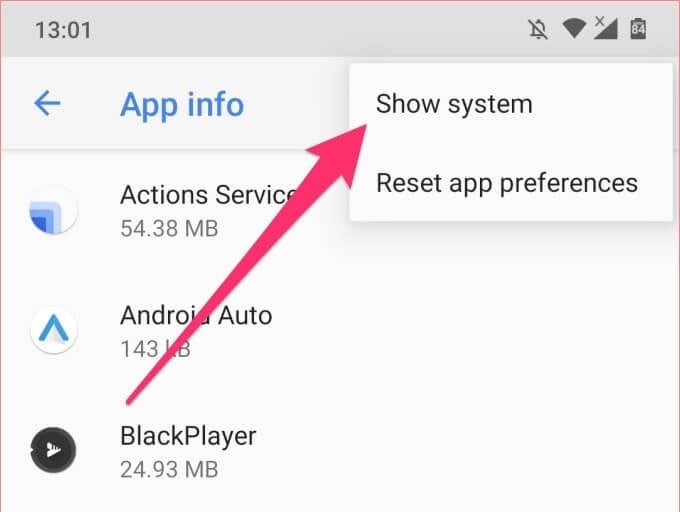
4. Scroll though the apps and select Carrier Services.
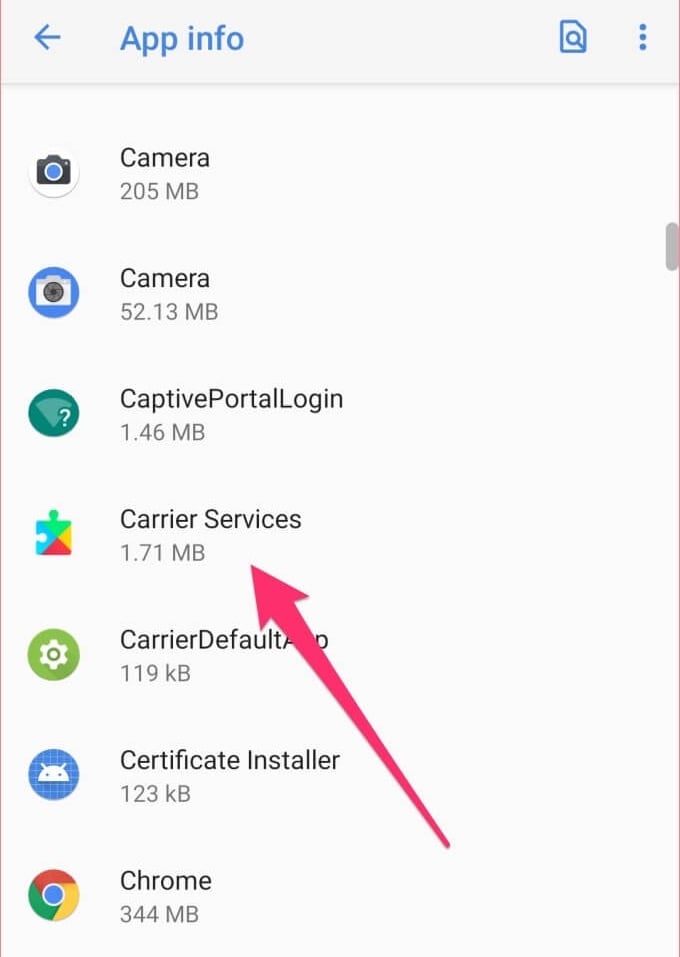
5. Tap the Advanced drop-down option.
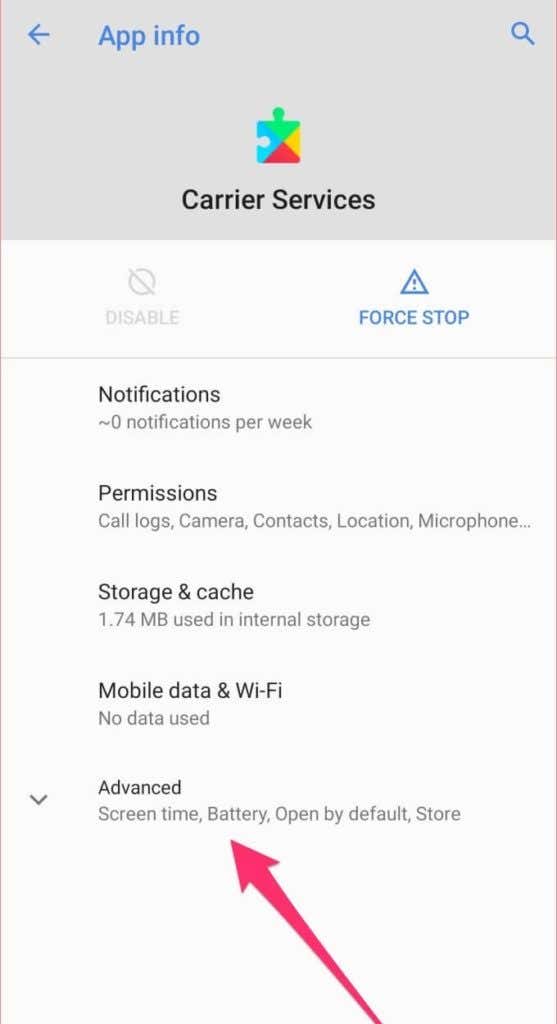
6. Scroll to the Store section and tap App details.
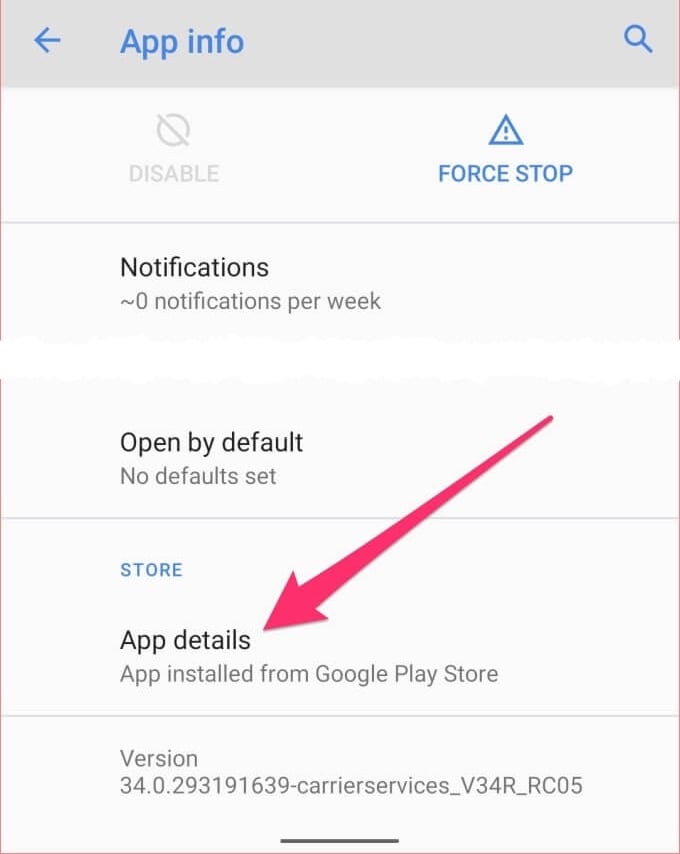
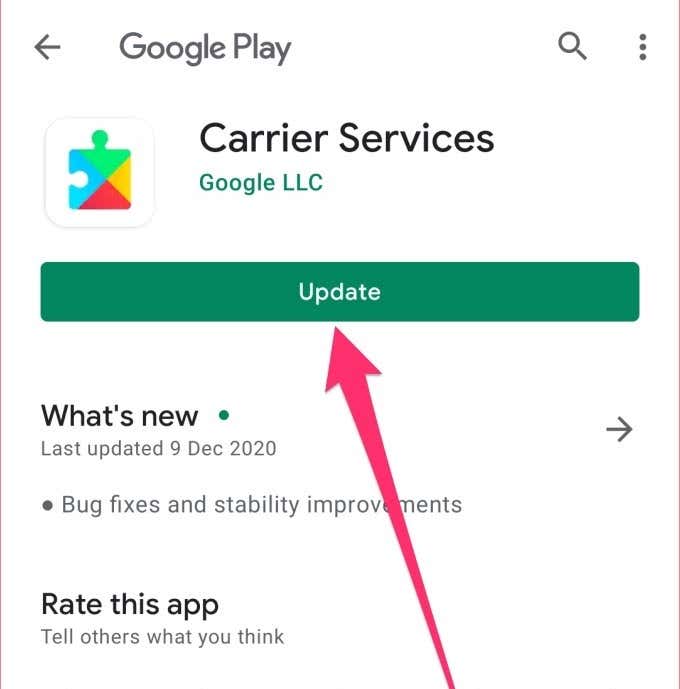
That will redirect you to the Carrier Services app page on the Google Play Store.
7. Tap the Update button to install the latest version of the app on your phone.
If the “SIM not provisioned” error persists after updating the app, restart your phone and see if that helps.
7. Contact SIM Card Provider
Should none of the solutions mentioned above fix the problem, you have one last card to play: seek help! Reach out to your cellular carrier company (via email, social media, or phone call) for further help. Ask if your SIM card is active or registered on their network and let them know the steps you’ve taken so far to fix the problem.
Restore SIM Card Functionalities Easily
Hopefully, you’ve been able to get your SIM card working again. If you’re still struggling with the “SIM not provisioned” error, even after contacting your network carrier, you may have to get a SIM replacement.