If you want to flip an image in Google Docs, you’re (almost) out of luck. There’s no button you can press to flip an image, but you can use a few workarounds instead.
These include editing your images using the built-in drawing tool and third-party tools like Adobe Express online. You can also change an image in Google Slides and import it back into Google Docs.
Using the Drawing Tool In Google Docs
The Drawing tool in Google Docs isn’t designed to be the best tool for image manipulation, but it’ll do the job if you need to create diagrams or enhance images.
Technically, the Drawing tool is an extension of Google Drawings, a basic, standalone app for making diagrams and basic images. The Drawing tool allows you to make further changes to your images, such as rotating, cropping, and adding text.
Most importantly, one feature it does allow you to do is to flip images, which you can use to edit your Google Docs images. To flip an image in Google Docs, follow these steps.
- Open your Google Docs document and position the cursor where you want the image to appear.
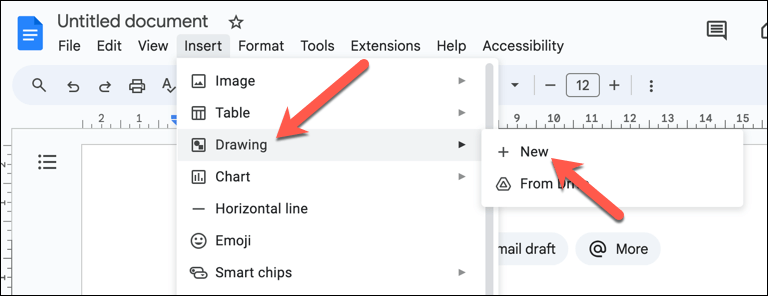
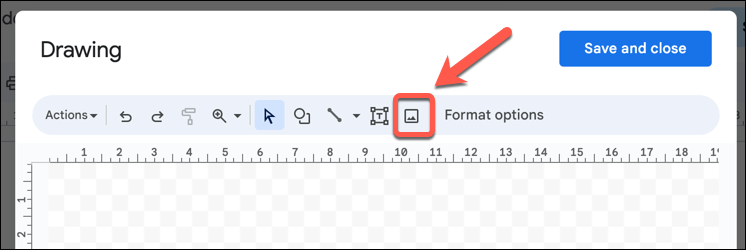
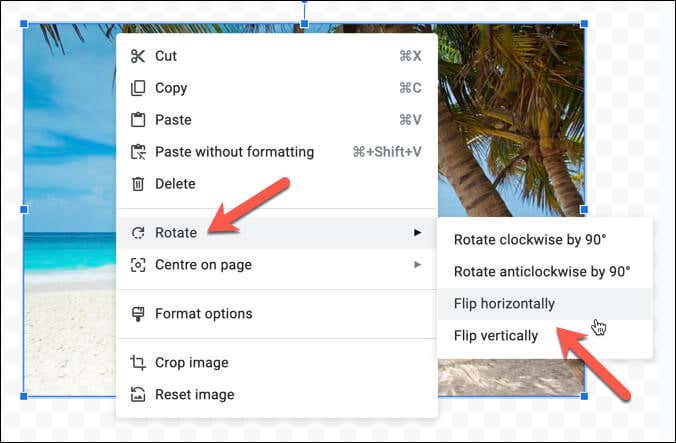
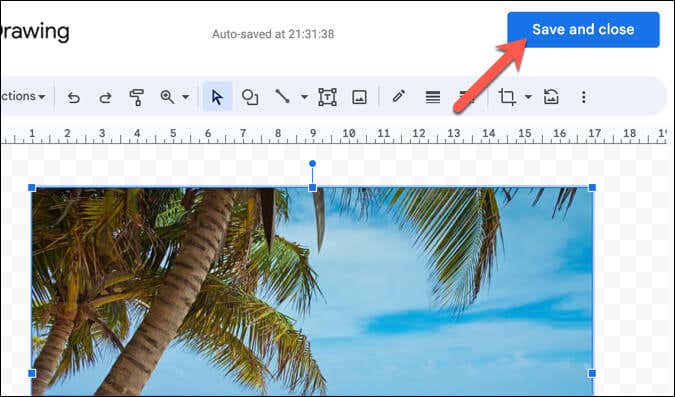
Once you’ve inserted the modified image, it’ll replace the original in your document.
Using the Free Image Flipping Tool in Adobe Express Online
Adobe Express is an online, paid-for tool that you can use to edit images from your web browser. While much of its functionality requires payment, you can use some of its more basic features for free.
That includes the ability to flip images, and the process is straightforward. To flip an image using Adobe Express, follow these steps.
- Open your web browser and navigate to the landing page for the Adobe Express image flipping tool.
- Press Upload Your Photo to begin the process. If prompted, sign in with your Adobe account credentials.

- Once you’ve signed in to Adobe Express, press the Upload from device button in the panel on the left.
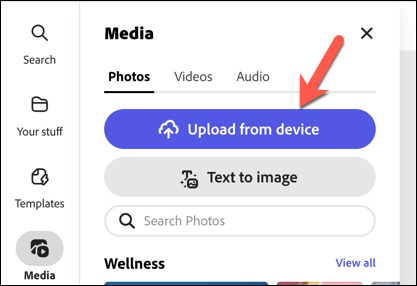
- Check if the image fits as intended, or use the corners to resize it accordingly.
- With your image selected, use the options in the left panel to flip your image. You can choose Flip Horizontally or Flip Vertically based on your needs.
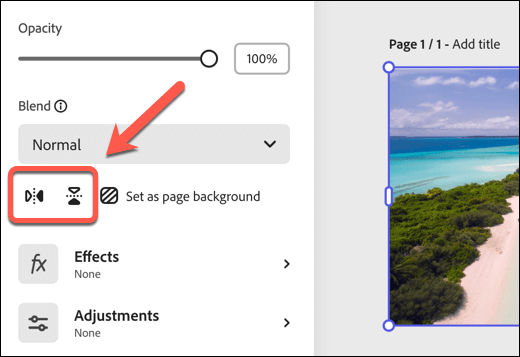
- Once you’re satisfied with the orientation, press the Download button on the top-right corner to save the modified image.
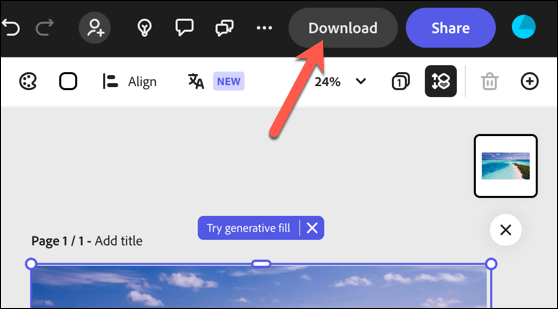
- Choose the file format you want to use, then press Download in the pop-up menu.
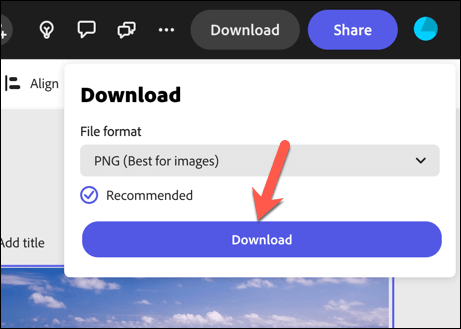
- Next, open your Google Docs and press Insert > Image > Upload from computer.
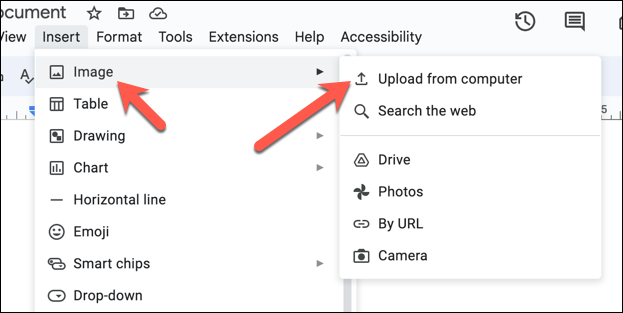
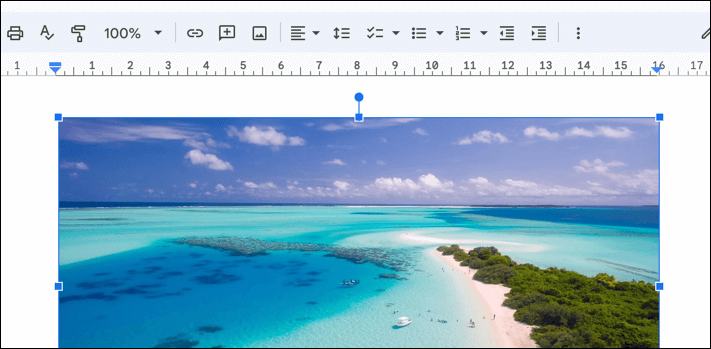
- Select your image from your PC. Once inserted, move and resize the image, as required.
Using the Flip Image Tools in Google Slides
Can’t flip your images in Google Docs? Switch to another Google app instead—Google Slides. While Docs doesn’t have a button to press to flip your images, Google Slides does, and you can use this feature to help you flip your images before moving them back to your Docs document.
To flip an image in Google Slides, follow these steps.
- Open a new presentation in Google Slides.
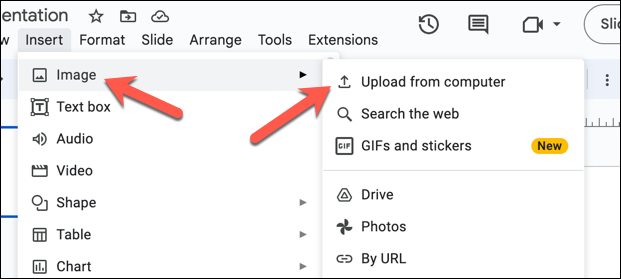
- Press Insert > Image and select your preferred method for inserting it (such as Upload from computer) to add the image you want to flip into the slide.
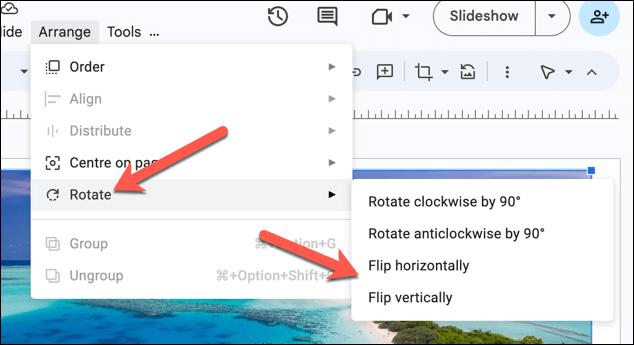
- Select Arrange > Rotate and then select either Flip horizontally or Flip vertically.
- Resize the image to fill the entire slide.
- Once you’re satisfied with the flip press File > Download and choose either the JPEG or PNG options to save the image to your computer.
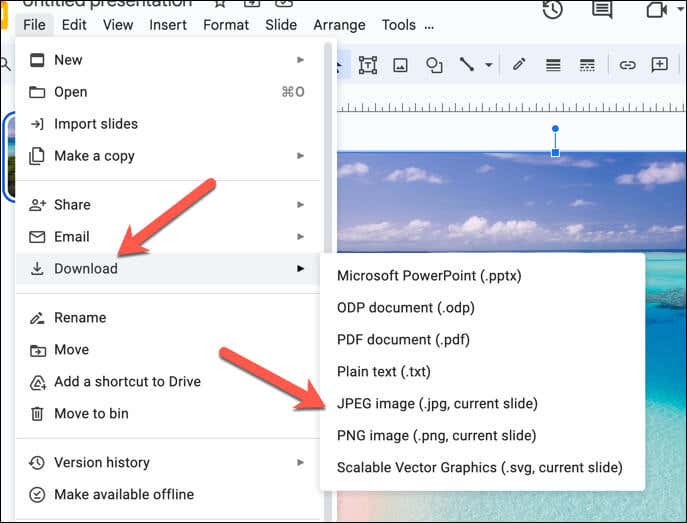
- Wait for the image to download. Once it does, open your Google Docs document and press Insert > Image > Upload from computer to insert your flipped image into your document.
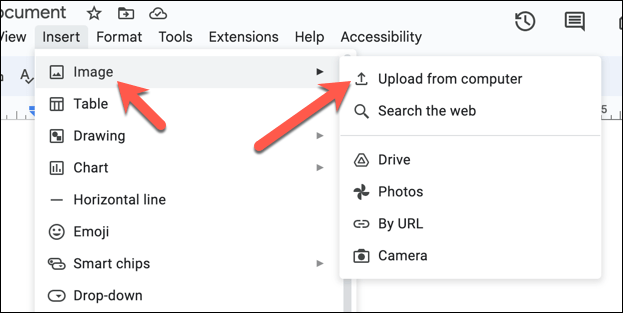
At this point, your flipped image should be ready for Google Docs, maintaining the changes you applied in Google Slides.
Editing Images in Google Docs
Google Docs isn’t designed as a fully-fledged image editing tool, but you can quickly flip an image in your Google Docs document using the steps above.
Have you got Microsoft Word? You can always flip an image in Word instead before importing the document (and your image) into Google Docs.
