Originally designed with the online gamer in mind, Discord has become a juggernaut in the world of VoIP communications. So much so that gamers, still the app’s most prominent userbase, no longer hold exclusive rights to its services.
Consider yourself a budding chef in search of new recipes? Join a cooking server. Perhaps you want some pointers on how to better advertise for your online business? There’s a Discord server for that too.

Discord in 2019 isn’t just for gamers anymore. This welcome change can be solely attributed to Discord’s hard stance on accessibility.
It should be no secret that almost since it first hit the market, Discord has remained dedicated to keeping its servers free and open to all major platforms and operating systems. This includes the likes of every power user’s most preferred operating system, Linux.
Windows and MacOS may receive all of the headlines, but Linux remains the go-to option for those who seek a more secure and simplistic operating system. The focus of this post is to offer all Linux novices, dabblers, and veterans alike, a step-by-step procedure for procuring access to Discord’s services, in as painless a process as possible.
Installing Discord For The Ubuntu Linux OS
The whole process is very straightforward and can be completed in just a short time, so long as you have a basic grasp of Linux commands. Ubuntu users specifically will find they have a more streamlined option of installation through the use of conveniently bundled-in packages that can be found on most Linux application sites.
There are two primary ways of acquiring Discord for Linux, both of which will require you to type in a command or two. I’ll be going over both of them, starting with the much faster method of using snapcraft.io. This will be followed by the more traditional way, requiring a slightly lengthier time investment, but also the most familiar to longtime Linux users.
Regardless of the method that you ultimately choose, the results will be the same.
The Sprint
This method will require that your version of Linux has snap package management capabilities. For all Ubuntu 16.04.4 LTS or later users, Snapd comes pre-installed. For earlier versions of Ubuntu, you’ll have to install Snapd manually.
If you find yourself in the latter camp, open the terminal (Ctrl+Alt+T on your keyboard) and enter the following command.

sudo apt update
sudo apt install -y snapd
Once you’ve got Snapd installed, you’ll also want to download the Snap Store app. This is the site where the Discord package you’ll be downloading is located.
Type this command into the terminal.

sudo snap install snap-store
Access to the Snap Store is now available to you. Not only for Discord but any future apps you may want to add. But for now, you can use the Snap command to install Discord for Linux.
With your terminal still open, type in the following.

sudo snap install discord
Hopefully, you already have a headset with a working microphone ready because Discord is now your oyster. You can begin using the app with the Ubuntu Linux OS whenever it strikes your fancy.
Just type the command $ discord into the terminal and you can join the 250 million other registered Discord users around the world.
For those Linux veterans who prefer a more traditional approach to installation, or newbies who’d like to learn a thing or two, the next section is meant for you.
The Marathon
Before you can begin, you’ll need a few dependencies that Ubuntu requires. This just means that other programs are required before you can get your hands on the Discord app.
Luckily for everyone, the necessary dependencies are available in an easily installable package.
Open up your terminal and enter the following command.

sudo apt install libgconf-2-4 libappindicator1
Mission accomplished. Now that that is over, the next step depends on if you prefer the use of commands to that of the GUI.
New-User Friendly
The GUI was meant for newer Linux users who may be more familiar opting for a graphical interface for installations rather than typing in commands. Anyone coming from either of the big two (Windows, MacOS) will find more comfort in choosing this option.
Open up your web browser and migrate over to the official Discord website. The site should automatically detect that you’re running Linux and suggest that you download the .deb package.
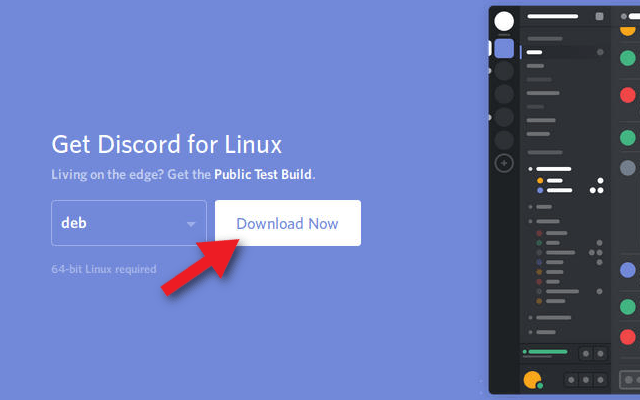
Click the Download Now button.
You’ll be asked by your browser if you would prefer to open the file with the Ubuntu software installer or simply download the file. Either option is fine but things will be a lot simpler by selecting the software installer.
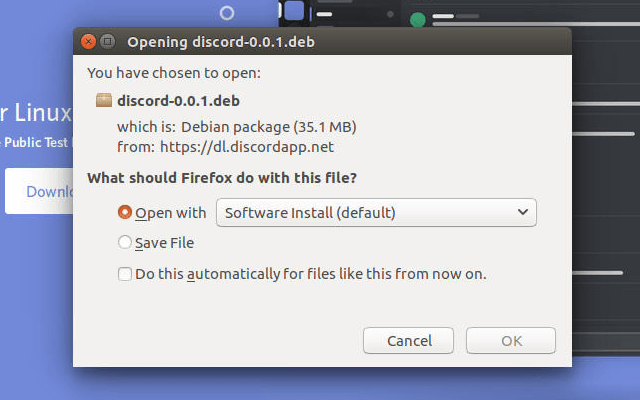
The download should be quick, and you’ll soon be able to install the newly-acquired Discord package. Click on the Install button and wait for the process to run its course.
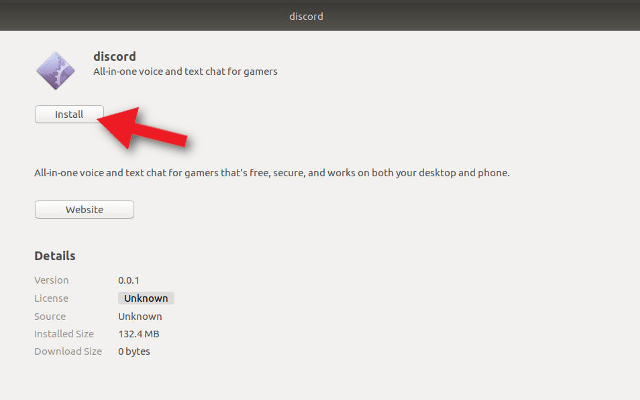
Discord will be available for use once the installation is complete.
Bring On The Commands
Not a big fan of the GUI? Prefer the use of terminal commands as the original creators intended? Then these are the steps you’ve been waiting for.
Open up a terminal and change it over to your download directory.

cd ~/Downloads
We’ll be using wget in order to retrieve the .deb package for Discord.

wget -0 discord-0.0.1.deb https://discordapp.com/api/download?platform=linux&format=deb
Complete the download and use dpkg to install the .deb package.

sudo dpkg -i discord-0.0.1.deb
You now have access to the Discord app. Open up your software launcher and type Discord into the search. Click the icon to launch the app when it appears.
Prior to participating in the service, Discord will require that you’ve previously registered an account. You will find the Register link toward the bottom of the login prompt window.
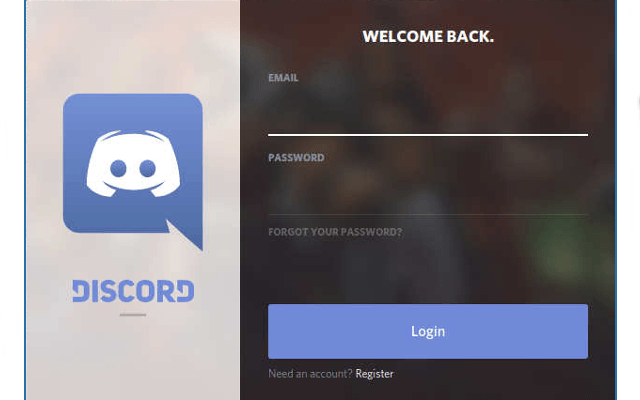
Already have an account? Even better. Just use your credentials to sign-in and begin using Discord immediately.