A popular effect to imitate through video editing is a glitch effect. You can use this beginner-friendly effect in many different ways in a project, such as a storytelling device, an artistic effect, or a transition. It’s also one of the more fun effects to create, as you can experiment a lot with how the glitch looks.
Below we’ve outlined a basic step-by-step method to creating a glitch effect in Adobe Premiere Pro that you can use for almost any project. However, feel free to take this tutorial as a base and experiment with it to achieve the look you want. In this article, you’ll also find some suggested ways to take your glitch effect to the next level.
How to Make a Glitch Effect
Many people make these effects using After Effects or plugins. However, it’s entirely possible to make a stunning glitch effect using Premiere. Follow these steps to create a basic glitch effect.
- Place the clip you want to use for your effect in the timeline.
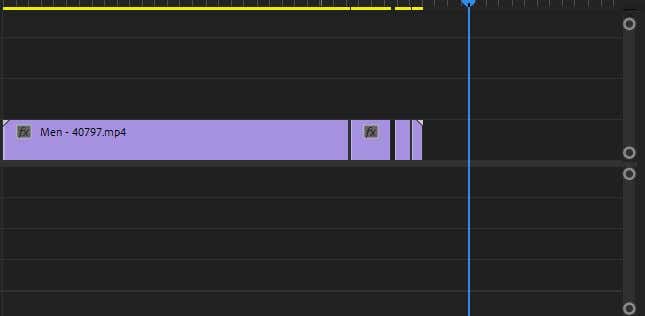
- To make the footage cut in and out, split the clip at the point you want the glitch out to start, and then spread them out a bit, as in the screenshot below.
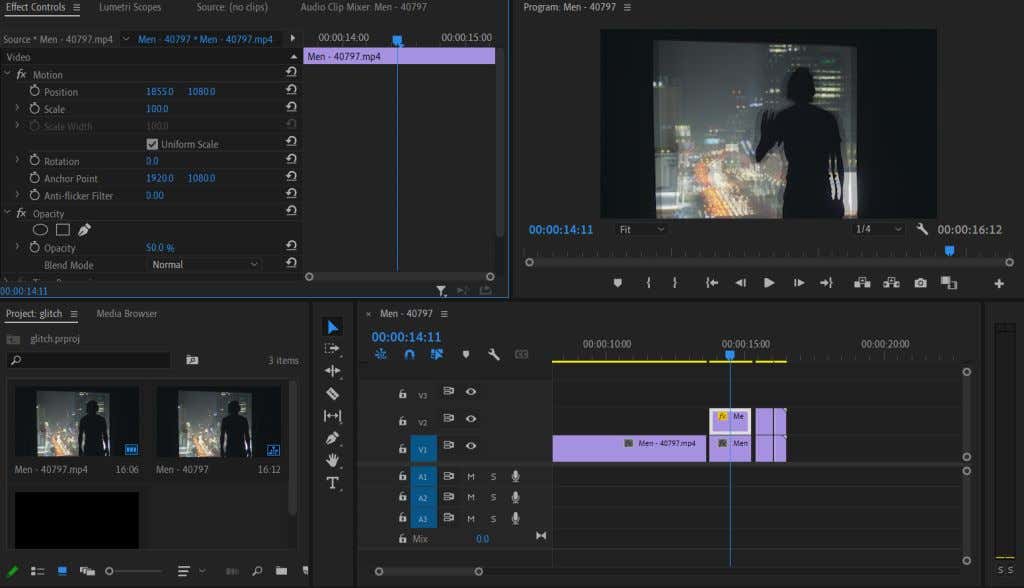
- Now, right-click to select and copy all the split-up clips, then paste them onto the V2 timeline above your original clips to make a duplicate layer.
- Select one of the duplicated clips and go to the Effect Controls panel. Go to the Opacity value, and set it to 50%. Then, under the Motion dropdown, change the Position values so that the overlay duplicate clip is slightly off from the original. Do this step with the rest of the duplicates as well. You’ll want to change up the position and possibly the scale values to create some variety in the glitch. You can also play with Blend Mode to get different looks.
This is sufficient for a basic glitch effect. However, you can make even more customizations to take it to the next level.
Customizing Your Glitch Effect
You can make your glitch effect look even more realistic with a few effects you can add in Premiere. You can experiment with these effects to make your glitch effect look the way you want it, depending on the look you’re trying to achieve.
RGB Effects
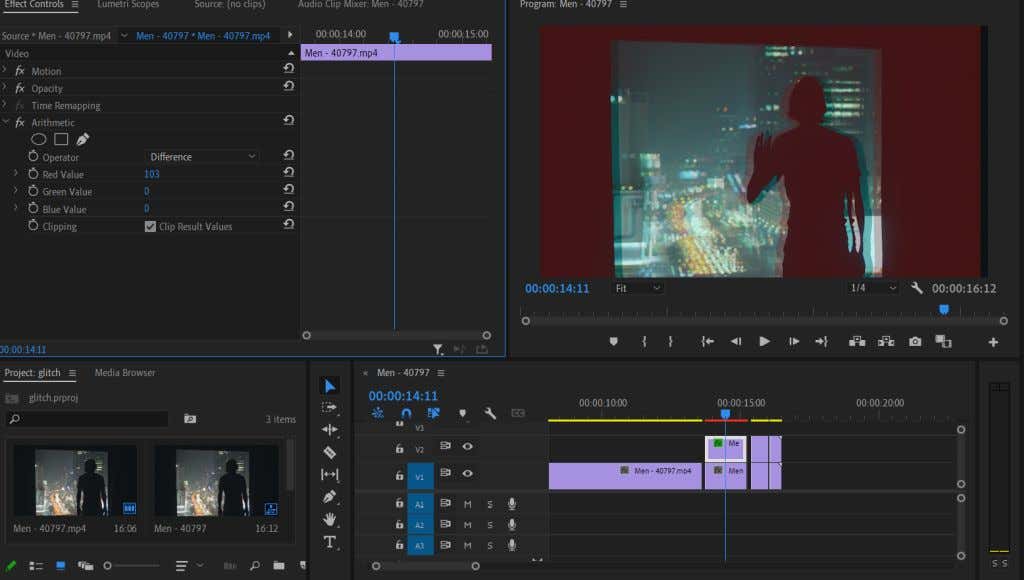
To get a good glitch art effect, you’ll want to play around a bit with the RGB values of the duplicated video clips. This can give you more of a glitched-out VHS or camera effect. Here’s how to do this using the Arithmetic effect.
- Go to the Effects panel, search for the Arithmetic effect, or go to Video Effects > Obsolete > Arithmetic.
- Apply it to the clips you duplicated from the original video.
- Go to the Effect Controls panel, and under Arithmetic, change the value of one of the color channels to achieve the RGB glitch effect. Also, change the Operator dropdown to Difference. This changes the blending option to get a cleaner look.
Changing the Red value will affect the saturation of the color, giving you a typical glitch effect. However, try experimenting with the other colors to get different looks. You could also play around with keyframe animations to make the RGB effect cut in and out to add to your overall glitch effect.
Wave Warp Effect
Another nice way of making your footage look glitchy is the Wave Warp distortion effect. This will segment the video in a wave-like pattern like a VHS scan line effect, though you can easily make it look more like a glitch by playing with the Effect Controls.
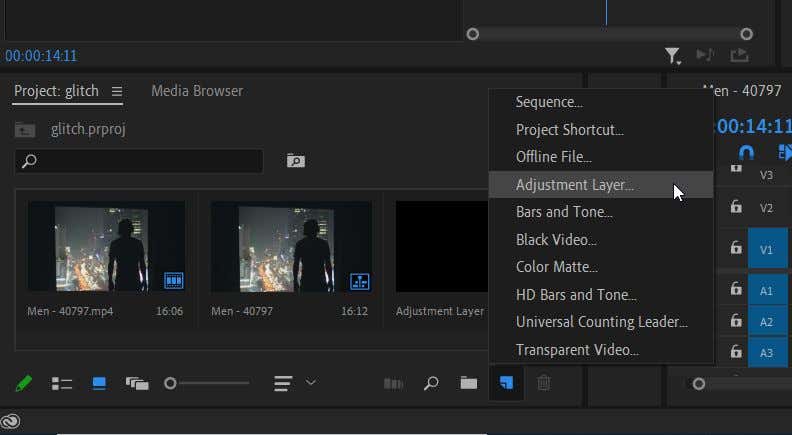
- First, you’ll want to add an adjustment layer to apply the wave effect to both the original and duplicated clips. Go to the bottom-right corner of the Project panel and select New Item > Adjustment Layer. Next, drag the created layer from the Project panel onto the V3 timeline above the cut-up clips.
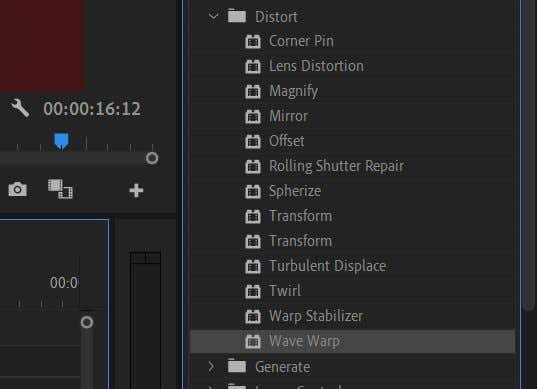
- Go to the Effects panel and go to Video Effects > Distort > Wave Warp. Drag it to your adjustment layer.
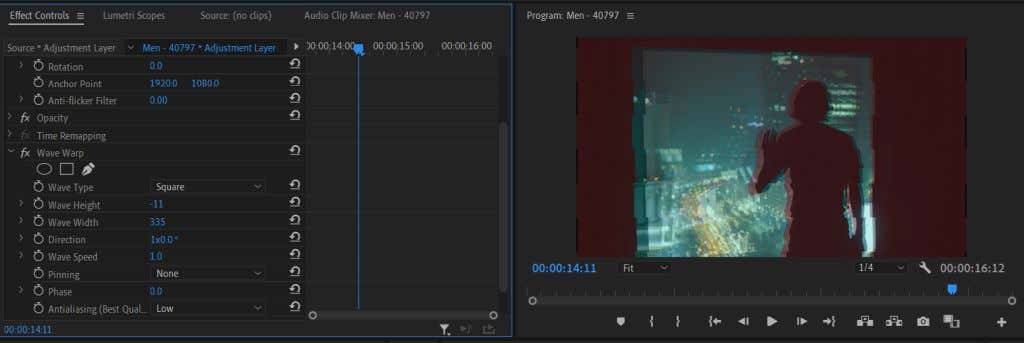
- Now go into the Effect Controls panel and open the Wave Warp dropdown. Here you can play with the effect until it looks the way you like. To achieve a true glitchy effect, try out the Square option in the Wave Type dropdown.
- You can also play with the Wave Width to change the distance between each wave and the Wave Speed to determine how quickly the wave warp moves. You may also want to try using keyframes to animate the wave warp so that the different properties change, making it look more glitch-like.
By playing with these above options, you can get a unique look for your glitch that fits your video.
Make an Exciting Video With a Glitch Effect
The glitch effect has become popular on YouTube and TikTok videos to make them more visually interesting. It can also be used effectively as a storytelling technique to get the effect of a malfunctioning camera or other devices.
Although creating a glitch effect might not be evident at first in Premiere, as there isn’t a simple effect you can apply to make one, it’s still not too tricky if you play around with some of the effects that do exist.
Where would you use a glitch effect in your video projects? Let us know below.
