There are many effects available in the video editor Adobe Premiere Pro CC which can help you make interesting videos. One effect, which can help you emphasize certain parts of your video or create a transition, is a zoom effect. This creates a unique visual effect.
To complete the zoom in effect, you will need to know how to zoom out so you can get back to the original view of your clip. It’s just as easy as doing a zoom in, so once you know how to do that you’ll quickly be able to pick up zooming out too.
In this article we’ll teach you how to do both, and how to use these zoom in and out effects in your own videos.
How to Make a Zoom In Effect
To begin this tutorial, we’ll assume that you already have your project open and the clip you want to apply the zoom in effect to is placed in your timeline. From this point on, you can follow the steps below to create the effect.
- Click on the clip which you want to have a zoom-in effect.
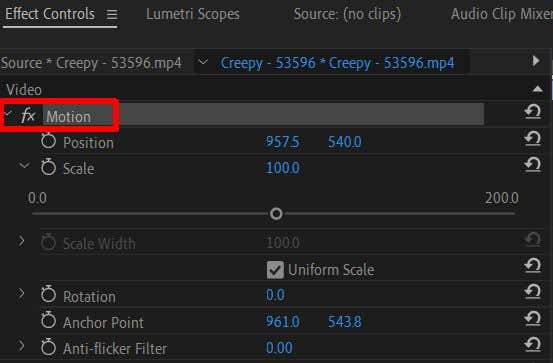
- Head to the Effect Controls panel and open the Motion options.
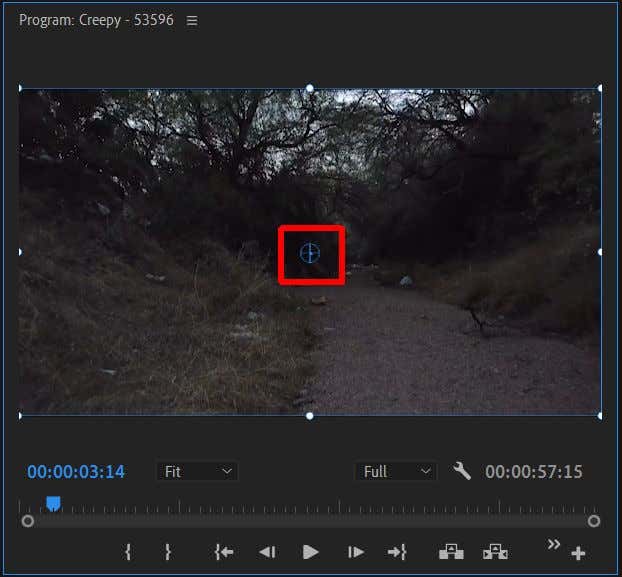
- To zoom in to a particular area of your clip, in the Program panel locate the circular blue target, called the Anchor Point, likely in the middle of your clip when you select it in the panel.
- Using your mouse, click and drag the Anchor Point to the point in your clip you want to zoom in to.
- Now, use the Scale effect by either changing the numerical value or using the slider. Increasing the number will produce a zoom-in on the Anchor Point.
During playback, you may notice the zoom in effect happens as soon as the video clip plays. If you want to have the zoom-in effect take place more slowly, as the clip plays, you’ll need to utilize key frames to do so. If you’re not acquainted with key frames yet, check out our article on the topic first. Then, follow these steps to create a gradual zoom in.
- First, place the Anchor Point on the area you want to zoom in to on your clip.
- Click on the stopwatch icon next to Anchor Point in the Effect Controls panel.
- Now, click on the stopwatch icon next to the Scale effect, after setting it to where you want your zoom in starting point to be.
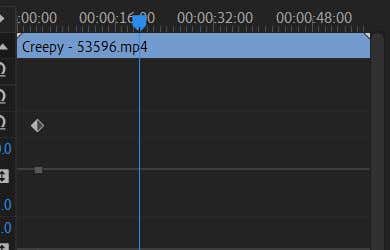
- In the keyframe timeline that appears next to your effect controls, slide the playhead (the blue marker in the timeline) to the point in your clip where you want the zoom in to end.
- Use the Scale effect and set the value so it’s fully zoomed in to the point you want. A keyframe will automatically be set once you change the Scale value.
Keep in mind that the closer together your two Scale keyframes are, the faster the zoom in effect will take place. So, you can adjust the speed by moving the keyframes closer or further apart. This should produce a smooth zoom in effect.
How to Zoom Out
If you’ve already zoomed in and want to zoom back out, the process is relatively simple. Zooming both in and out requires using keyframes, so if you followed the steps above to achieve a zoom in, you can use these next steps to zoom back out.
- From the keyframe of your zoom in point, move your playhead in the keyframe timeline to the point you want your clip to be fully zoomed out.
- Use the Scale effect and slide it back to the original value, before the zoom in.
- The keyframe for the zoom out will automatically be set. You can slide it along the keyframe timeline to alter the speed.
A zoom out of a clip already at its original scale will only make the background behind the clip visible. If you want your clip to begin with a zoom out, you’ll have to first enlarge the scale at the beginning of the clip and use keyframes to create a zoom out from there.
How to Zoom In to Multiple Point In One Clip
Maybe you want not only one, but two zoom in effects within one clip. This is entirely possible, but you’ll have to create your zoom in effects from the beginning with the Position effect instead of the Anchor Point. Follow these steps to create multiple zoom in points within one clip.
- Turn your attention to the Position effect and turn on its stopwatch, opening the keyframe timeline. Also turn on the stopwatch for Scale, making sure it’s at its original value.
- Use the Position controls or double-click on your clip in the Program panel and drag the position of your clip to your new zoom in point.
- Move your keyframe playhead to the point in the clip where you want a second zoom in.
- Use the Scale effect the same as before to create your next zoom in with keyframes.
You could potentially have as many zoom in effects as you want in one clip by following the method above.
Create Visual Interesting Videos With a Zoom In or Out
A zoom in can have many useful or stylistic purposes within a video, and knowing how to create one is important beginner knowledge to have when it comes to video editing. Thankfully, it’s not too difficult to do this in Adobe Premiere Pro, especially if you have some knowledge already in using effects and editing keyframes.
Do you enjoy zoom in or out effects in videos? Let us know your thoughts below.


