Even though it was the first kind of photography, black and white photography remains a popular aesthetic. While some platforms like Instagram provide presets that help you make an image black and white, others do not. This is where image editing programs like Adobe Photoshop CC come in.
In this Photoshop tutorial, we’ll show you six workflows you can use to convert any color image to black and white using Photoshop on Mac or Windows.
How to Make an Image Black and White
Here are six methods to convert your color image to black and white.
Method 1: Use Grayscale
Photoshop now has a feature that automatically converts your images to grayscale. The problem with this method is that it is destructive, so you cannot adjust the saturation and brightness of each color after the conversion.
To use this feature:
- Open the color photo you want to convert.
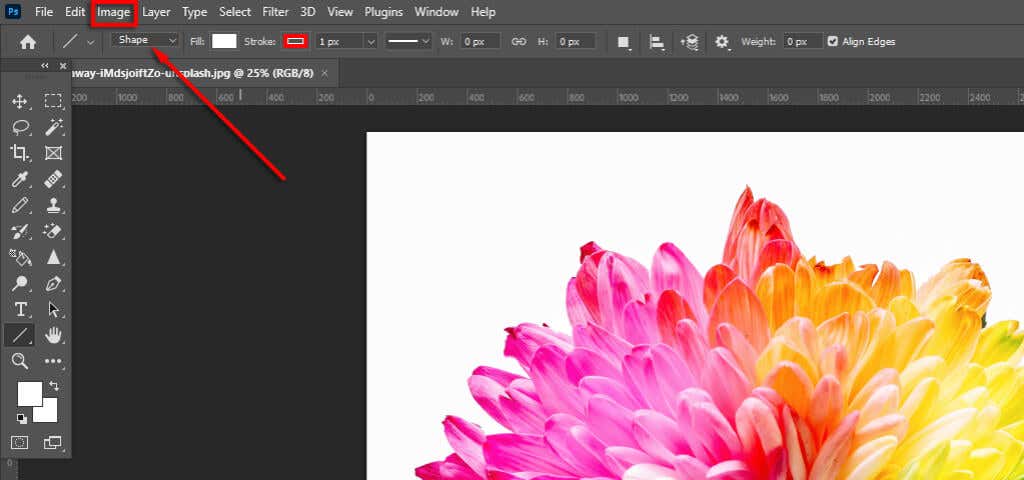
- Click Image.
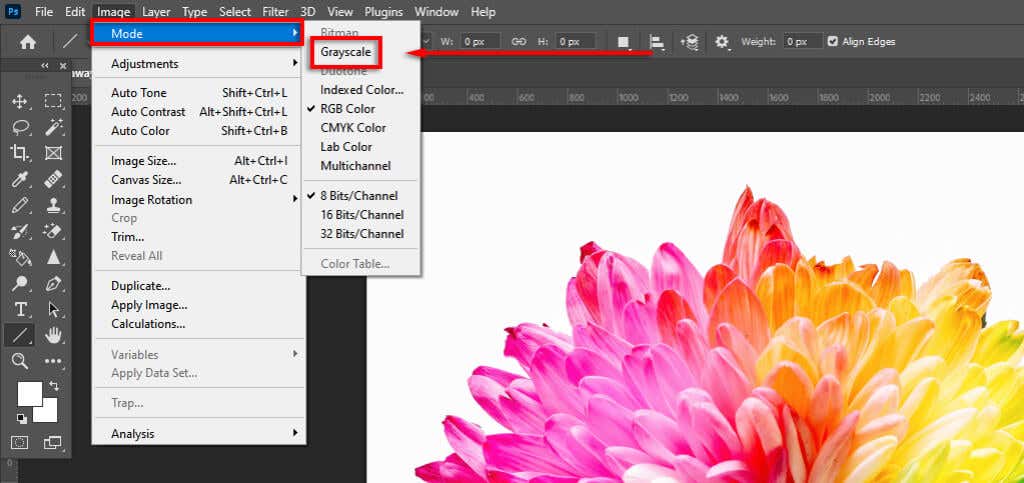
- Click Mode > Grayscale.
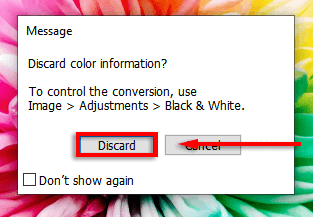
- A dialog box will open asking if you want to discard the color information. Select Discard.
Note: You can also access this feature from the Properties panel by clicking the drop-down menu next to Mode and selecting Grayscale.
Method 2: Make an Image Black and White Using the Black & White Adjustment Layer
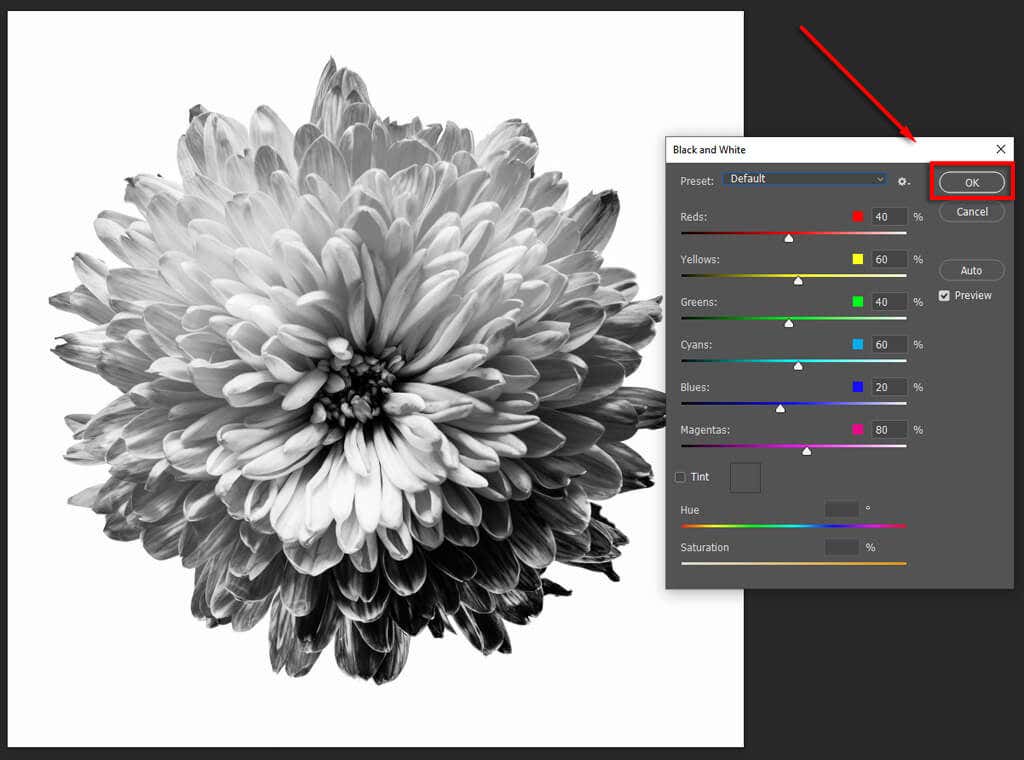
The second way to convert an image to grayscale is using the Black and White adjustment layer. This method will enable you to keep all color data, meaning you can adjust the color values for your desired look. To do so:
- Open the image you want to convert to black and white.
- Click Image.
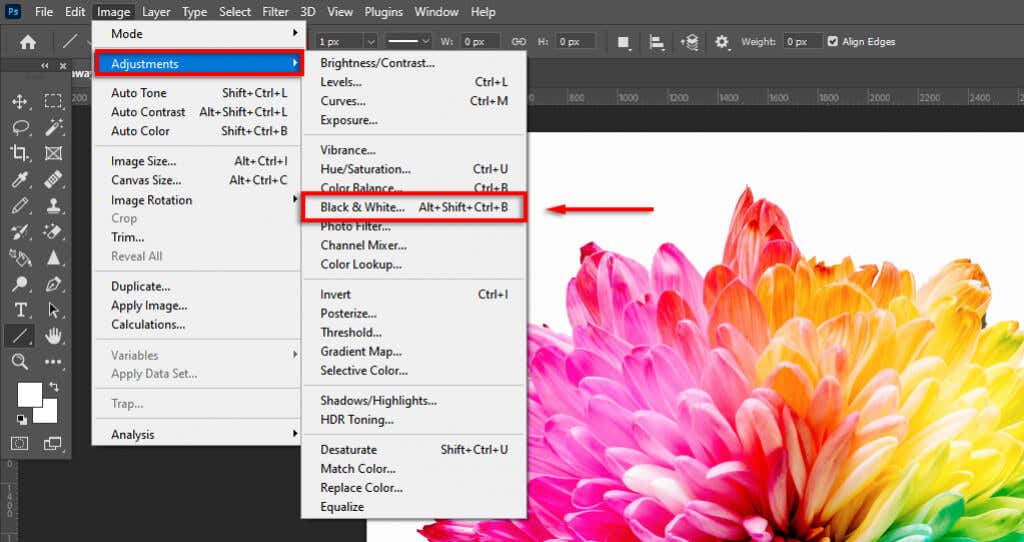
- Select Adjustments > Black & White.
- If you’re happy with how the image looks, click OK. Otherwise, you can fine tune the photograph by playing with the color sliders.
Method 3: Use Hue/Saturation Adjustment Layers
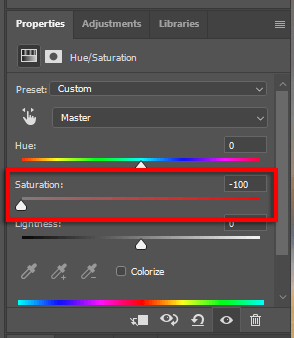
Using the Hue/Saturation adjustment tool is another non-destructive method allowing you to preserve color data.
- Open the color image in Photoshop.
- Click the Adjustments tab.
- Select Hue/Saturation. This will add a Hue/Saturation adjustment layer so your original photograph won’t be affected (i.e., the color data is preserved).
- In the drop-down menu, select Master.
- Slide the Saturation slider to -100.
Note: The Adjustment feature lets you desaturate each color channel separately to apply a selective coloring effect to a black and white photo. To do this, simply leave a specific color channel unsaturated (for example, magenta). Bonus tip, you can use the color selection tool to automatically choose the color you want from a part of the image.
Method 4: Use a Gradient Map
The Gradient Map tool turns color images into grayscale based on the brightness values. With this effect, the darker areas will become dark gray while the lighter areas become light gray.
To use this tool:
- Open the color image in Photoshop.
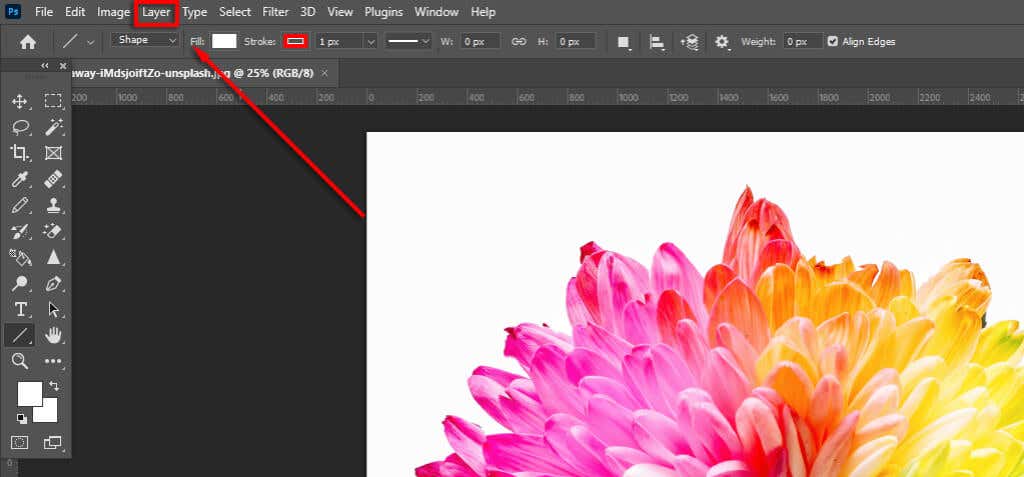
- Select Layer.
- In the drop-down menu, click New Adjustment Layer > Gradient Map.
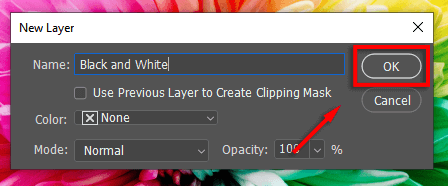
- Click OK.
Method 5: Use the Channel Mixer
The Channel Mixer is another feature that uses color data to create a black and white image to your preferences. This tool lets you mimic the effect of using a color filter when you take a photo.
- Open the color image in Photoshop.
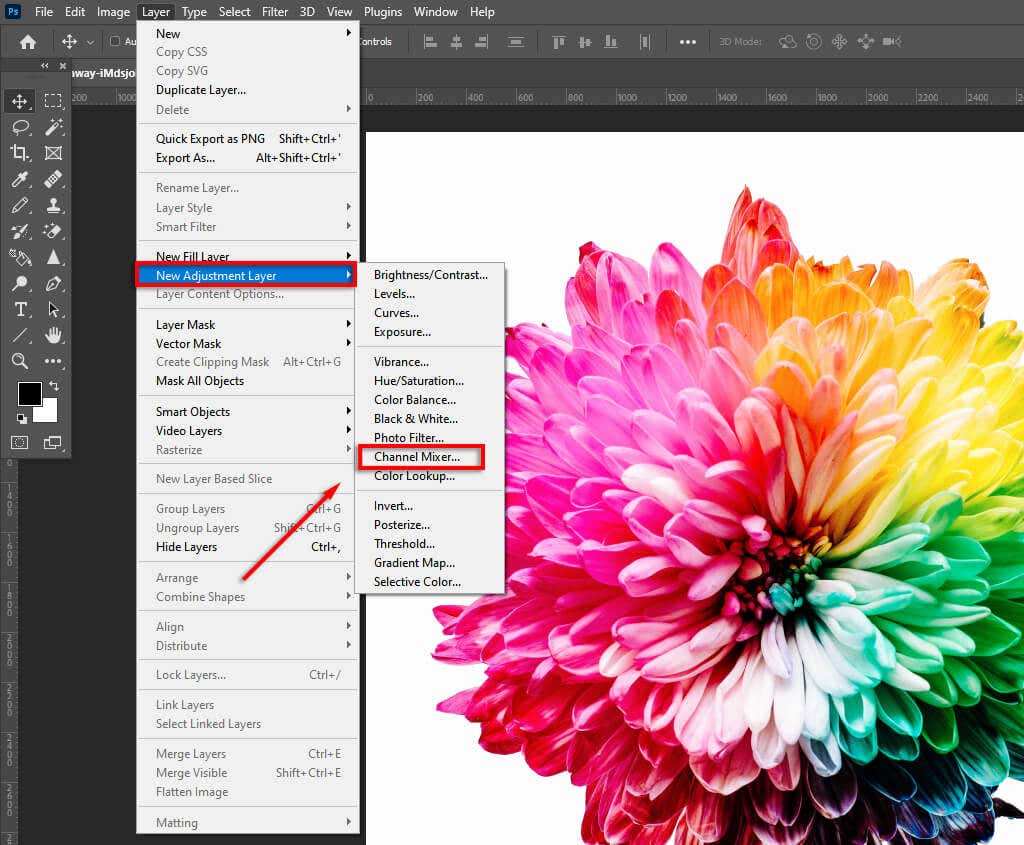
- Select Layer > New Adjustment Layer > Channel Mixer. Alternatively, select the Adjustments tab and click on the Channel Mixer adjustment layer icon.
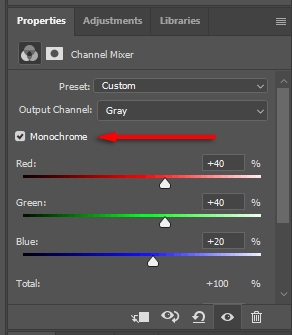
- Tick Monochrome.
- Adjust the RGB sliders until you’re happy with the effect.
Method 6: Use Lab Color
The Lab Color method is destructive (it removes all color data and is permanent). However, the conversion to black and white is more accurate (based on brightness values).
- Open the color image in Photoshop.
- Select Image.
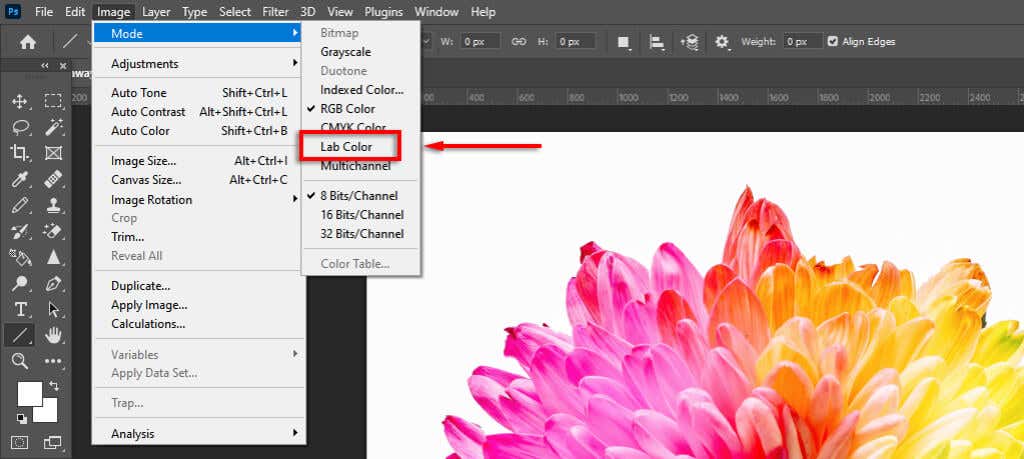
- Click Mode > Lab Color.
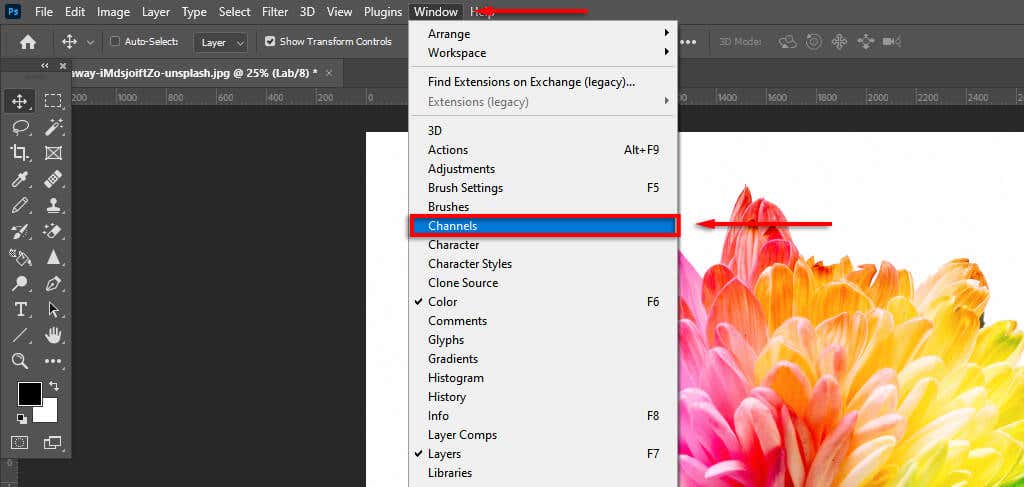
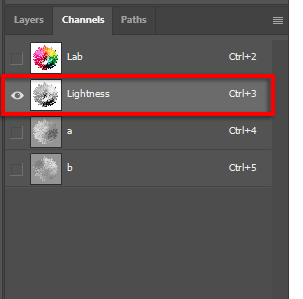
- Select the Channels panel (next to the Layers panel). If it isn’t displayed, open Channels by clicking Windows > Channels.
- Select the Lightness channel.
- Click Image > Mode > Grayscale.
Vintage Photos in Three Clicks
Photo editing tools like Photoshop, Camera Raw, and Lightroom now include many tools for black and white conversions and hundreds of other easy image modifications, helping you make photos exactly how you like them.


