In this guide, I will explain how you can remove a green screen from a video incredibly quickly. The whole process takes just a few seconds once you have installed the software that I’m going to suggest.
Follow the steps below to learn how it’s all done. I will also explain how you can add your own background to the video, or choose to add other effects.

The whole process should take less than an hour if you have a reliable internet connection to install the software.
Getting Started – Installing Free Video Editing Software
To start with, you must install a video editing software. For this guide, I’m going to suggest Hitfilm Express. You can download it from their website for free.

The entire software is free, so long as you give them a share on Facebook or Twitter. You can delete your share after the software has downloaded. Once the software has downloaded, it’s time to get started. Click File in the top left, then click New.
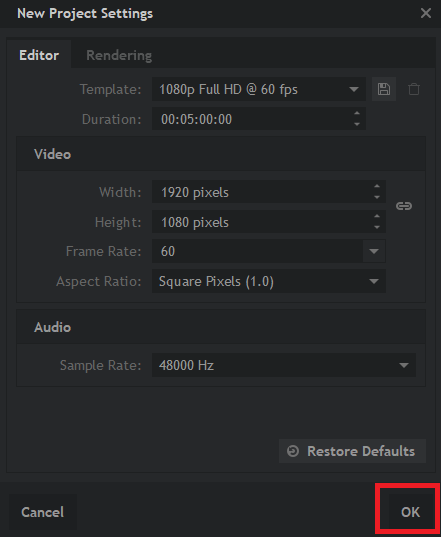
You can select the defaults, which should be 1080p Full HD @ 60 fps. Once they are selected, click OK. If your video has other dimensions, don’t worry, the right dimensions can be applied automatically once the video is added.
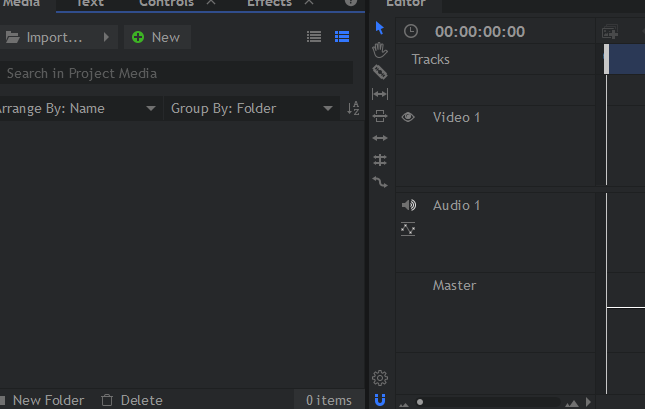
Once you’ve followed the steps above, you’ll be in the editor. The only parts you need to pay attention to for now are the media and editor tabs at the bottom. The media tab is where you need to place your imported video with the green screen. The editor tab works as a timeline and you can drag imported media into it.
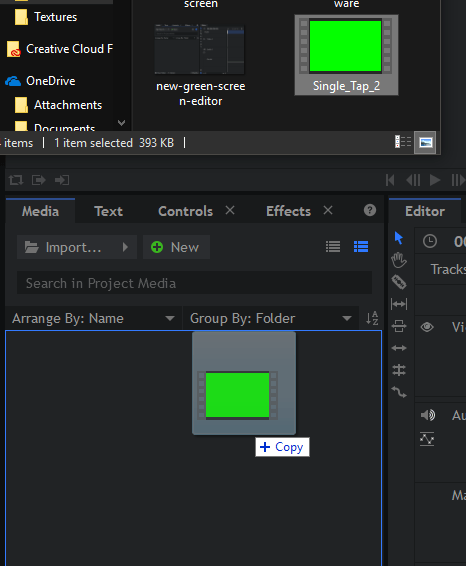
So, let’s begin. Drag your green screen video into the media tab on Hitfilm Express. Doing this is simple: find your green screen video on your PC, then click and drag it into the media tab.
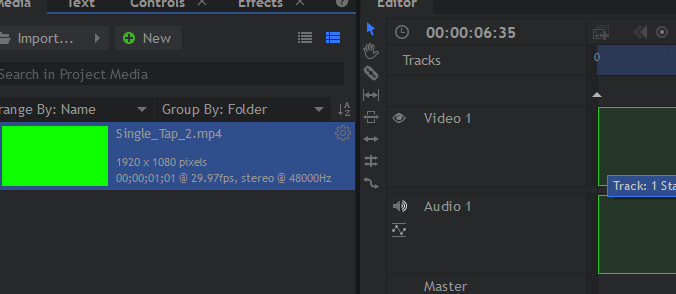
Next, drag the green screen video from the media tab into the editor tab within Hitfilm Express. You’ll see the outline of the clip in the timeline. Let go of the mouse button and the video will be placed into your timeline. If the resolution of your video is different, a pop-up will appear, you can click OK here.
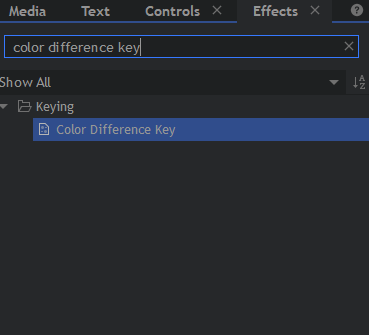
Next, click the Effects tab in the bottom left window. In the search bar of this new window, search for Color Difference Key. Next, drag the color difference key text onto your video clip in the editor timeline.
The green screen will be removed. Generally, the end result will be good so long as the video you have used has good lighting conditions
After you’ve removed the green screen, it’s time to add a background video. If you don’t need a background, you can skip this step.
How to Add a New Background to a Green Screen Video
First, you need to have a suitable background. It can be a video or a picture. Ideally, it needs to be the same resolution as your original green screen video for the best results.
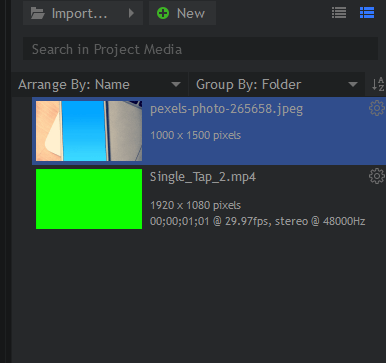
Once you have a suitable background, find the file for it on your PC and drag it into the media tab on Hitfilm Express, just like you did with the green screen video earlier.
Next, it’s important to understand how the timeline works. When you add a new clip or image on top of another, it appears over the top of it in the final video. You will need to move the background underneath the green screen video.
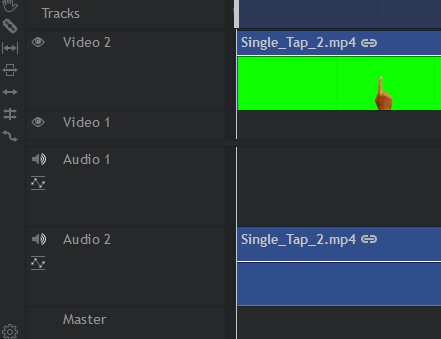
To do this, first click and drag the green screen video from within the editor timeline and bring it into the video 2 slot.
With your green screen video now occupying video 2, you can click and drag your background media into the video 1 slot in the editor timeline.
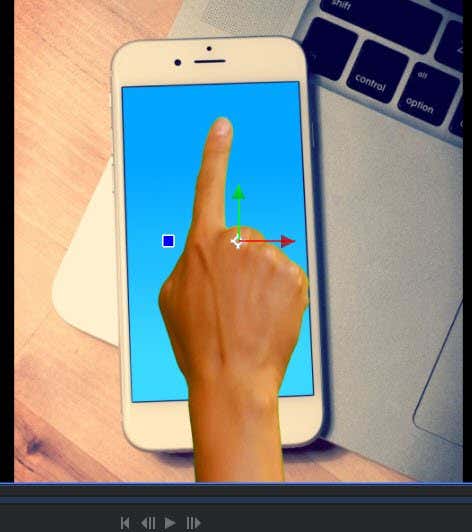
Once it is in video 1, you can use the playback tools in the top right to test the results. As you can see from our example video, we managed to get the our green screen video to appear above the background.
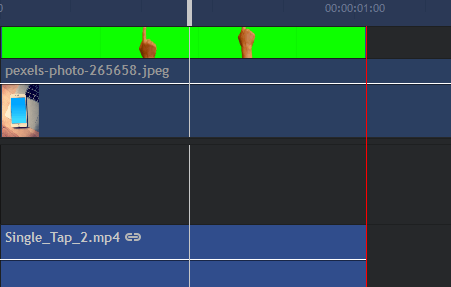
You can go back to the editor timeline and press C to select the slice tool. This will allow you to cut any excess footage of the background. With the slice tool selected, hover over the edge of the green screen video and then click to cut it.
Once the excess footage has been cut, you can press V to select the selection tool. Now, click on the excess footage on the right side of your cut. You can now press Delete to remove it.
Finalize Your Green Screen Video by Exporting
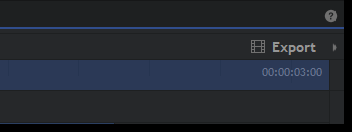
Once you’re happy with the results, you can export it. Right now, it’s only a Hitfilm project file. To export your video, Click Export on the right side of the screen, just above the editor tab. After, click Contents.
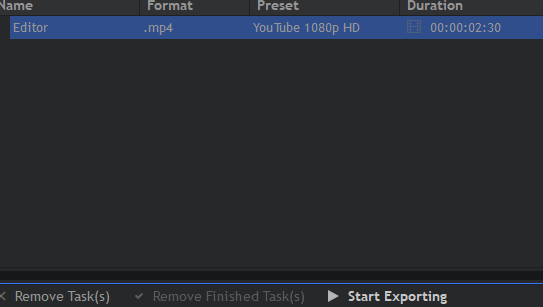
Doing this will take you to the export screen. Click Start Exporting at the bottom of the screen. Your video will now export. The time it takes will depend on how long the video is and how powerful your processor is. Once it is done, you’ll hear the familiar Windows alert noise. The Hitfilm icon in the taskbar will also glow orange.

You can open Hitfilm again and click on the link in the Output fieldto find the file on your computer.
Summary
If you’ve read this far, you should now know how to remove a green screen from a video and how to add a background with free software. If you have any questions about this guide, please leave a comment below and I’ll reply to you when I can.