Despite the growth and prominence of chat apps and mobile messaging services, we still send and receive emails every day. Email is a common form of communication in business, but also an integral part of our daily online life since most websites require email addresses to create accounts.
Microsoft Outlook commands an active user base of more than 400 million people, many of whom open emails from mobile devices running Android and iOS platforms. Consequently, syncing Outlook on mobile devices and with other services is necessary to ease access from any device or location.

One of the most powerful productivity features of any email communication is the contacts list, which is pivotal to our personal and business communication.
If you’re a loyal Microsoft Outlook user and aren’t sure how to sync Outlook contacts with your mobile device or other email services, don’t worry. We’re going to show you a few workarounds to use.
How To Sync Outlook Contacts
The steps in this guide may vary between operating systems and devices. Check that access to Contacts is allowed for Outlook before proceeding with the sync setup.
Sync Outlook Contacts To Android
To sync Outlook contacts with your Android device, your email provider must use Microsoft Exchange ActiveSync. Most major providers like Gmail do.
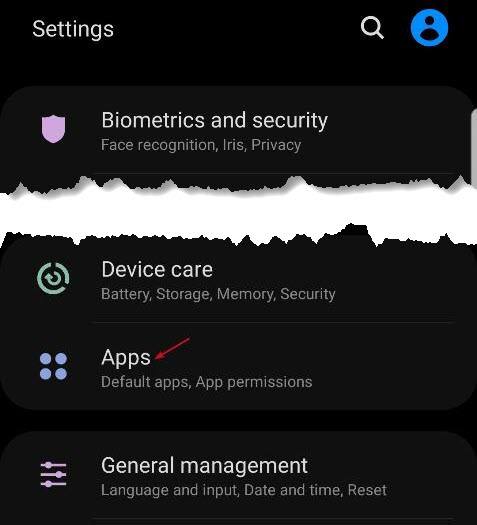
- On your Android device, open Settings, tap Apps (or Applications).
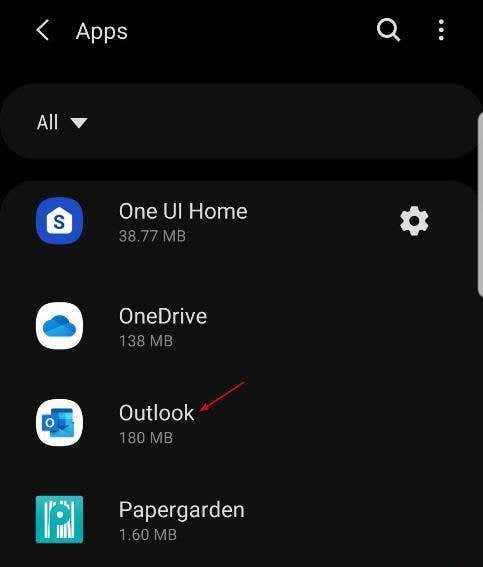
- Tap Outlook.
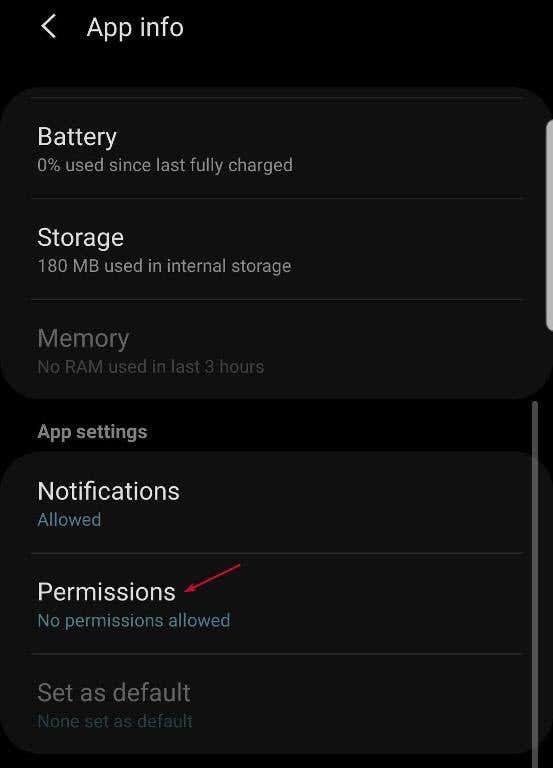
- Under App Settings, tap Permissions.
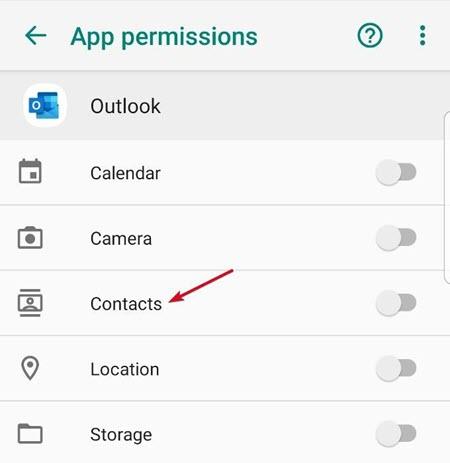
- Toggle the Contacts switch to enable it (if disabled).
- Open the Outlook app and go to Settings.
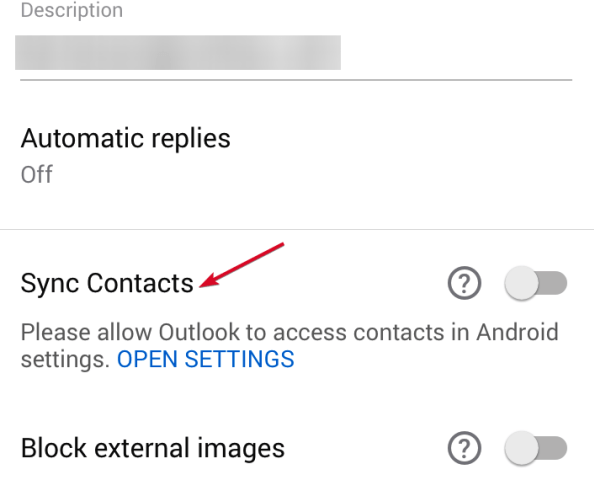
- Tap your account and then tap Sync Contacts
Sync Outlook Contacts With Gmail
Gmail is a popular email service with more than 1.5 billion active monthly users. Thankfully, it’s easy to sync your Outlook contacts with this provider as it uses Microsoft Exchange ActiveSync.
- To sync your Outlook contacts with Gmail, download the Gmail app (if it’s not already on your device), or update it.
- Register your Outlook account on Gmail. You’ll need a valid Outlook account to do this, so register for one if you don’t have, set it up and log in on your computer to check that the sync works properly.
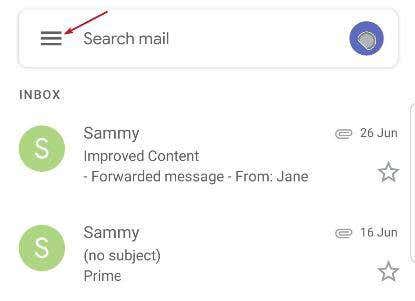
- Log into your Outlook account from the Gmail app using the same credentials you use on desktop. Open Gmail and tap Menu (three horizontal lines) on the left side.
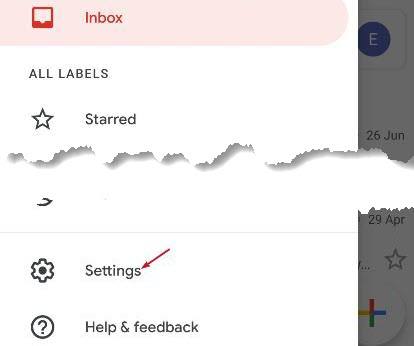
- Tap Settings.
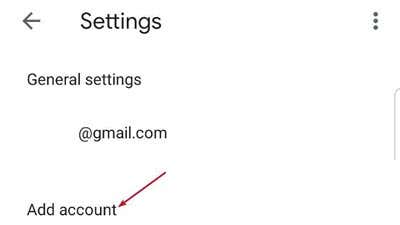
- Tap Add account.
- On the next page, you’ll see a list of email services that the Gmail app supports. Tap Exchange and Office 365.
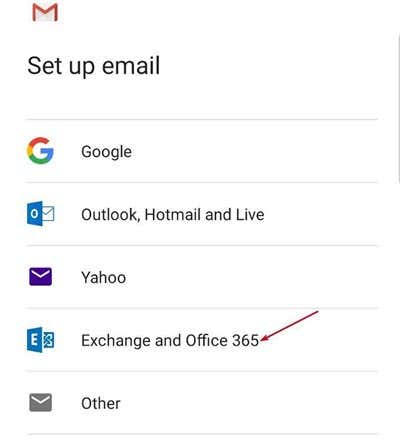
Note: Don’t select Outlook, Hotmail and Live as these services use IMAP and POP, which are sync protocols that can’t sync contacts or calendar. They only sync email.
- Type your email address and password in the next page.
- It’ll start validating server settings on your Android device. If a popup requesting Remote security administration appears, tap OK and then complete your sign-in on the next page.
Note: Make sure Gmail can access your contacts and calendar. You can check this by going to Settings > Apps (Applications) > Permissions and toggle the Contacts switch to on to green.
Sync Outlook Contacts With iPhone
iPhones usually do a good job of syncing and updating contacts across apps and devices. This isn’t always the case though, especially where there are incorrect permission settings or general software issues like bugs that stop Outlook from syncing with your phone.
You can sync Outlook contacts on iPhone using Settings, iTunes, iCloud, via email, by importing as vCards, or through Exchange.
Using Settings
- Open Settings and tap Outlook > Contacts.
- Switch Background App Refresh on to green.
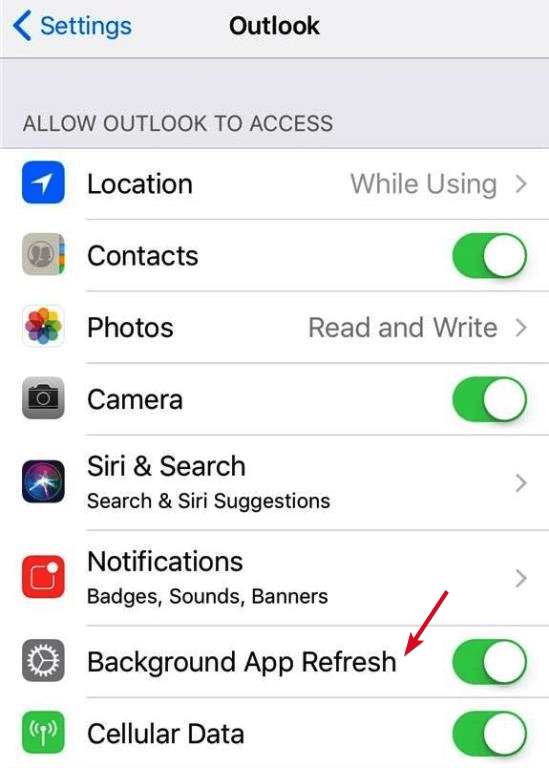
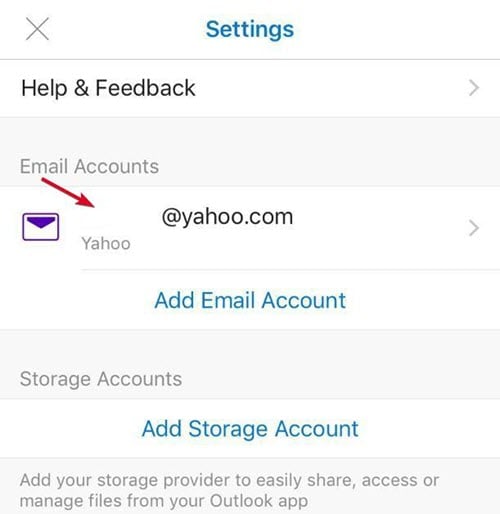
- Open the Outlook app and go to Settings > your account> Sync Contacts
Using iTunes
Besides being a music player or safe storage tool, iTunes can manage and store data from your iPhone too, making it easy to update and transfer your Outlook contacts across devices.
Make sure iCloud is disabled before using iTunes to sync your Outlook contacts.
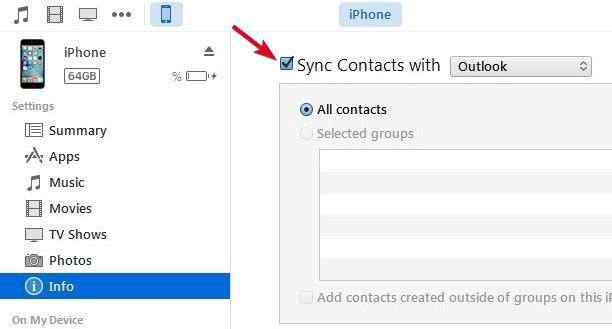
- Connect your iPhone to your PC, and open iTunes.
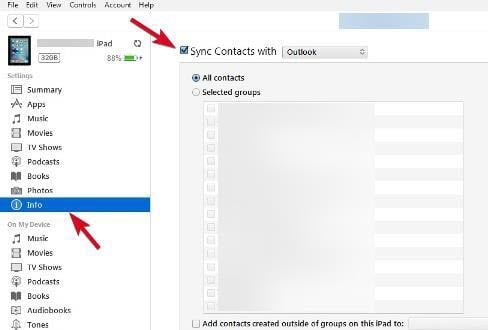
- Tap the iPhone icon and go to Settings > Info.
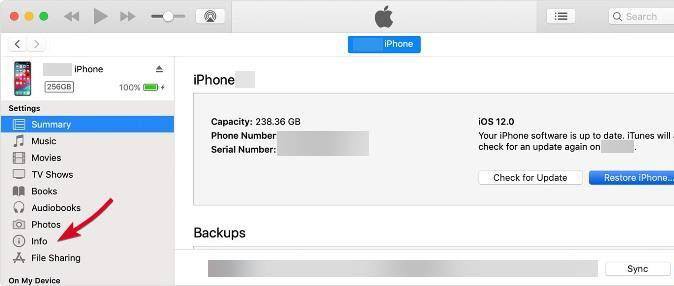
- Tap the Sync Contacts with checkbox and select Outlook from the list.
- Select Apply to complete the setup.
Using iCloud
Before syncing your Outlook contacts to your iPhone with iCloud, ensure the iCloud control panel for Windows is available or installed on your PC.
Note: iCloud doesn’t let you sync only contacts to the cloud. If you don’t mind uploading your calendars, mail, and contacts altogether to iCloud storage, take the steps below.
- Launch iCloud on your PC and sign in with your ID and password.
- Tap the Mail, Contacts, Calendars, and Tasks checkbox.
- Tap Apply.
Via Email
You can transfer your Outlook contacts to your iPhone using your email, though it’s a bit of a lengthy process.
- Open the Outlook desktop application.
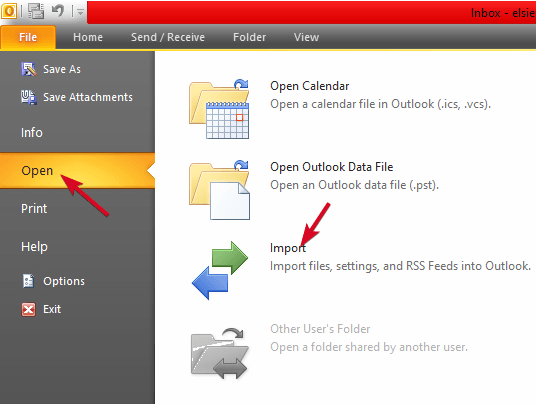
- Click File > Open > Import.
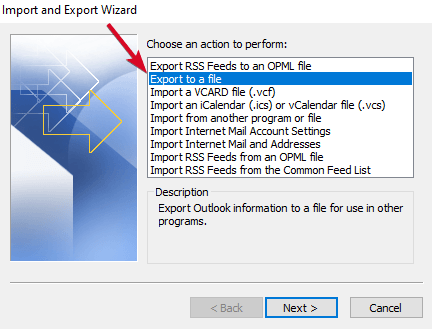
- In the Import/Export wizard, select Export to a file.
- Click Next.
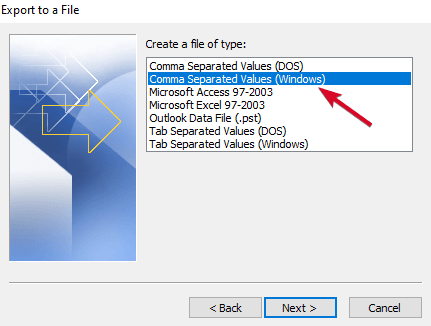
- Click Comma Separated Values (Windows) and click Next.
- Select the folder with the contacts you’d like to export and click Next.
- Name your CSV file, save it and click Next > Finish.
- Compose a new email and upload the CSV file Outlook generates as an attachment, and send it to an email address connected to your iPhone.
- On your iPhone, open the email, tap the attachment, and follow the steps up to the Add All Contacts option.
Note: Not all iOS devices work with CSV files the same way. Some offer only a preview of the file without prompting you to add them as contacts.
Importing Contacts As vCards
This method enables you to sync Outlook contacts with iPhone by converting them to vCards or electronic business cards that you can view on any Outlook version. However, vCards are only created on the Outlook desktop app.
- Open Outlook and click Contacts.

- Pick the contacts you want to sync and click File>Save As>Save as type and select vCard Files.
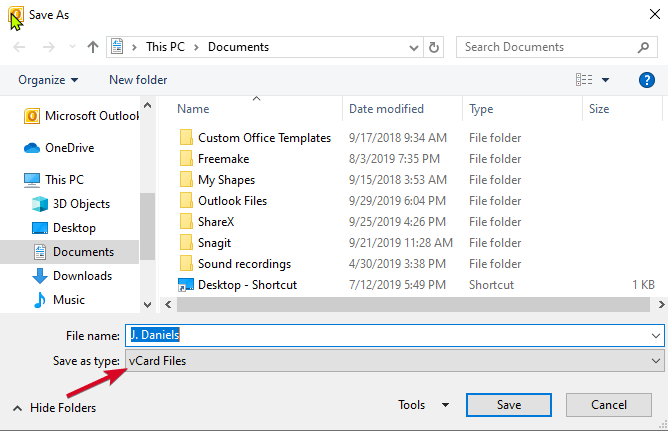
- Pick a location to save your vCard, give it a name and click Save.
- On iCloud.com, sign in and click Settings > Import vCard.
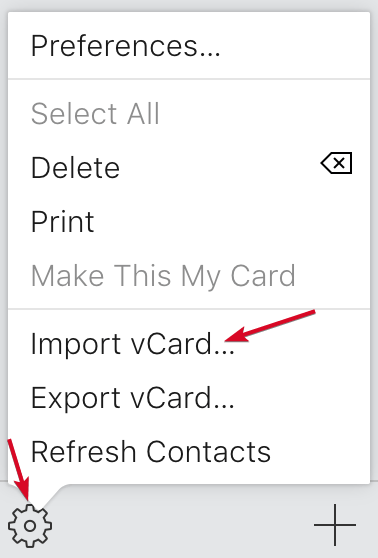
- Select the vCard you saved and click Import.
iCloud will add your contacts to the All Contacts folder. The challenge with using vCards is that you have to create and import a new one each time you add new contacts in Outlook.
Through Exchange
This method works only if your iPhone is connected to your internal corporate network. If your company has an Exchange server, you can sync your Outlook contacts with it and access them on your iPhone.
- Open your iPhone and go to Settings > Mail, Contacts, Calendars (Select Exchange if it’s your first time to set this up).
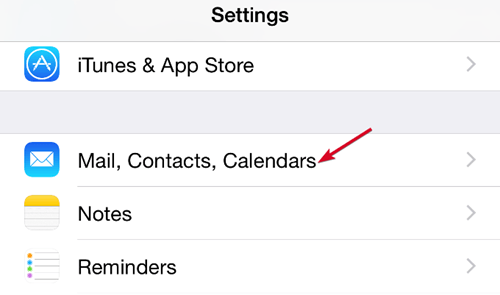
- Select Add Account.
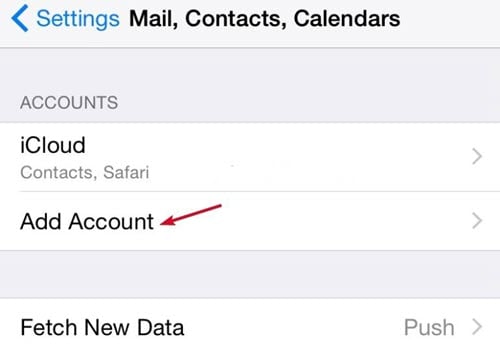
- Select Exchange.
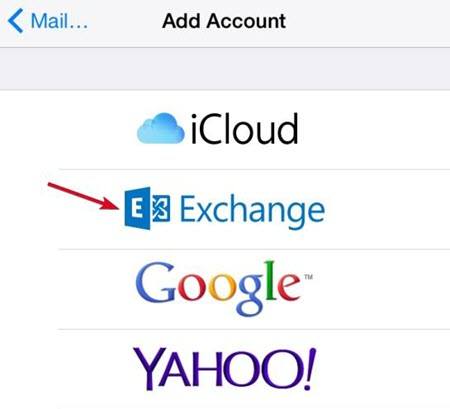
- Type your email, username and password, and click Next.
- Your iPhone will contact the Exchange Server, so make sure you know the server address as you’ll need to enter it here.
- Choose Contacts from the options of items you want to sync, and you’re good to go.
Sync Outlook Contacts With iPad
For iPad, you have two options to use when syncing Outlook contacts – iTunes or iCloud. If you use iCloud on your computer, you can copy contacts to iCloud and access them from your iPad.
However, if you use iTunes on your computer, you can sync contacts using iTunes to your iPad.
Using iTunes
- Make sure you have the latest iTunes version, open it and sign in with the credentials you use on your iPad.
- Connect the iPad to your computer, and select it from iTunes.
- Click Info and select the sync options for mail, calendars, and contacts, in this case, Sync contacts with > Outlook.
- If you have multiple contact groups, specify the one you want to sync by clicking Select Group, or sync all of them and click Sync.
- Click the Summary tab for wireless syncing, and click Sync with this device over WiFi.
From now on, when your iPad is turned on, and iTunes is running on your computer, syncing will happen automatically.
Using iCloud
Before using this method, make sure you have iCloud Control Panel for Windows on your computer. Sign in with the credentials for your iPad, and select the sync options you’d like to use – in this case it’s Contacts with Outlook.
- Open Settings on your iPad.
- Select Mail, Contacts, Calendars.
- Click iCloud.
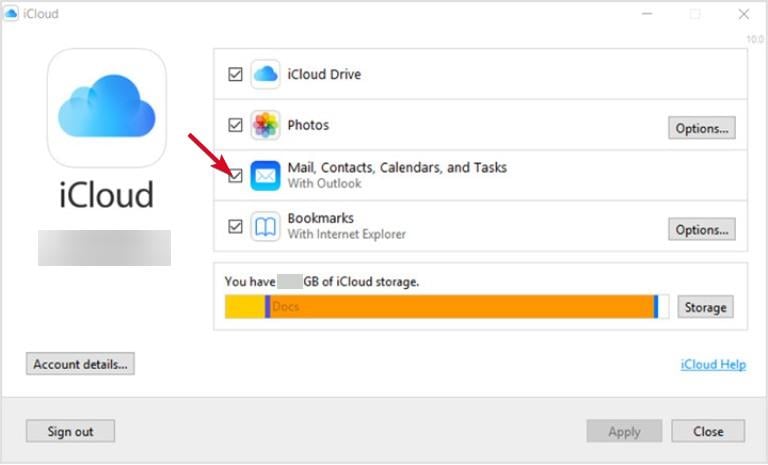
- Sign in with your Apple ID, and select Mail, Contacts and Calendars to sync them with Outlook via iCloud.
- You can choose to select other iCloud sync options like Find My iPhone or Documents and Data.
Sync To Outlook.com Or Exchange
- Open Settings on your iPad and select Mail, Contacts and Calendars and tap Add Account.
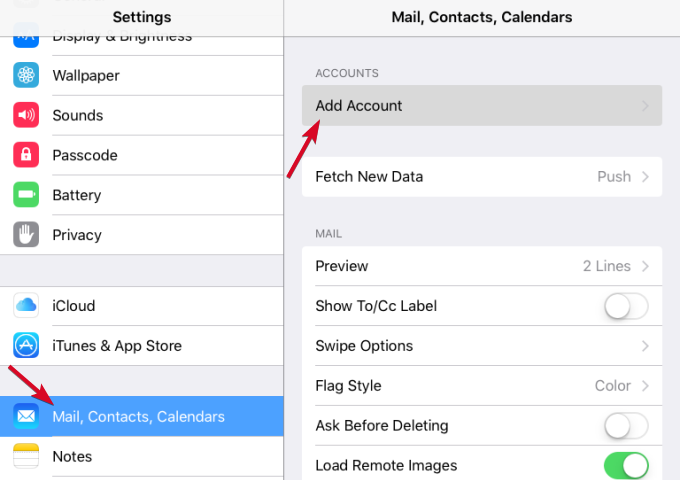
- Tap Microsoft Exchange to sync with your workplace server, or select Outlook.com to sync with an Outlook.com account.
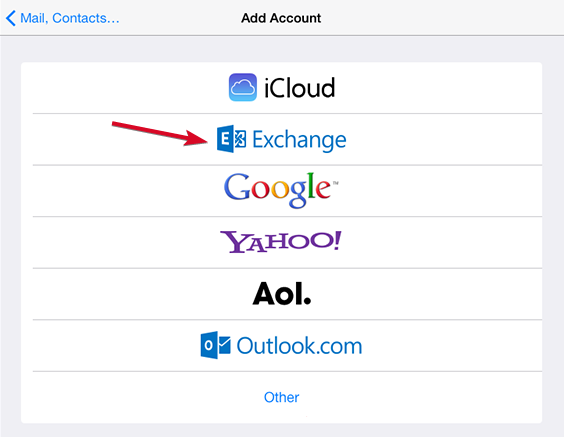
- Type your email, username and password (if connecting via Exchange Server, type domain name, though it’s optional).
- Tap Next.
- Your iPad will contact the Exchange Server. Enter the domain name here and tap Next.
- Select the services you’d like to sync – Mail, Contacts or Calendars – and that’s it.
Sync Outlook Contacts With iCloud
If you have a PST file on your computer that has all your Outlook profile data, you can import the contacts to iCloud in two parts – convert the PST contacts into vCards and then import the file into iCloud.
Convert a PST file Into a vCard/VCF
You can convert the .PST file into a vCard using a tool like SysTools vCard Export Tool.
- Download the tool to your computer and click Add File.
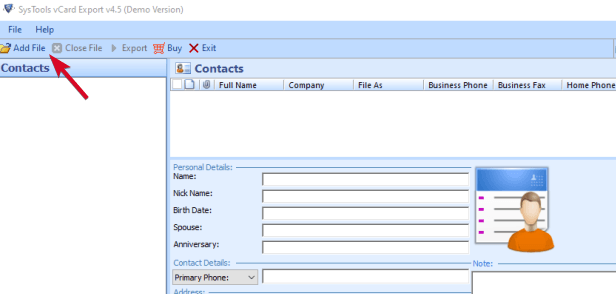
- You’ll get the File and Folder options. If you have one file, click the File option. If they’re multiple files in a folder, click the Folder option.
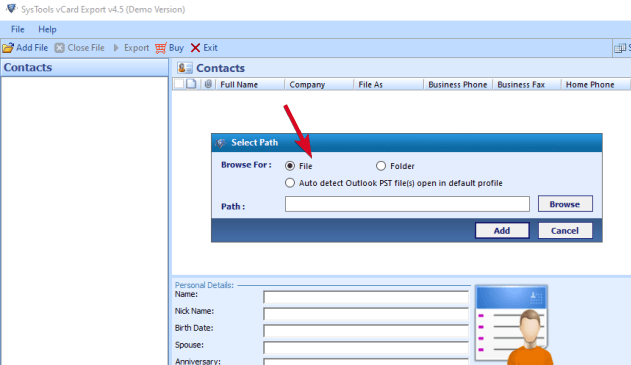
- Click Browse and choose your PST file and then click Add. The tool will show you a preview of the complete PST file data.
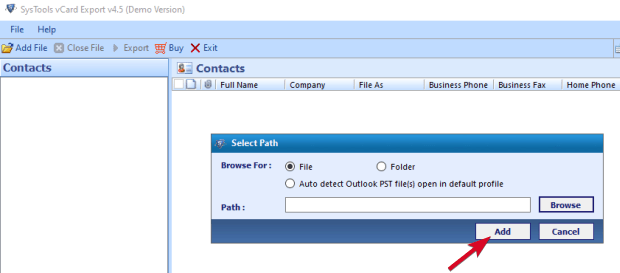
- Select the contacts and click Export.
- In Export Options, click vCard and choose it from its location.
- Click Export to convert all the contacts into a VCF file.
- You’ll get a notification that the export is complete. Go to the location folder and check for the VCF file.
Import a vCard Into iCloud
- Sign into your account using your iCloud credentials.
- Click Contacts and go to the gear icon at the lower end of the screen.
- Click on the icon and select Import vCard.
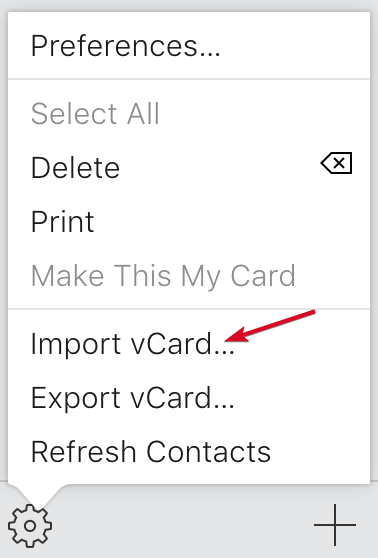
- Click Browse to locate your VCF file, select it and click Open.
- All your Outlook contacts in the vCard file will be synced to iCloud.