If you work with PDF files, you know how they can become very large very quickly if they contain graphics and images. Luckily, you can compress PDF files like you can compress any other type of file, which can mean big savings in the size of your PDF file.
In this post, I will try to show you a couple of methods to reduce the size of a PDF file. If you have Adobe Acrobat (which is not free), you can try out methods 4 and 5, which work really well. There is also a way to reduce PDF file size on Mac OS X specifically, which is Method 3.
Method 1 – SmallPDF.com
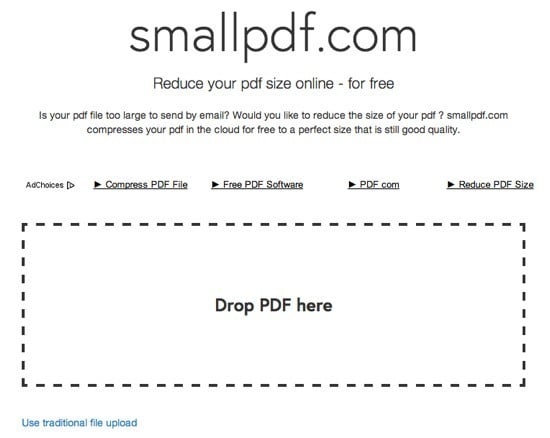
The simplest way to shrink your PDF file is to use a free online tool called SmallPDF.com. The site is super clean (not filled with spammy ads, etc) and it does a pretty good job of reducing the size of large PDF files.
What’s nice is that you can use it anywhere or any operating system and it even supports the new drag and drop feature of HTML 5, which is a nice convenience. It was able to take a 500 KB file and shrink it down to about 368 KB. Not too bad, however, on the Mac (Method 2), I was able to get that same PDF down to only 82 KB.
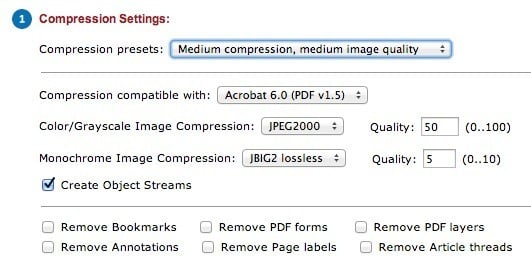
Another online tool I use to compress PDF files is Neevia Compress PDF. It has a bunch of options and some presets like high compression, low image quality or low compression, high image quality, etc.
In addition, you can remove bookmarks, remove PDF layers, remove annotations, remove page labels and manually adjust the quality for color and monochrome image compression.
Method 2 – PDF Compressor
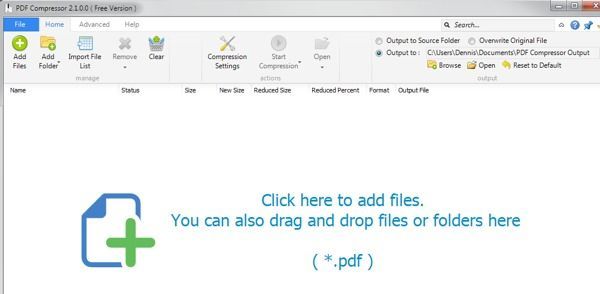
PDF Compressor is a free program you can download for Windows XP/Vista/7/8 that lets you quickly and effectively reduce the size of one or many PDF files.
It supports lossless compression, so you should not see any reduction in the quality of the PDF. It also supports encrypted PDF documents and can work on a batch of hundreds or even thousands of PDF files at once.
Method 3 – OS X PDF Filter
If you have a Mac, there is a great and easy way to significantly reduce the size of a PDF file using the built in Preview app. Firstly, open your PDF file in Preview by just double-clicking on it in Finder. By default, PDF files will open in Preview unless you installed Adobe Reader or a third-party PDF viewer. In that case, just right-click and choose Open With.
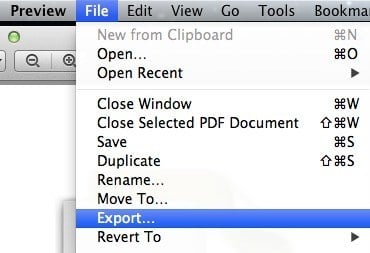
Now, click on File and then click on Export.
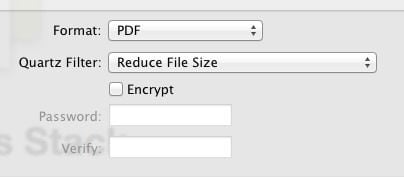
You’ll get a pop-up dialog and one of the options at the bottom is Quartz Filter. Click on the drop down and select Reduce File Size.
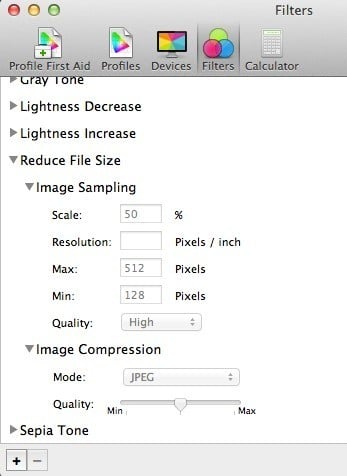
Click Save and you’re done. I was able to get a PDF file from 500 KB down to only 82 KB using this filter. If you want to fine-tune it, you can open the ColorSync Utility. Just press Command + Spacebar and start typing colorsync. Then, click on Filters and click on Reduce File Size. Note that adjusting settings here is only useful if you have a lot of high resolution images in your PDF file.
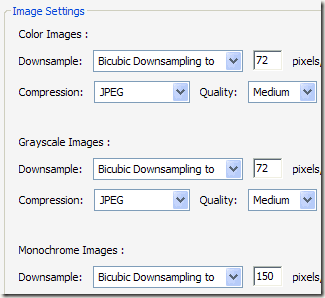
Here you can remove all values from Image Sampling and enter a value for Resolution. If you only need the PDF to view on a computer, 72 pixels/inch will greatly reduce the size of your PDF if the images are large. You can also play around with the Image Compression and see what type of benefit you get.
Method 4– Print to Adobe PDF
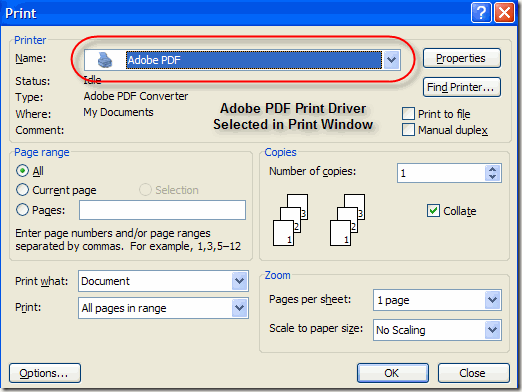
The easiest way to try and shrink a PDF file is to perform a little trick, which basically is printing the PDF document to a PDF file. Sounds strange? It is. Basically, you open the PDF file in Adobe Reader and print it to the Adobe PDF printer.
A lot of time this works really well and will significantly reduce the size of your PDF file. When you go to File – Print, choose Adobe PDF from the drop down list of printers:
Amazingly enough, I’ve been able to shrink a 20 MB PDF file down to 3 MB just by using this method. Not really sure what it does to shrink it, but it works, especially if you have a good number of images that are eating up a lot of space.
Method 5 – Adobe Acrobat PDF Optimizer
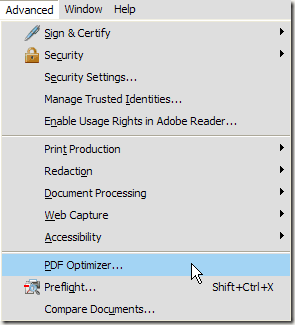
Since version 7 of of Adobe Acrobat, there is a new option in the Advanced menu called PDF Optimizer.
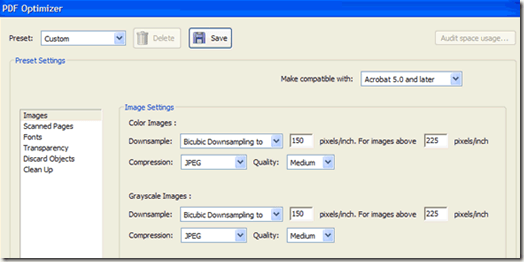
Now you’ll be brought to a screen that has a whole bunch of options to configure!
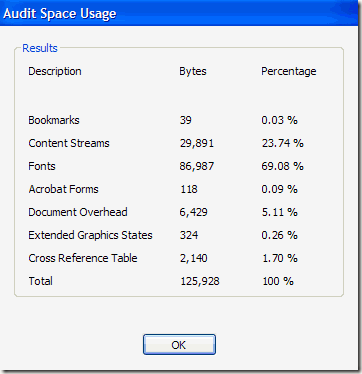
Click on the Audit space usage button in the top right to get a detailed listed of each component of the PDF file and exactly how much space it is using:
As you can see, there are six different things you can do to make a PDF file smaller including optimizing or down-scaling images, reconfiguring scanned pages, adjusting fonts, adjusting transparency, discarding objects, and cleaning up the PDF file.
Under Images, for example, you can downsample and compress the images to save space. This is really useful, especially if your images are at a really high resolution. If the PDF file doesn’t need to be printed, you can reduce the quality and number of pixels per inch. For viewing on the screen, you only need 72 pixels.
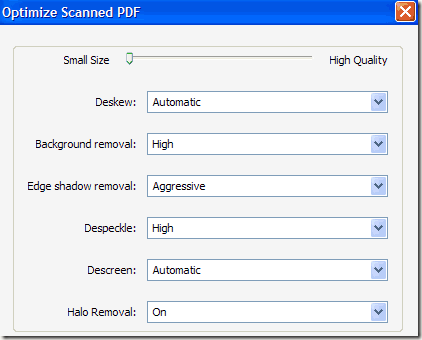
If you scanned a bunch of pages into your PDF, then click on the Scanned Pages option and mess around with the sliding bar, which goes from Small Size to High Quality. Adjust as needed.
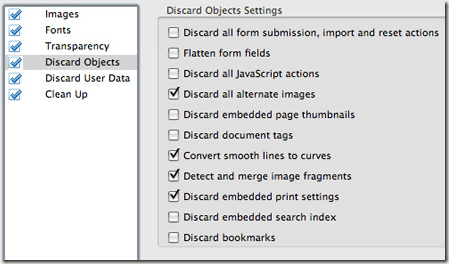
The Discard Objects and Discard User Data are two really useful cleanup options for PDF files. You can basically get rid of all the extra junk that is normally stored in every PDF file. You can remove tags, flatten form fields, etc.
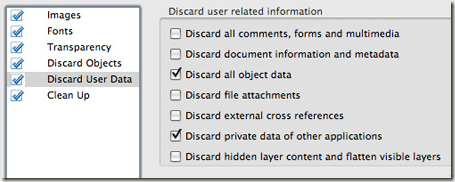
For Discard User Data, you can get rid of comments, document information, metadata, object data, file attachments, data from other applications, and more.
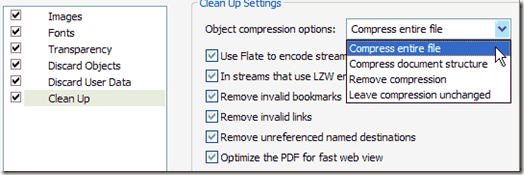
Finally, the Clean Up tab does a few more housekeeping tasks like compressing the entire file and optimizing the PDF for fast web view.
The best thing to do is to play around with all the settings to see what works best for your particular PDF file. Hopefully, one of the five methods above will get your PDF file to a reduced size that you can attach to an email or post to a website. If you use a different method not mentioned above for shrinking your PDF files, let us know in the comments. Enjoy!
