Rooting your Android device lets you access many of the features that aren’t provided by default on your device. These features include access to root-only apps, custom versions of the operating system, and custom recoveries to flash various files.
It’s totally possible to root a Pixel XL, 2, 2XL, 3, and 3XL to enjoy a number of root-only features on these devices. The following are the procedures on how to gain root on these phones.
Before you go ahead and perform the procedures, please keep in mind these will erase all the data on your device. Make sure to have a backup of your files before you root your device.
Root a Pixel XL & Install a Custom Recovery On It
This should work to root the Pixel XL running Android 9.0.
- Download Fastboot and extract it on your computer.
- Download both IMG and ZIP versions of TWRP recovery. Save the IMG version in the Fastboot folder where fastboot.exe is located and transfer the ZIP version to your phone.
- Download the Magisk ZIP and transfer it to your phone.
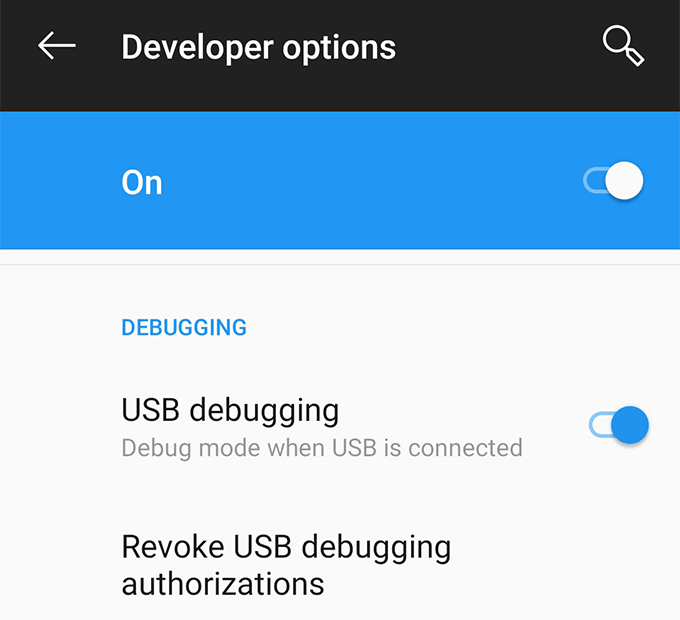
- On your phone, go to Settings > Developer options and enable both OEM unlocking and USB debugging.
- Connect your phone to your computer using a USB cable.
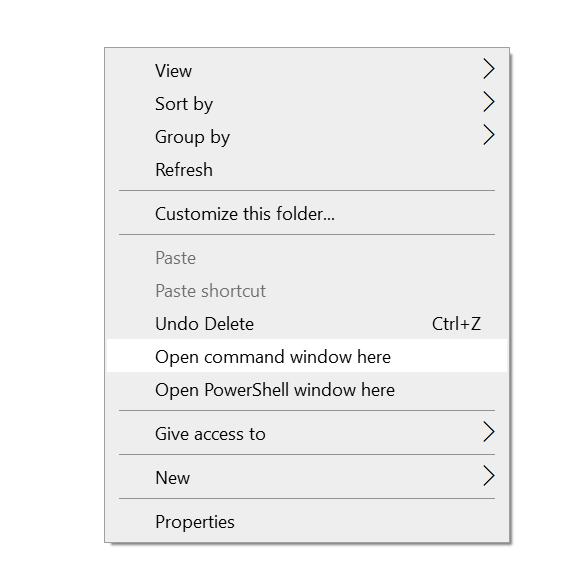
- Open the Fastboot folder, hold down Shift, right-click anywhere blank, and select Open command window here.
- Type in the following command and hit Enter.
adb reboot bootloader

- Enter the following command to unlock your bootloader.
fastboot flashing unlock

- Confirm the prompt on your phone.
- Type in the following command to reboot your device.
fastboot reboot

- When your phone boots back up, go to Settings > Developer options and enable USB debugging. Then connect the phone to your computer.
- Type in the following command replacing twrp.img with your IMG file name and hit Enter.
fastboot boot twrp.img

- Unplug your phone from your computer.
- Tap on Install and flash the TWRP ZIP version.
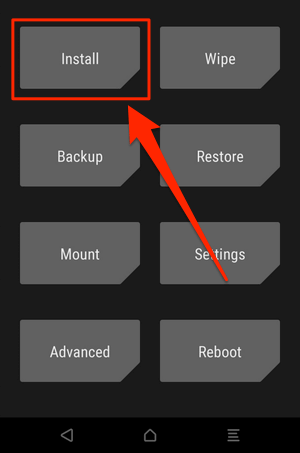
- Select Reboot followed by Recovery.
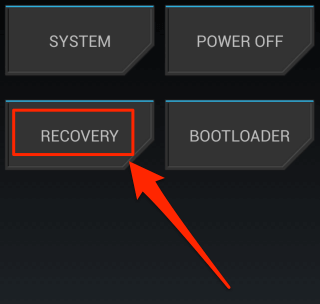
- Tap on Install and flash the Magisk ZIP file.
- Tap on Reboot and select System.
Your phone is now rooted.
Root a Pixel 2 & 2XL & Install TWRP Recovery On It
There are three stages to root a Pixel 2 and 2XL.
Unlock Bootloader:
- Download Fastboot and extract it to your computer.
- Head to Settings > Developer options on your phone and enable USB debugging and OEM unlocking.

- Plug-in your phone to your computer via a USB cable.
- Open the Fastboot folder, hold down Shift, right-click anywhere blank, and select Open command window here.

- Type in the following command and hit Enter.
adb reboot bootloader

- Use the following command to unlock your bootloader.
fastboot flashing unlock

- Confirm the prompt on your phone.
Install TWRP Recovery:
- Download both ZIP and IMG versions of TWRP for Pixel 2 or Pixel 2 XL. Place IMG in the Fastboot folder and transfer ZIP to your phone.
- Run the following command in a Command Prompt window to boot into TWRP. Make sure to replace twrp.img with your actual file name.
fastboot boot twrp.img

- Once in TWRP, select Install and install the TWRP ZIP file.

Root a Pixel 2 & 2XL Using Magisk:
- Download the factory image for your phone and extract it.
- Transfer boot.img to your phone.
- Install and open Magisk Manager on your phone.
- Tap on Install followed by Install.
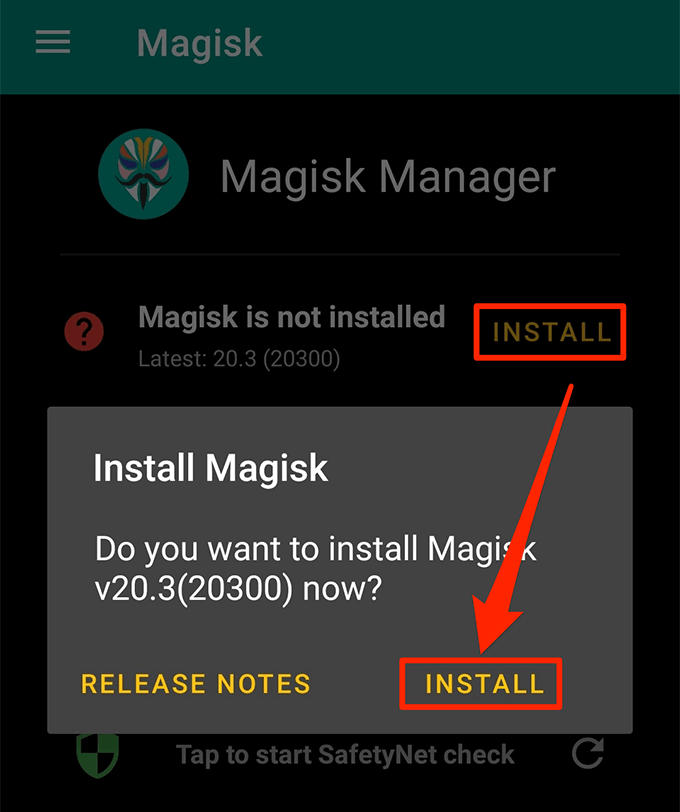
- Choose Select and Patch a File.
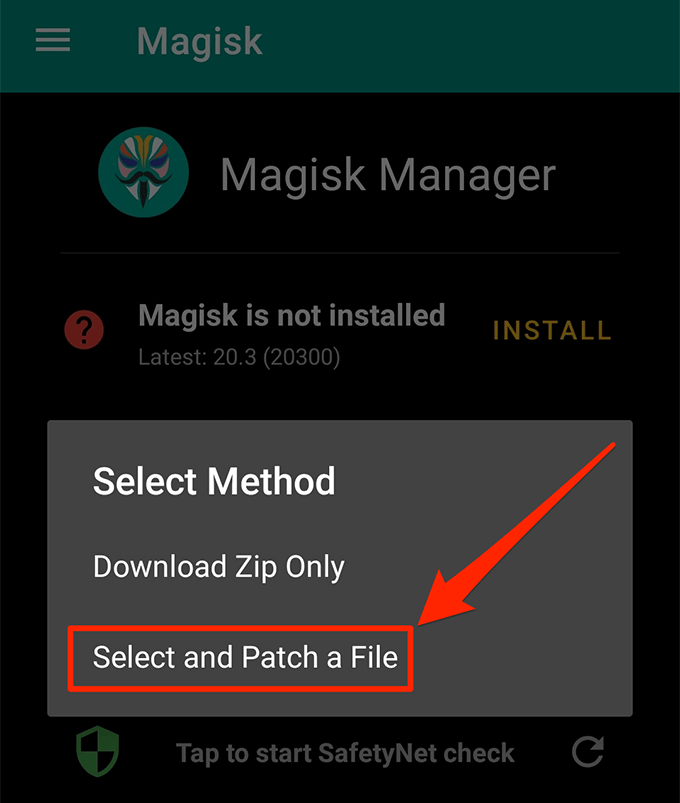
- Patch the boot.img file you copied to your phone.
- Transfer the patched file back to your computer in the Fastboot folder.
- Use the following command to reboot your phone into the bootloader.
adb reboot bootloader

- Flash the patched boot file with the following command. Replace boot.img with the actual file name.
fastboot flash boot boot.img

- Reboot your device with the following command.
fastboot reboot

- Launch Magisk Manager and you’ll be rooted.
Root a Pixel 3 & 3XL & Install a Custom Recovery On It
Unlock Bootloader:
- Open Settings > Developer options on your phone and turn on both USB debugging and OEM unlocking.

- Connect the phone to your computer via a USB cable.
- Download and extract Fastboot.
- Open the Fastboot folder, hold down Shift, right-click anywhere blank, and select Open command window here.

- Enter the following command and hit Enter.
adb reboot bootloader

- Run the following command to unlock the bootloader.
fastboot flashing unlock

- Follow the on-screen instructions on your phone.
Install TWRP Recovery & Gain Root Access:
- Download both ZIP and IMG versions of TWRP for Pixel 3 or 3 XL. Transfer ZIP to your phone and keep IMG in the Fastboot folder.
- Download Magisk Installer ZIP and copy it to your phone.
- Enable USB debugging on your phone from Settings > Developer options.
- Connect your phone to your computer over a wired connection.
- Launch a Command Prompt window and enter the following command. Replace twrp.img with your IMG file name.
fastboot boot twrp.img

- Tap on Install and install TWRP ZIP file.

- Tap on Reboot followed by Recovery.
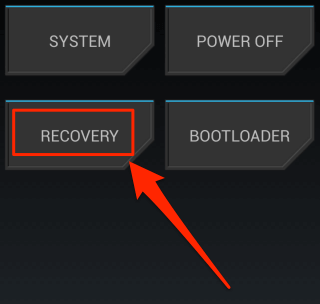
- Tap on Install and flash the Magisk Installer ZIP file.
- Tap on Reboot and then System.
- Open the Magisk app and you should be rooted.
Unroot a Pixel XL, 2, 2XL, 3, & 3XL
- Download the factory image for your phone and extract it to your computer.
- Turn off your phone.
- Press and hold down Volume Down and Power and your phone will boot into the bootloader mode.
- Connect your phone to your computer via USB.
- Open the factory image folder, hold down Shift, right-click anywhere blank, and select Open command window here.

- Type the following command and ensure your phone appears in the list.
fastboot devices

- Run the following command to flash the stock firmware.
flash-all.bat

- Reboot your phone into the bootloader as described above.
- Run the following command to relock the bootloader.
fastboot flashing lock

- You’re now unrooted.