Facebook pages are often created to gather people who share interests in a certain topic. Unique custom page names are what make them memorable to Facebook users, and the Facebook page gets a straightforward URL. This is especially significant if you create a Facebook page for your website, blog, or YouTube channel.
Your page will share the name of your business and your followers will have an easy time finding you. With that said, when you create such a page you might face a “This page isn’t eligible to have a username” error because Facebook isn’t perfect.
Custom-made usernames can trigger the “This page isn’t eligible to have a username” error. Facebook has yet to come out with an official fix for this error, but don’t worry, there’s an easy fix to get it up and running.
What Is the “This Page Isn’t Eligible to Have a Username” Error?
Facebook guidelines warn that newly created pages can’t have a username. At least not as soon as they are made. Some time needs to pass between creating a page and dedicating a unique username to it. In fact, there are several rules you need to follow to make your page eligible for a new username:
- The username mustn’t be used by anyone else, even a personal account.
- Your page needs to have a minimum of 25 page likes.
- Multiple names are not allowed.
- Your page username can contain only alphanumeric characters (A-Z, 0-9), and periods.
- The username needs to have a minimum of 5 characters and a maximum of 15.
- The username shouldn’t impersonate someone else.
- The username must adhere to the Facebook Terms of Service.
When one or more of these rules isn’t met, Facebook will display different error messages. The “Page Isn’t Eligible to Have a Username” error is just one of them.
How to Fix Facebook “This Page Isn’t Eligible to Have a Username” Error?
The solution to this username error has two steps: setting page roles and creating the username. That means that the solution to this issue is very simple. You can do it either over the Facebook app for Android and iOS, or by using a web browser.
1. Setting Page Roles
In step one you’ll assign a new page role to an account that’s not yours. That means you’ll have to choose a person you can trust to become an admin of your page. You can either set an admin temporarily or let the person keep their role, the choice is yours. Just be aware that the role of the admin is changed with Facebook’s New Pages Experience, and it’s not called an admin anymore. Instead, you’ll have to set Page Access. Here’s how to do it:
- Log into your Facebook account.
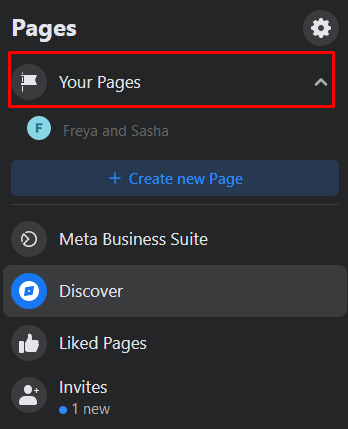
- You’ll see Your Pages on the left side of your Facebook profile. Select it, then go to the one you want to give a custom username.
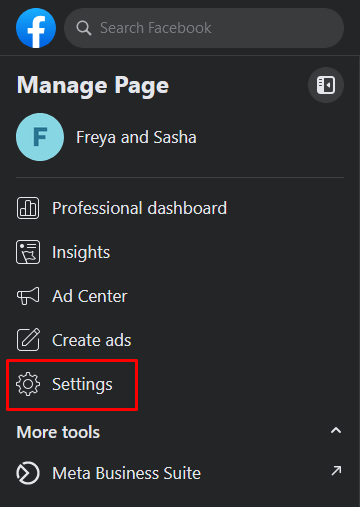
- In the Manage Page section, go to Settings.
- Navigate to the New Pages Experience, and select it.
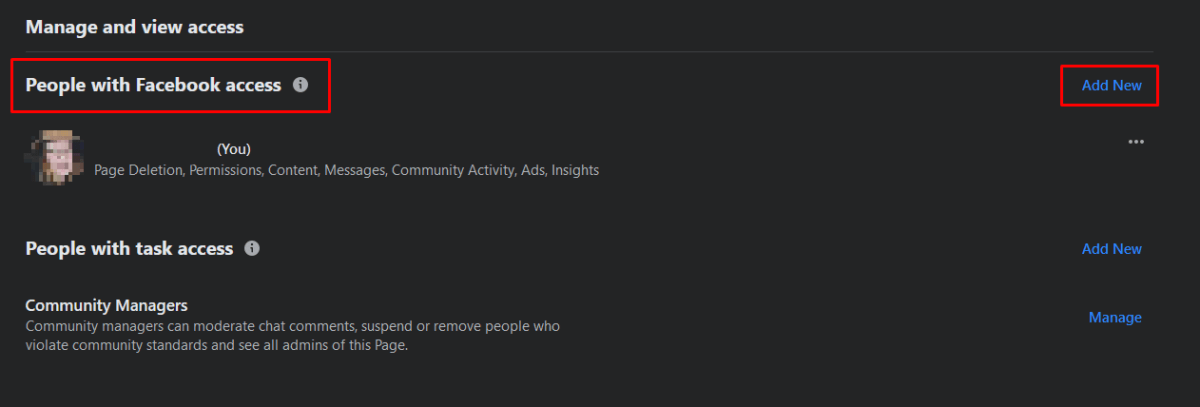
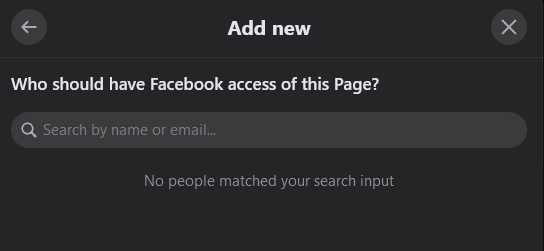
- On the main page find People with Facebook Access, and click Add New.
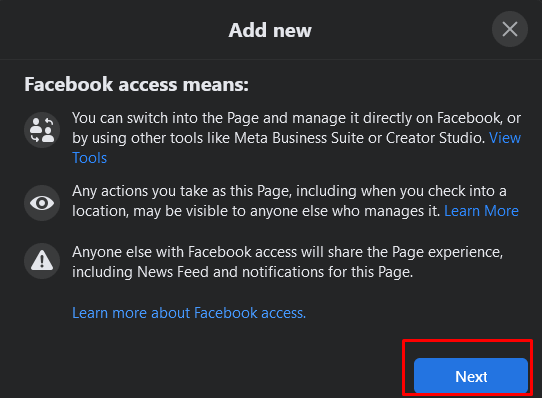
- A new window will appear explaining the Facebook Access. Click Next.
- In the text box, type the name of your friend’s account to whom you’ll give access.
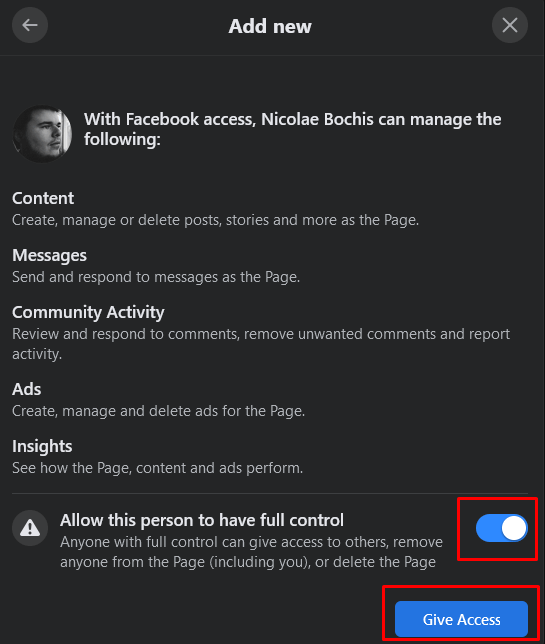
- Allow this person to have full access, and then click Give Access.
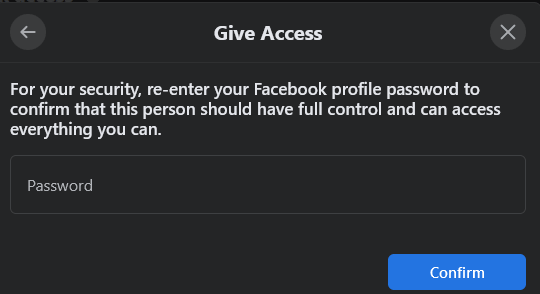
- You’ll have to type in your password for security reasons. Select Confirm.
Once your friend accepts the new role you assigned, you’ll be able to set a username for your page.
2. Setting a Facebook Page Username
Once you have your friend accept Facebook access, move on to set the page username.
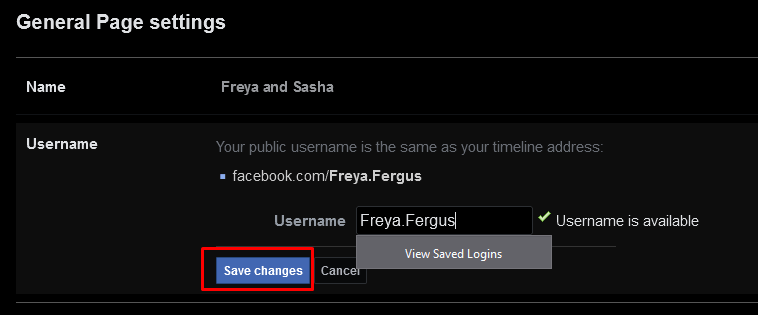
- Go to your page’s Settings. In the general section, click Edit next to Username.
- In the designated field type in the username you want to add to your page. Make sure the name you choose is available. It should have a green checkmark next to it.
- Click the Save Changes button.
And that’s it. You successfully added the unique and custom Username to your Facebook page without getting the “this page isn’t eligible to have a username” Facebook error.
Overall, this Facebook error is strange and can be a bit of a headache to tackle. Fortunately, you can quickly dispatch it with a few simple steps.

