Since I bought a PlayStation 4 last year as a gift to myself, I was quite excited to hear about the remote play feature coming in software update 3.50. I installed it immediately and tried it out on my Mac and PC to see how well it worked.
Overall, I would give the remote play feature a 4 out of 5 stars, docking one star for the lower-than-desired 720p resolution that the feature maxes out at. The setup is very easy and everything just worked well, which is surprising whenever you have to stream something across a network.
Just streaming a movie from my Synology NAS to my HDTV downstairs usually results in some sort of troubleshooting on my part, so I expected to run into at least a couple of issues. However, everything worked without a hitch.
I’ll first quickly go over how to setup remote play on a Windows PC and then talk about the performance, troubleshooting, etc. The setup procedure was pretty much identical on the Mac. You should also know that remote play doesn’t work with Windows 7, only Windows 8.1 and Windows 10. For Macs, it’s either OS X Yosemite or El Capitan.
Install PS4 Remote Play
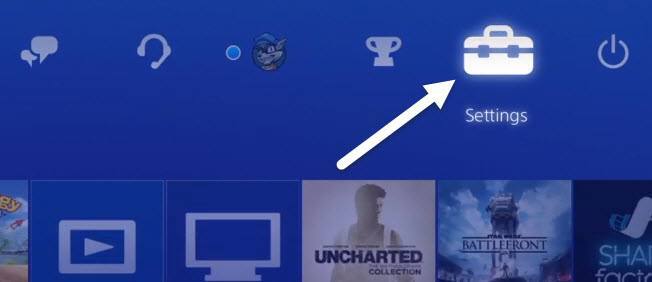
Obviously, the first step is to turn on your PS4 and make sure you have installed the latest system software, which should be 3.50 as of the time of this writing. To update the system software on your PS4, press up on the D-Pad and then over to the right until Settings is highlighted.
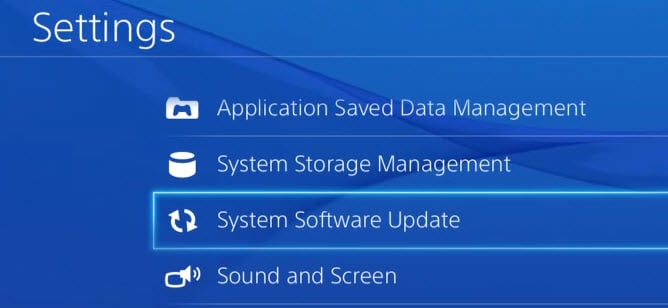
Now scroll down until you see System Software Update and press X on the controller.
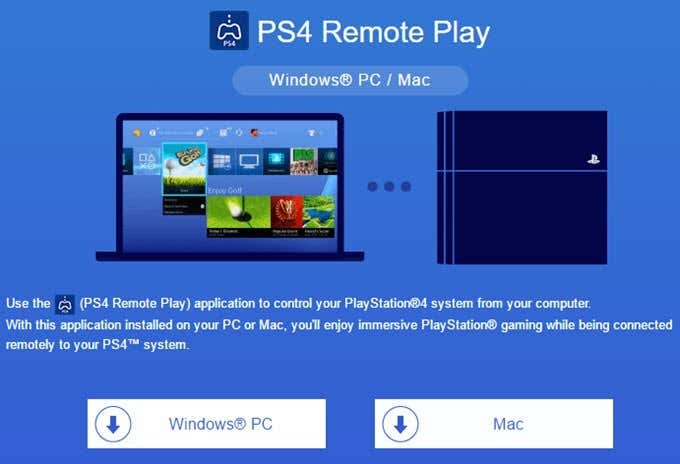
If an update is available, it will automatically be downloaded and installed. Once your system is up-to-date, you can now install the Remote Play software on your Windows or Mac machine.
The installation is straight-forward and doesn’t require you to choose any settings, etc. Once completed, run the PS4 Remote Play program from your desktop.
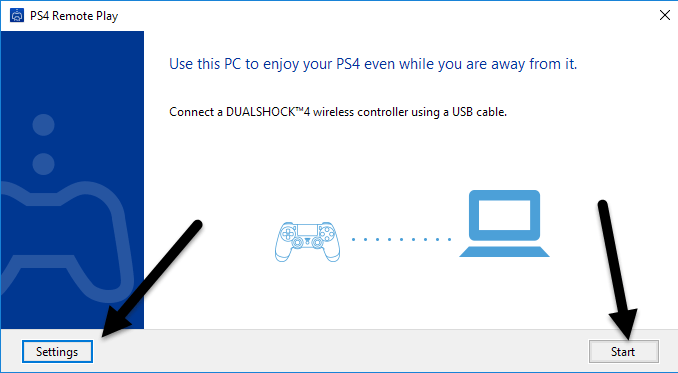
The first screen that will popup tells you to connect a DualShock 4 controller to your computer via USB. Once you have connected your controller, you can either click on Start or Settings. I suggest clicking on settings first to configure the resolution and frame rate.
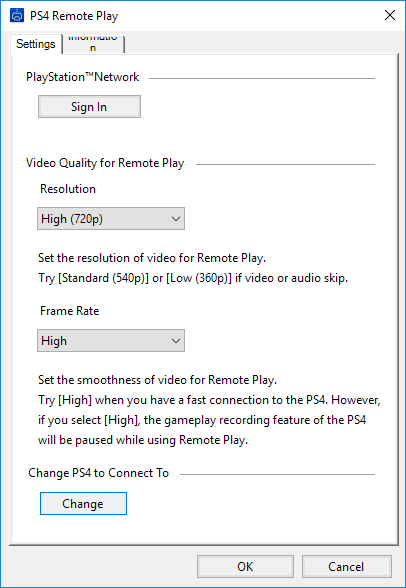
By default, the resolution is set to 540p and the frame rate is set to Standard. If you are streaming PS4 games over your home network and everything is gigabit, then you should be fine changing the resolution to 720p and the frame rate to High. Obviously, if you run into sound issues or choppy graphics, you can change these setting each time you run remote play.
Currently, remote play does not support 1080p or higher resolutions and may or may not in the future. If the PS4 doesn’t have the hardware to handle 1080p, then we’ll probably be stuck with 720p until the PS4.5 comes out.
It’s also worth noting that remote play will work across the Internet too, but the results will depend heavily on the Internet connection speeds at both locations. I didn’t get to try this out, so I can’t really comment on how it performs.
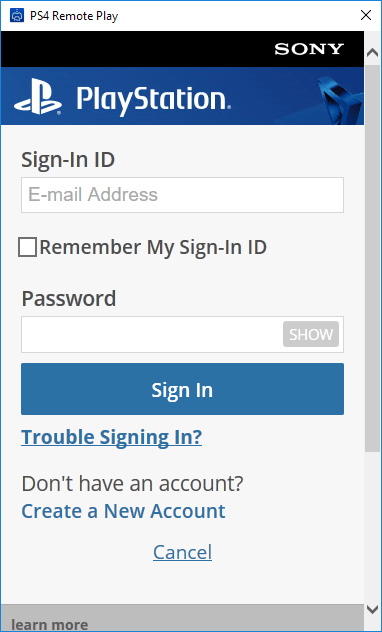
Finally, once you configure your settings, click on Start and you’ll first be asked to sign into the PlayStation network. You’ll obviously need a PSN account and it should be the same account that your PS4 is logged into.
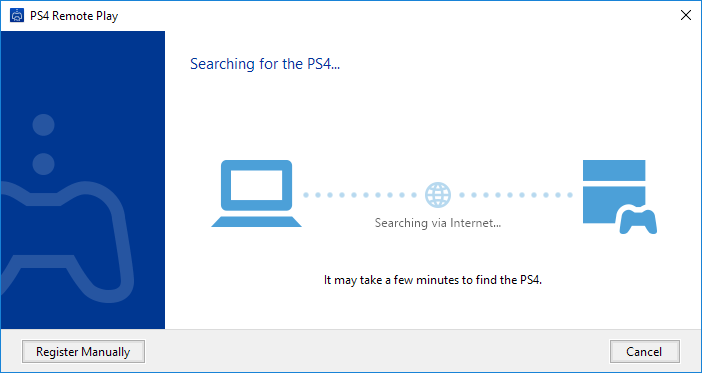
Once you have signed in, it will start searching for your PS4 automatically. It might take a minute or two while it searches for the console. If it doesn’t find your PS4, you can also click on the Register Manually button and try that method.
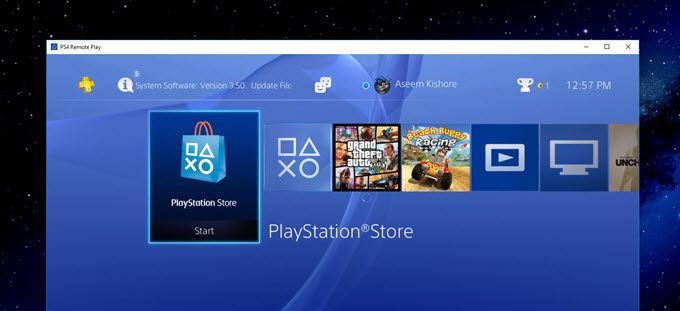
If all goes well, you should get a window with your PS4 steaming to your Windows or Mac machine!
As I mentioned above, the performance and quality of the game streaming was superb over the local network. If you are using a 1080p display, you won’t be as disappointed as I was with the 720p resolution. I have a 2560×1440 monitor and so the window is fairly small on the screen. If you have a 4K monitor, it’s going to be really small unless you have everything scaled up.
Troubleshooting Tips
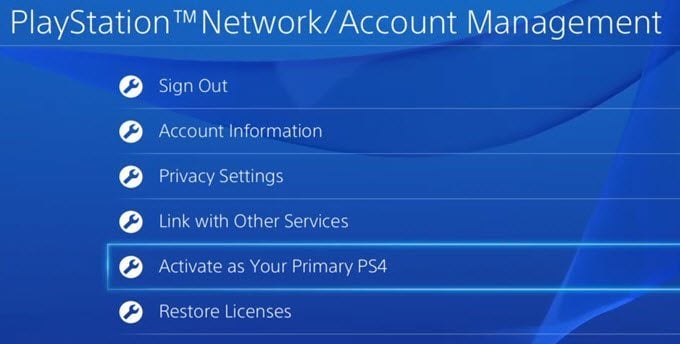
If you are having issues getting everything working, log onto your PS4 and check a couple of settings. Firstly, go to Settings, then PlayStation Network/Account Management and select Activate as Your Primary PS4.
You really only need to do this if you have multiple setup under the same account. You can only stream games over remote play from the primary PS4. Once it is primary, go to Settings and then Remote Play Connection Settings.
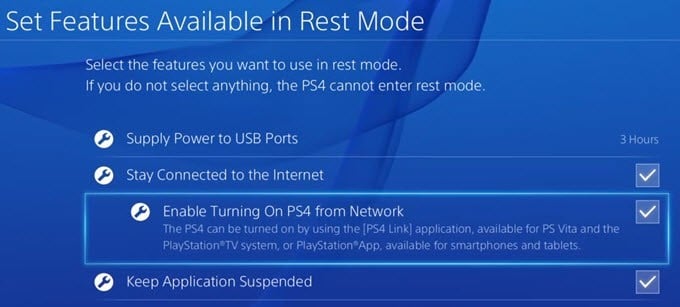
Make sure that Enable Remote Play is checked. Finally, so that you don’t have to keep going to your PS4 and manually turning it on before playing remotely, go to Settings, then Power Save Settings and select Set Features Available in Rest Mode.
Make sure that Stay Connected to the Internet and Enable Turning On PS4 from Network are checked. Even if your PS4 is turned off or in rest mode, it will turn on when you start a remote play session.
That’s about it! Overall, it works well and it’s a nice feature to have if you own a PS4 system. Unlike the Xbox One, PS4 supports streaming to Macs and over the Internet, which are two excellent pluses. If you have any questions, feel free to comment. Enjoy!
Related Posts
- Tribit StormBox 2: The Under $70 Portable Speaker that Stands Out
- ENGWE L20 2.0 Review: The Best Budget-Friendly Foldable E-Bike?
- TopDon TC004 – a Thermal Imaging Camera That Will Give You Predator Vision
- Newyes Portable Wireless Thermal A4 Printer Review
- Eskute Star Folding Fat Tire Electric Bike Review
