If you’ve ever tried to format an external hard drive larger than 32GB to FAT32 in Windows, you will have seen that your operating system doesn’t allow you to do it. There are various reasons as to why it does so, but if your particular situation requires you to use FAT32, you need to find a way.
FAT32 is actually a great file system and it was widely used until people started to hit its limits. One of the limits with this file system is that it doesn’t let you store a single file larger than 4GB. People who wanted to store files larger than this size moved on to other formats such as NTFS that allows really large files to be stored on your hard drive.
- Format An External Hard Drive To FAT32 Using Command Prompt
- How To Use It
- Using PowerShell In Windows 10 To Format An External Hard Drive To FAT32
- How To Use It
- Use FAT32Format To Format Your External Hard Drives
- How To Use It
- Format An exFAT External Hard Drive To FAT32 With EaseUS
- How To Use It
- Conclusion
The format is still in use though and there are even situations where this is the only format that works. For instance, some of the modern video doorbells you buy require your storage devices to be in the FAT32 format.
Format An External Hard Drive To FAT32 Using Command Prompt
Just because you don’t see the option to format your hard drive to FAT32 in Windows’ user interface doesn’t mean the ability is gone completely. The feature still exists on your systems and the Command Prompt utility should help you find and use it to do the task.
How To Use It
All this method requires you to do is run a few commands and your hard drive will be formatted in your chosen file system.
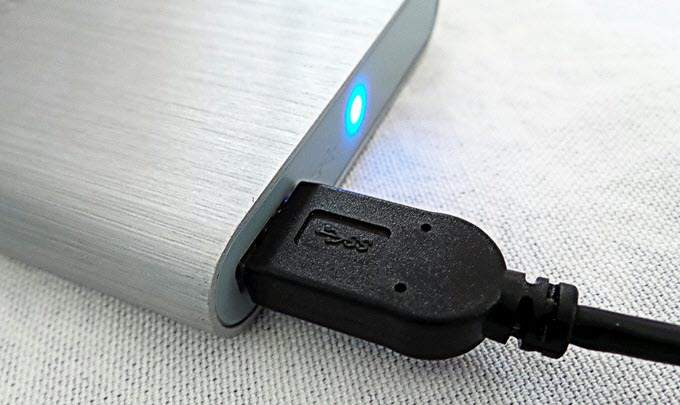
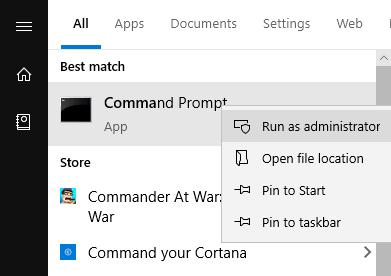
Plug-in your external hard drive to your computer. Search for Command Prompt in Windows Search, right-click on it, and select Run as administrator.
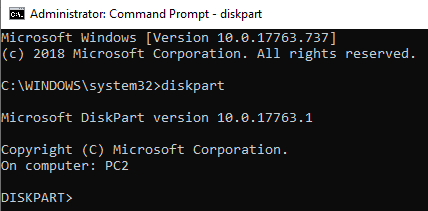
Type in the following command into the command prompt window and hit Enter. It’ll launch the utility that lets you format your drives.
diskpart
Enter the following command and press Enter. It will list out all the available hard drives on your machine.
list disk
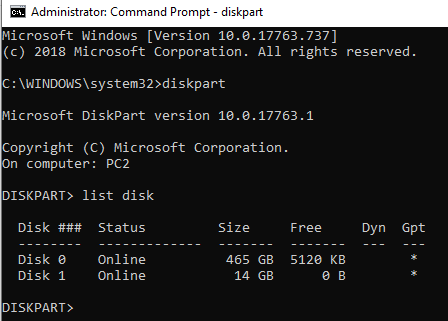
Note down the number for your external hard drive. Run the following command replacing N with your drive number.
select disk N
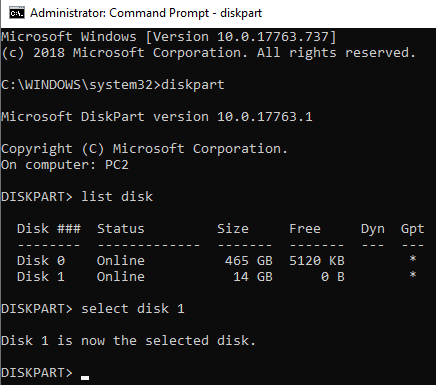
Then, type in each of the following commands pressing Enter after each line:
create partition primary
select partition 1
active
format fs=fat32
assign
exit
Your hard drive should now be formatted to FAT32.
Using PowerShell In Windows 10 To Format An External Hard Drive To FAT32
Windows 10 users can use PowerShell instead of Command Prompt to format the external hard drive to the FAT32 format. You’re likely familiar with this utility if you’ve been using a Windows 10 PC for quite some time.
How To Use It
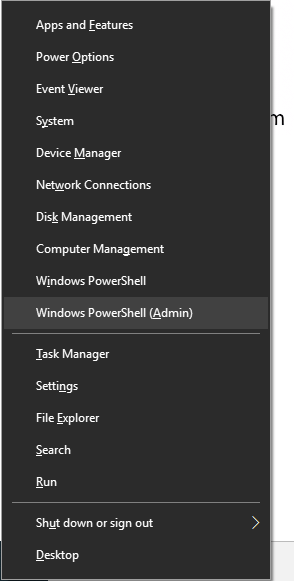
Press the Windows + X keys simultaneously and a menu will pop-up. Click on Windows PowerShell (Admin) in the newly opened menu.
On the following screen, type in the following command into the utility and hit Enter. Make sure to replace D with the actual letter for your hard drive.
format /FS:FAT32 D:

It’ll format the drive to FAT32 and let you know when it’s done. In most cases, it should only take a few minutes but it also depends on how large your external hard drive is.
Use FAT32Format To Format Your External Hard Drives
The FAT32Format utility has been around for a long time and it lets you quickly format any of your external hard drives to FAT32.
This method is ideal for those of you who don’t like running commands and prefer tools with a simple user interface. A great thing about this tool is that you don’t even need to install it on your computer – it just works straight out of the box.
How To Use It
- Head over to the FAT32Format website and download the tool to your computer.
- Connect your external hard drive to your computer if it isn’t already.
- Double-click on the downloaded file and the tool will launch. Here are the options you need to specify before you can format the drive:
Drive – choose your external hard drive from this dropdown menu.
Allocation unit size – leave it to the default values.
Volume label – enter a name for your hard drive.
Quick Format – it’s suggested to leave this unticked if you’re not sure.
Then hit the Start button to begin formatting your hard drive.
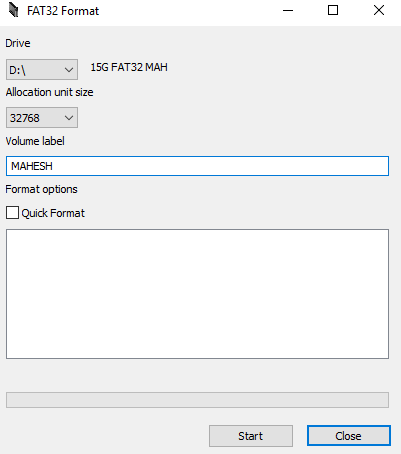
You’ll be able to see the progress in the white box.
Format An exFAT External Hard Drive To FAT32 With EaseUS
EaseUS Partition Master Free is more than just a disk formatting tool. It lets you create, delete, and clone partitions in addition to formatting hard drives to chosen formats.
How To Use It
Download, install, and launch the tool. Select your hard drive in the drives list, right-click on it, and select Format.
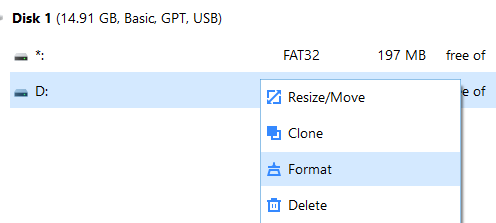
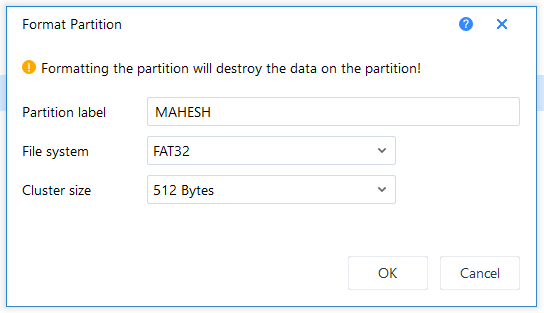
Set the options as the following and then hit OK.
Partition label – enter a name for your drive.
File system – select FAT32.
Cluster size – leave it as is.
Once the drive is formatted, the tool will send you a notification.
Conclusion
The popularity and use of FAT32 is slowly fading away but there are still a few occasions where this format is a must. For those rare situations, you have various ways as shown above to get your existing hard drives converted to the FAT32 format.


